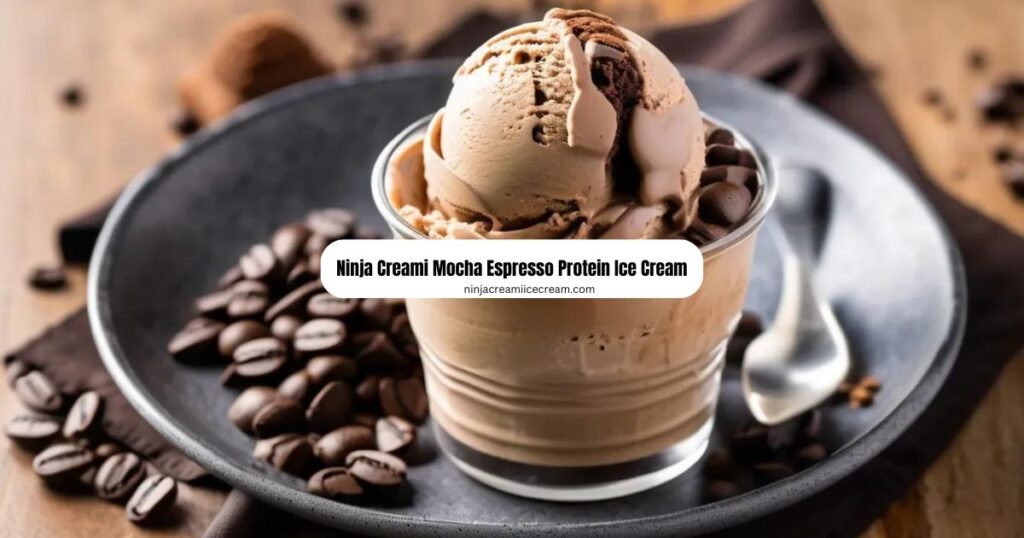
Indulge in a delightful and nutritious treat with Ninja Creami Mocha Espresso Protein Ice Cream. This homemade ice cream combines the rich, bold flavors of mocha and espresso with a boost of protein, making it a perfect choice for a satisfying dessert that also supports your fitness goals. Using the Ninja Creami, you can create a creamy, smooth texture that rivals store-bought ice creams, but with the added benefit of controlling the ingredients and flavors to suit your preferences.
Mocha Espresso Protein Ice Cream is not just about taste; it’s about making a healthier choice. By making it at home, you avoid the excessive sugars and artificial ingredients often found in commercial ice creams. The addition of protein powder enhances the nutritional profile, making it a great post-workout snack or a guilt-free dessert. With this recipe, you can enjoy a delicious, customizable treat that aligns with your dietary needs and preferences.
Ninja Creami Mocha Espresso Protein Ice Cream Recipe
Ingredients
- Unsweetened Almond Milk (2 cups):
- Provides a light and dairy-free base for the ice cream. Almond milk is low in calories and adds a subtle nutty flavor without overpowering the other ingredients.
- Greek Yogurt (1 cup):
- Adds creaminess and a tangy flavor to the ice cream. Greek yogurt is also high in protein and helps achieve a thick, rich texture.
- Brewed Espresso (1/2 cup, cooled):
- Delivers a robust coffee flavor and a caffeine boost. Make sure the espresso is cooled before adding it to avoid affecting the freezing process.
- Cocoa Powder (1/4 cup):
- Contributes a deep chocolate flavor and pairs well with the espresso. Use unsweetened cocoa powder to keep the sugar content low.
- Protein Powder (1/4 cup, chocolate or vanilla flavor):
- Enhances the protein content of the ice cream, making it a more filling and nutritious option. Choose a flavor that complements the mocha and espresso.
- Sweetener (1/4 cup):
- Sweetens the ice cream to taste. Options include honey, agave syrup, or any other preferred sweetener. Adjust the amount based on your taste preference and dietary needs.
- Vanilla Extract (1 tsp):
- Adds a hint of vanilla flavor, which enhances the overall taste and balances the bitterness of the cocoa and espresso.
These ingredients work together to create a rich, creamy, and flavorful protein ice cream that’s both delicious and nutritious.
Whynter Ice Cream Maker Machine Automatic 2.1 Qt. with Built-In Compressor, LCD Digital Display & Timer, No Pre-Freezing, ICM-200LS, Stainless Steel
$294.55 (as of June 27, 2025 08:37 GMT +00:00 - More infoProduct prices and availability are accurate as of the date/time indicated and are subject to change. Any price and availability information displayed on [relevant Amazon Site(s), as applicable] at the time of purchase will apply to the purchase of this product.)Slushy Maker Cup, Slushie Cup Maker, Milk Cola Juice Squeeze Cup, Magic Quick Freeze Cup, Cooling Cup, Smoothies Cup with Lids and Straws for All Age (Blue)
$11.68 (as of June 27, 2025 08:37 GMT +00:00 - More infoProduct prices and availability are accurate as of the date/time indicated and are subject to change. Any price and availability information displayed on [relevant Amazon Site(s), as applicable] at the time of purchase will apply to the purchase of this product.)SharkNinja NC301 CREAMi 7-In-1 Ice Cream Maker with 7 Custom Frozen Treat Modes and Easy 3-Step Treat Preparation, Cloud Silver (Renewed)
$169.99 (as of June 27, 2025 08:37 GMT +00:00 - More infoProduct prices and availability are accurate as of the date/time indicated and are subject to change. Any price and availability information displayed on [relevant Amazon Site(s), as applicable] at the time of purchase will apply to the purchase of this product.)Disclosure: This post may contain affiliate links. As an Amazon Associate, I earn from qualifying purchases. Read more.
Instructions
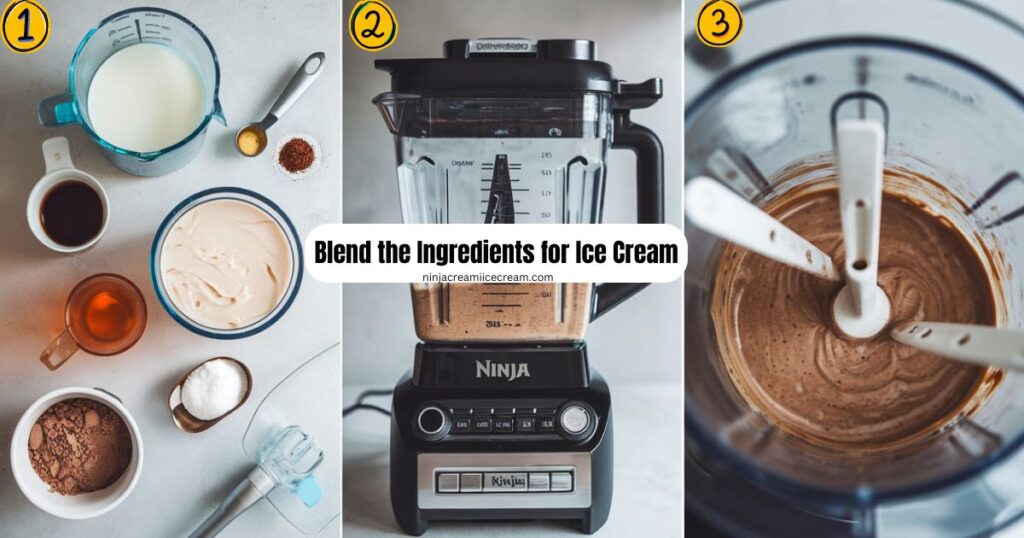
1. Blend the Ingredients for Ice Cream:
- In a blender, combine 2 cups unsweetened almond milk, 1 cup Greek yogurt, 1/2 cup cooled brewed espresso, 1/4 cup cocoa powder, 1/4 cup protein powder, 1/4 cup sweetener (such as honey or agave syrup), and 1 tsp vanilla extract.
- Blend on high until the mixture is smooth and fully incorporated, ensuring there are no lumps from the cocoa powder or protein powder.
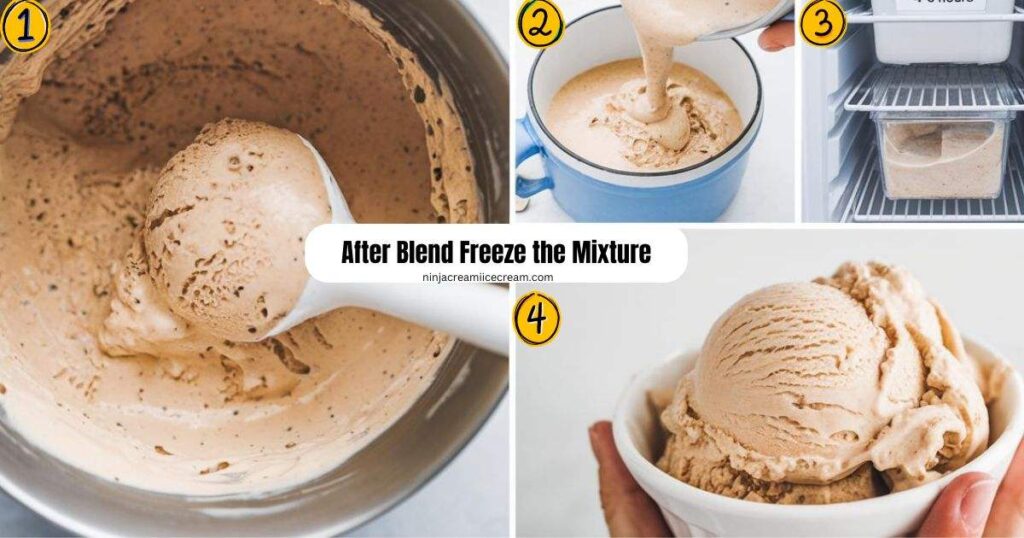
2. After Blend Freeze the Mixture:
- Pour the blended mixture into a freezer-safe container or the Ninja Creami pint container.
- Freeze for at least 4-6 hours or until the mixture is firm. For best results, ensure the mixture is frozen solid but not rock-hard.
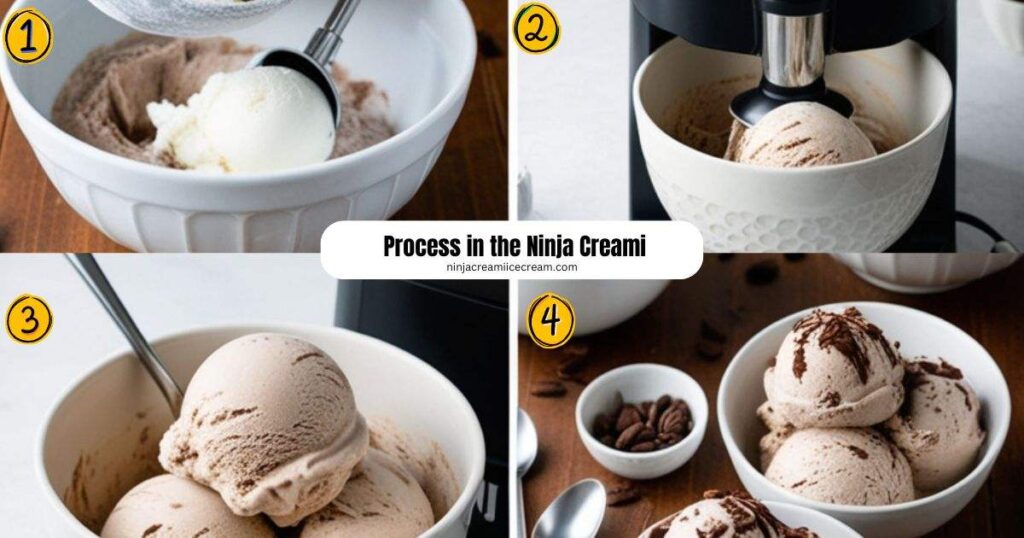
3. Process in the Ninja Creami Machine:
- Remove the frozen mixture from the freezer and place it in the Ninja Creami bowl.
- Process according to the manufacturer’s instructions until the ice cream is smooth and creamy.
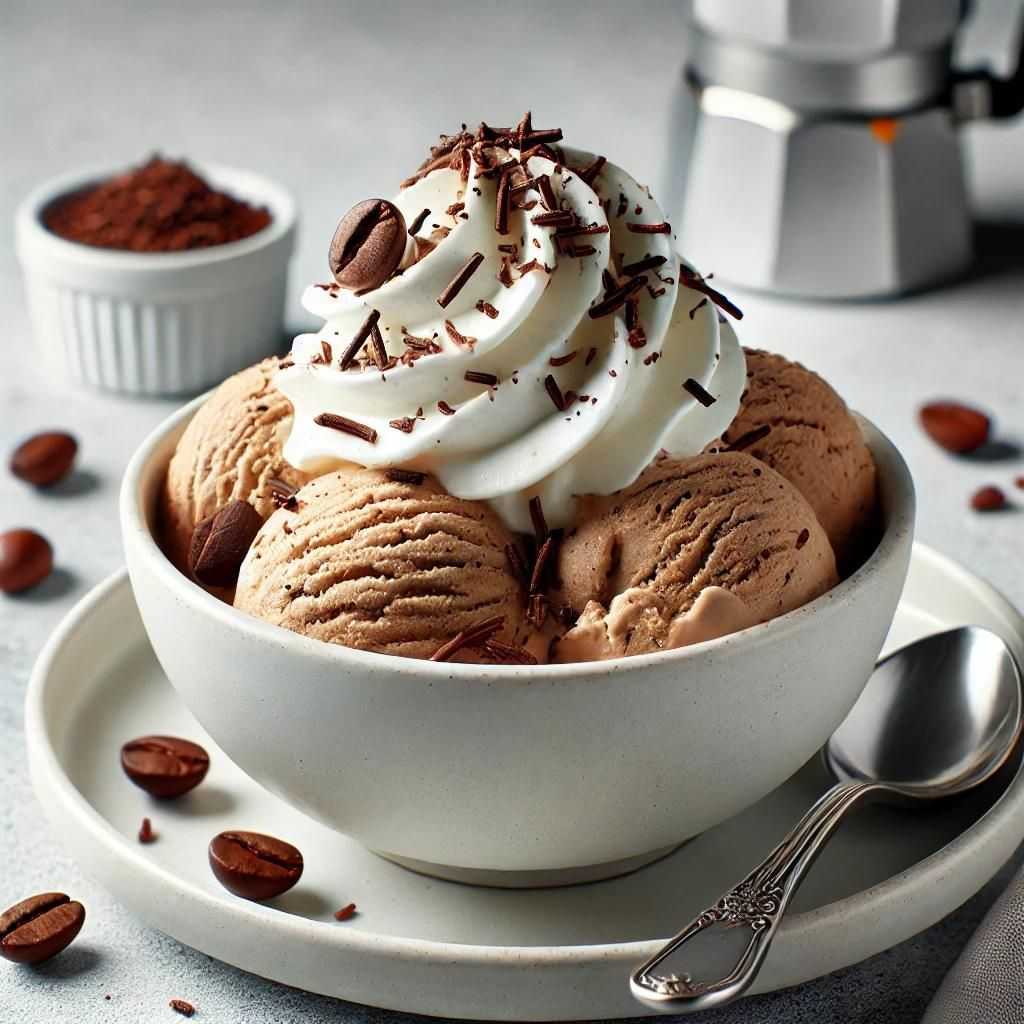
- Scoop the Mocha Espresso Protein Ice Cream into bowls or cones and add optional toppings like whipped cream, chocolate shavings, or espresso beans if desired. Enjoy your homemade, protein-packed dessert!
Amazon Basics 2 Slice Toaster, With 6 Browning Settings, Extra Wide Slots For Bagels and Special Breads, Removable Easy-to-Clean Crumb Tray, Cancel/Defrost/Bagel Buttons, 900W, Black & Silver
$23.29 (as of June 27, 2025 07:36 GMT +00:00 - More infoProduct prices and availability are accurate as of the date/time indicated and are subject to change. Any price and availability information displayed on [relevant Amazon Site(s), as applicable] at the time of purchase will apply to the purchase of this product.)Amazon Basics Electric Kettle with Glass Carafe for Tea and Coffee, BPA-Free, Fast Boiling, Auto Shut-Off, 1.8 Quarts, 1500W, Black and Silver
$22.49 (as of June 27, 2025 07:36 GMT +00:00 - More infoProduct prices and availability are accurate as of the date/time indicated and are subject to change. Any price and availability information displayed on [relevant Amazon Site(s), as applicable] at the time of purchase will apply to the purchase of this product.)AROMA Digital Rice Cooker, 4-Cup (Uncooked) / 8-Cup (Cooked), Steamer, Grain Cooker, Multicooker, 2 Qt, Stainless Steel Exterior, ARC-914SBD
$36.15 (as of June 27, 2025 07:36 GMT +00:00 - More infoProduct prices and availability are accurate as of the date/time indicated and are subject to change. Any price and availability information displayed on [relevant Amazon Site(s), as applicable] at the time of purchase will apply to the purchase of this product.)Once you’ve served your Ninja Creami Mocha Espresso Protein Ice Cream, take a moment to savor the rich, creamy texture and bold flavors. Enjoy each scoop as a satisfying treat that’s both indulgent and health-conscious. Whether you’re treating yourself after a workout or simply enjoying a guilt-free dessert, this homemade ice cream is sure to be a hit. Feel free to experiment with different toppings and variations to make it your own.
Ninja Creami Mocha Espresso Protein Ice Cream is a delicious and nutritious homemade dessert that combines the rich flavors of mocha and espresso with a protein boost. Utilizing the Ninja Creami, this recipe transforms a simple blend of almond milk, Greek yogurt, espresso, and cocoa powder into a smooth, creamy treat. The addition of protein powder makes it a satisfying option for those looking to enhance their protein intake, whether after a workout or as a healthier snack choice.
This ice cream not only delivers a delightful taste but also offers the advantage of customization. By making it at home, you can control the sweetness, adjust flavors, and avoid the excess sugars and artificial ingredients commonly found in store-bought options. It’s a perfect example of how indulgence and health can go hand-in-hand, allowing you to enjoy a rich, flavorful dessert while sticking to your dietary goals.
Ninja Creami Mocha Espresso Protein Ice Cream Nutrition Info
Here is a detailed nutrition table for Ninja Creami Mocha Espresso Protein Ice Cream. This table provides an approximate nutritional breakdown per serving, assuming the recipe makes 4 servings in total.
| Nutrient | Per Serving | % Daily Value |
| Calories | 99 | 5% |
| Total Fat | 2.5 g | 4% |
| Saturated Fat | 0.3 g | 2% |
| Cholesterol | 5 mg | 2% |
| Sodium | 60 mg | 3% |
| Total Carbohydrates | 15 g | 5% |
| Dietary Fiber | 2 g | 8% |
| Sugars | 10 g | — |
| Protein | 7 g | 14% |
| Calcium | 150 mg | 15% |
| Iron | 1 mg | 6% |
Cuisinart ICE-21RP1 1.5-Quart Frozen Yogurt, Ice Cream and Sorbet Maker, Double Insulated Freezer Bowl elminates the need for Ice and Makes Frozen Treats in 20 Minutes or Less, Red
$89.95 (as of June 27, 2025 08:37 GMT +00:00 - More infoProduct prices and availability are accurate as of the date/time indicated and are subject to change. Any price and availability information displayed on [relevant Amazon Site(s), as applicable] at the time of purchase will apply to the purchase of this product.)DASH My Pint Ice Cream Maker Machine (Aqua): Multi-Purpose Soft Serve Ice Cream Machine for Homemade Gelato, Sorbet, Frozen Yogurt, Includes Mixing Spoon, Easy to Clean and Store
$18.60 (as of June 27, 2025 08:37 GMT +00:00 - More infoProduct prices and availability are accurate as of the date/time indicated and are subject to change. Any price and availability information displayed on [relevant Amazon Site(s), as applicable] at the time of purchase will apply to the purchase of this product.)Percent Daily Values are based on a 2,000-calorie diet. Your daily values may be higher or lower depending on your calorie needs.
| Ingredient | Serving Size | Calories | Total Fat | Saturated Fat | Cholesterol | Sodium | Total Carbohydrates | Dietary Fiber | Sugars | Protein |
|---|---|---|---|---|---|---|---|---|---|---|
| Unsweetened Almond Milk | 1 cup (240 ml) | 30 | 2.5 g | 0 g | 0 mg | 180 mg | 1 g | 1 g | 0 g | 1 g |
| Greek Yogurt | 1 cup (245 g) | 100 | 0 g | 0 g | 10 mg | 60 mg | 6 g | 0 g | 6 g | 10 g |
| Brewed Espresso | 1/2 cup (120 ml) | 5 | 0 g | 0 g | 0 mg | 5 mg | 0 g | 0 g | 0 g | 0 g |
| Cocoa Powder | 1/4 cup (25 g) | 50 | 2 g | 1 g | 0 mg | 0 mg | 12 g | 6 g | 0 g | 3 g |
| Protein Powder | 1/4 cup (30 g) | 120 | 1 g | 0.5 g | 0 mg | 70 mg | 3 g | 1 g | 1 g | 20 g |
| Sweetener (Honey) | 1/4 cup (85 g) | 60 | 0 g | 0 g | 0 mg | 0 mg | 17 g | 0 g | 17 g | 0 g |
| Vanilla Extract | 1 tsp (5 ml) | 12 | 0 g | 0 g | 0 mg | 0 mg | 0 g | 0 g | 0 g | 0 g |
The nutritional values are approximate and can vary based on the specific brands and formulations used. Ingredients such as sweeteners can be substituted with alternatives that may have different nutritional profiles.
Tips for Best Results
- Cool the Espresso: Ensure that the brewed espresso is fully cooled before adding it to the mixture. This prevents it from affecting the freezing process and helps achieve a smoother texture.
- Blend Thoroughly: Blend the ingredients thoroughly to ensure a smooth and consistent mixture. This helps avoid lumps and ensures that the cocoa powder and protein powder are fully incorporated.
- Freeze Properly: Allow the mixture to freeze completely for optimal results. If it’s not frozen solid, it may not process well in the Ninja Creami. Aim for a firm but not rock-hard consistency.
- Adjust Sweetness: Taste the mixture before freezing and adjust the sweetness if necessary. Different sweeteners have varying levels of sweetness, so customize to suit your preference.
- Let It Sit: If the ice cream is too hard to process after freezing, let it sit at room temperature for a few minutes to soften slightly. This will make it easier to process in the Ninja Creami and achieve a creamy texture.
- Use Fresh Ingredients: For the best flavor and texture, use fresh, high-quality ingredients. This includes using fresh espresso and ensuring that your Greek yogurt and protein powder are within their freshness dates.
- Experiment with Flavors: Don’t hesitate to experiment with different flavor variations. You can adjust the cocoa powder for a richer chocolate flavor or try adding a dash of cinnamon or a few chocolate chips for added texture.
- Proper Storage: Store any leftover ice cream in an airtight container in the freezer to maintain its texture and prevent freezer burn.

Ninja Creami Mocha Espresso Protein Ice Cream Recipe
Equipment
- Ninja Creami For processing the frozen mixture into creamy ice cream.
- Blender: To blend the ingredients until smooth.
- Freezer-Safe Container: For freezing the blended mixture before processing (or use the Ninja Creami pint container).
- Measuring Cups and Spoons: For accurate ingredient measurements.
- Mixing bowl Optional, for combining ingredients before blending.
Ingredients
- 2 cups unsweetened almond milk
- 1 cup Greek yogurt
- ½ cup brewed espresso (cooled)
- ¼ cup cocoa powder
- ¼ cup protein powder (chocolate or vanilla flavor)
- ¼ cup sweetener (honey, agave syrup, or your choice)
- 1 tsp vanilla extract
Optional toppings:
- Whipped cream
- Chocolate shavings
- Espresso beans
- A sprinkle of cocoa powder
Instructions
- Blend Ingredients: Combine 2 cups almond milk, 1 cup Greek yogurt, 1/2 cup cooled espresso, 1/4 cup cocoa powder, 1/4 cup protein powder, 1/4 cup sweetener, and 1 tsp vanilla extract in a blender until smooth.
- Freeze: Pour the mixture into a freezer-safe container or Ninja Creami pint and freeze for 4-6 hours or until firm.
- Process: Place the frozen mixture in the Ninja Creami bowl and process until creamy.
- Serve: Scoop the ice cream into bowls or cones.
- Add Toppings: Top with optional whipped cream, chocolate shavings, or espresso beans if desired. Enjoy!
Notes
- Espresso Cooling: Ensure the brewed espresso is fully cooled before adding it to the mixture to prevent melting and uneven freezing.
- Freezing Time: Allow the mixture to freeze completely for best results. If it’s too soft, it might not process properly in the Ninja Creami.
- Blender Efficiency: Blend the ingredients thoroughly to avoid lumps, especially with cocoa powder and protein powder, for a smooth texture.
- Consistency Check: If the ice cream is too hard after freezing, let it sit at room temperature for a few minutes before processing in the Ninja Creami.
- Protein Powder Choice: Use a protein powder that blends well and complements the flavor of the ice cream for the best taste and texture.
Delicious Topping Ideas
- Whipped Cream: A dollop of light, fluffy whipped cream adds a touch of indulgence and complements the rich flavors of mocha and espresso.
- Chocolate Shavings: Add a sprinkle of dark or milk chocolate shavings for a decadent touch that enhances the chocolatey goodness.
- Espresso Beans: Crushed or whole espresso beans provide a crunchy texture and an extra burst of coffee flavor.
- Caramel Sauce: Drizzle a bit of caramel sauce on top for a sweet, buttery contrast to the mocha and espresso flavors.
- Toasted Nuts: Sprinkle some toasted almonds, walnuts, or hazelnuts for added crunch and a nutty flavor.
- Cocoa Powder: A light dusting of cocoa powder can enhance the chocolate flavor and add a sophisticated touch.
- Fresh Berries: Top with fresh raspberries, strawberries, or blueberries for a fruity contrast and a pop of color.
- Mini Marshmallows: For a fun and playful addition, sprinkle mini marshmallows on top.
- Shredded Coconut: Add a layer of shredded coconut for a tropical twist and extra texture.
- Peanut Butter Drizzle: Swirl a bit of melted peanut butter over the ice cream for a rich, nutty flavor.
FAQ
Can I use a different type of milk instead of almond milk?
Yes, you can use different types of milk instead of almond milk. Options like cow’s milk, oat milk, or soy milk can all work well. However, keep in mind that each alternative will slightly alter the flavor and texture of the ice cream. For a dairy-free option, ensure you choose a non-dairy milk that suits your taste and dietary needs.
How can I make this recipe dairy-free?
To make this recipe dairy-free, substitute the Greek yogurt with a dairy-free Greek-style yogurt made from almond, coconut, or soy milk. For the protein powder, use a plant-based protein powder, such as pea, hemp, or rice protein. Ensure that all other ingredients, including the milk and sweeteners, are also dairy-free. This will keep the recipe compliant with dairy-free dietary preferences while maintaining a similar creamy texture and flavor.
Can I use instant coffee instead of brewed espresso?
Yes, you can use instant coffee instead of brewed espresso. To achieve a similar coffee flavor, dissolve about 1 to 2 tablespoons of instant coffee in a small amount of hot water. Adjust the amount based on your taste preference for a stronger or milder coffee flavor. Keep in mind that instant coffee might have a slightly different taste compared to espresso, but it will still provide a delicious coffee kick to the ice cream.
What if my ice cream is too hard to process in the Ninja Creami?
If your ice cream is too hard to process in the Ninja Creami, let it sit at room temperature for a few minutes to soften slightly. This will make it easier to process and achieve a smoother, creamy texture. If it remains too hard, you can briefly blend or stir the mixture to loosen it before placing it back into the Ninja Creami for processing.

Hi, I’m Katelyn Williams, the expert behind Ninjacreamiicecream.com. With a deep passion for creating delectable ice cream recipes, I’m here to share my love for all things ice cream. I earned my Bachelor’s degree from Louisiana State University, and since then, I’ve been dedicated to perfecting the art of ice cream making. From classic flavors to innovative creations, my goal is to inspire you to make delicious and creamy treats at home effortlessly. Join me for the best recipes, tips, and techniques to elevate your ice cream game and indulge in delightful frozen desserts!

