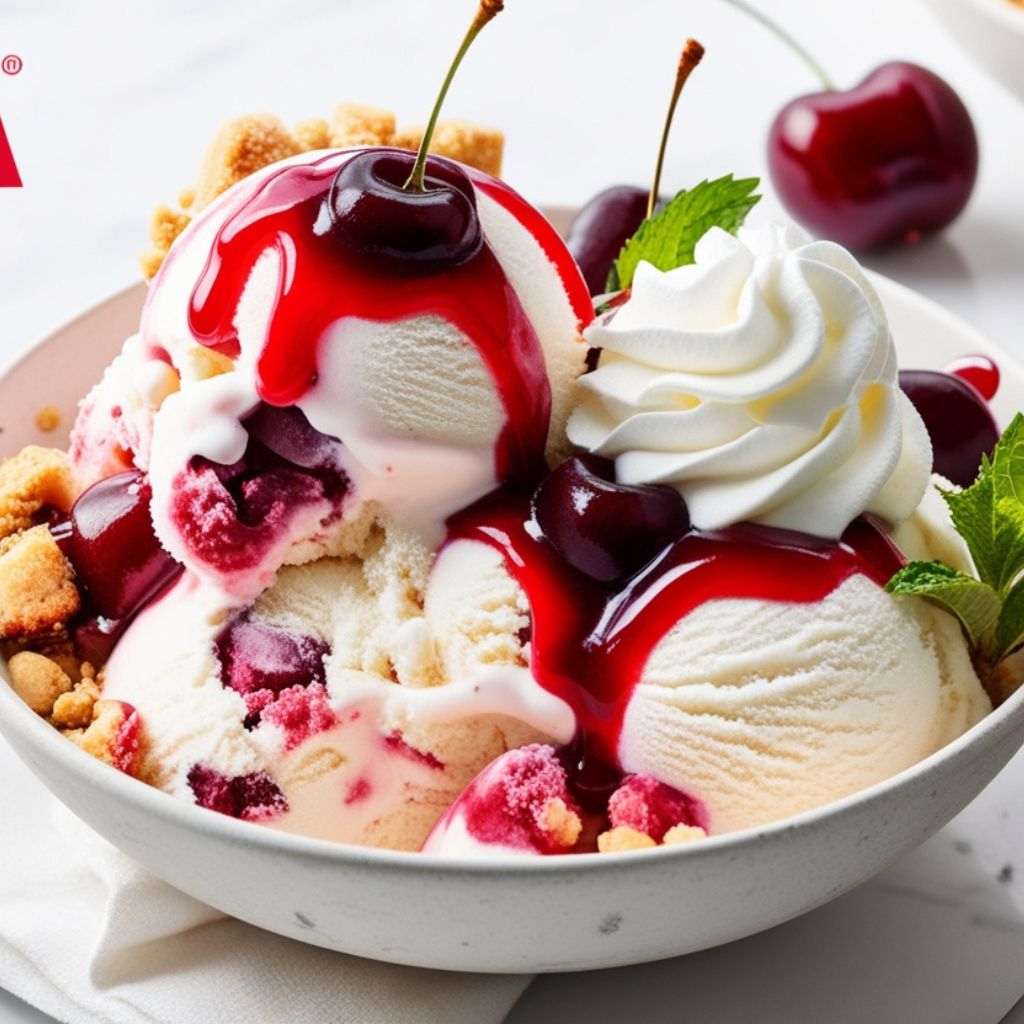
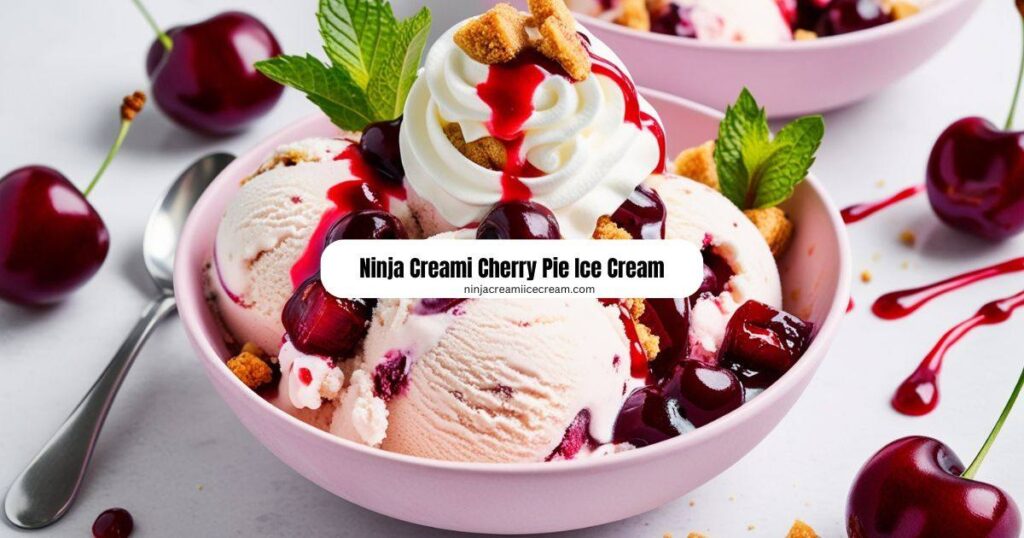
Ninja Creami Cherry Pie Ice Cream is a delightful twist on a classic American dessert, offering a creamy, frozen version of the beloved cherry pie. This innovative treat combines the rich, smooth texture of homemade ice cream with the sweet and tangy flavors of cherry pie filling, making it a standout choice for any dessert lover.
Cherry Pie Ice Cream is a perfect flavor choice for summer, as it captures the essence of fresh, seasonal cherries in a refreshing frozen treat. However, its comforting pie-like qualities also make it an enjoyable dessert year-round. The blend of tart cherries, sweet cream, and buttery pie crust pieces brings together the best of both worlds—light and refreshing for hot days, yet cozy and indulgent for cooler seasons. This versatile flavor is sure to please any palate and elevate your dessert experience.
Ninja Creami Cherry Pie Ice Cream Recipe
Ingredients
Cherry Mixture:
Ice Cream Maker, 1.5-Qt Ice Cream Machine and Frozen Yogurt Machine, 1.5-Qt Insulated Freezer Bowl, LCD Screen and Timer, Quick Results, Easy to Operate and Clean
$49.98 (as of June 27, 2025 08:37 GMT +00:00 - More infoProduct prices and availability are accurate as of the date/time indicated and are subject to change. Any price and availability information displayed on [relevant Amazon Site(s), as applicable] at the time of purchase will apply to the purchase of this product.)SharkNinja NC301 CREAMi 7-In-1 Ice Cream Maker with 7 Custom Frozen Treat Modes and Easy 3-Step Treat Preparation, Cloud Silver (Renewed)
$169.99 (as of June 27, 2025 08:37 GMT +00:00 - More infoProduct prices and availability are accurate as of the date/time indicated and are subject to change. Any price and availability information displayed on [relevant Amazon Site(s), as applicable] at the time of purchase will apply to the purchase of this product.)Ninja CREAMi Ice Cream Maker, 5 One-Touch Programs, Includes (2) 16oz Pints with Lids, Transform Frozen Bases to Ice Cream, Sorbets, Milkshakes, Vegan, Dairy-Free Options, NC300 White (Renewed)
$184.95 (as of June 27, 2025 08:39 GMT +00:00 - More infoProduct prices and availability are accurate as of the date/time indicated and are subject to change. Any price and availability information displayed on [relevant Amazon Site(s), as applicable] at the time of purchase will apply to the purchase of this product.)Disclosure: This post may contain affiliate links. As an Amazon Associate, I earn from qualifying purchases. Read more.
- 2 cups fresh or frozen cherries: Pit and chop the cherries to enhance their flavor and make them easier to cook. If using frozen cherries, thaw them before cooking.
- 1/2 cup granulated sugar: Sweetens the cherry mixture and balances the tartness of the cherries.
- 1 tablespoon lemon juice: Adds a touch of acidity to enhance the cherry flavor and help balance the sweetness.
- 1 tablespoon cornstarch (optional): Used to thicken the cherry mixture if a thicker consistency is desired. Mix with a bit of water to create a slurry before adding.
- 1 teaspoon vanilla extract: Adds a warm, aromatic flavor that complements the cherries.
Ice Cream Base:
- 1 cup heavy cream: Provides a rich, creamy texture that forms the base of the ice cream.
- 1 cup whole milk: Adds additional creaminess and helps balance the thickness of the heavy cream.
- 1/2 cup granulated sugar: Sweetens the ice cream base and ensures a smooth texture.
- 1 teaspoon vanilla extract: Enhances the overall flavor of the ice cream and complements the cherry mixture.
Pie Crust Pieces:
- 1 pre-made pie crust or homemade pie crust: Provides the pie-like texture and flavor in the ice cream. A pre-made crust is convenient, but a homemade crust can add a personal touch.
- 2 tablespoons butter: Used to toast the pie crust pieces, adding a rich, buttery flavor.
- 1 tablespoon granulated sugar (optional): For extra sweetness when toasting the pie crust pieces.
- 1/2 teaspoon ground cinnamon (optional): Adds a hint of spice to the pie crust, enhancing its flavor.
These ingredients work together to create a delicious, creamy Cherry Pie Ice Cream with the perfect balance of tart cherries, sweet cream, and crunchy pie crust pieces.
Instructions
1. Prepare the Cherry Mixture:
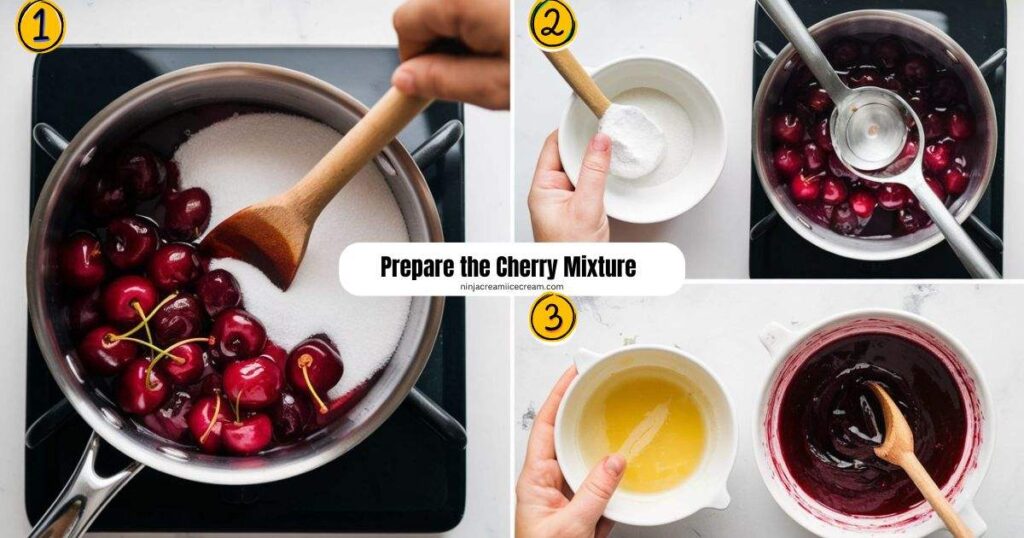
- Cook the Cherries: In a saucepan over medium heat, combine 2 cups of chopped cherries and 1/2 cup granulated sugar. Stir occasionally until the mixture starts to release juices and becomes syrupy, about 5-7 minutes.
- Thicken (Optional): If you prefer a thicker cherry mixture, mix 1 tablespoon of cornstarch with 1 tablespoon of water to create a slurry. Add this slurry to the cherry mixture and cook for an additional 2-3 minutes until thickened.
- Finish: Stir in 1 tablespoon of lemon juice and 1 teaspoon of vanilla extract. Allow the cherry mixture to cool completely before using.
Amazon Basics 2 Slice Toaster, With 6 Browning Settings, Extra Wide Slots For Bagels and Special Breads, Removable Easy-to-Clean Crumb Tray, Cancel/Defrost/Bagel Buttons, 900W, Black & Silver
$23.29 (as of June 27, 2025 07:36 GMT +00:00 - More infoProduct prices and availability are accurate as of the date/time indicated and are subject to change. Any price and availability information displayed on [relevant Amazon Site(s), as applicable] at the time of purchase will apply to the purchase of this product.)Amazon Basics Electric Kettle with Glass Carafe for Tea and Coffee, BPA-Free, Fast Boiling, Auto Shut-Off, 1.8 Quarts, 1500W, Black and Silver
$22.49 (as of June 27, 2025 07:36 GMT +00:00 - More infoProduct prices and availability are accurate as of the date/time indicated and are subject to change. Any price and availability information displayed on [relevant Amazon Site(s), as applicable] at the time of purchase will apply to the purchase of this product.)AROMA Digital Rice Cooker, 4-Cup (Uncooked) / 8-Cup (Cooked), Steamer, Grain Cooker, Multicooker, 2 Qt, Stainless Steel Exterior, ARC-914SBD
$36.15 (as of June 27, 2025 07:36 GMT +00:00 - More infoProduct prices and availability are accurate as of the date/time indicated and are subject to change. Any price and availability information displayed on [relevant Amazon Site(s), as applicable] at the time of purchase will apply to the purchase of this product.)2. Prepare the Cherry Ice Cream Base:
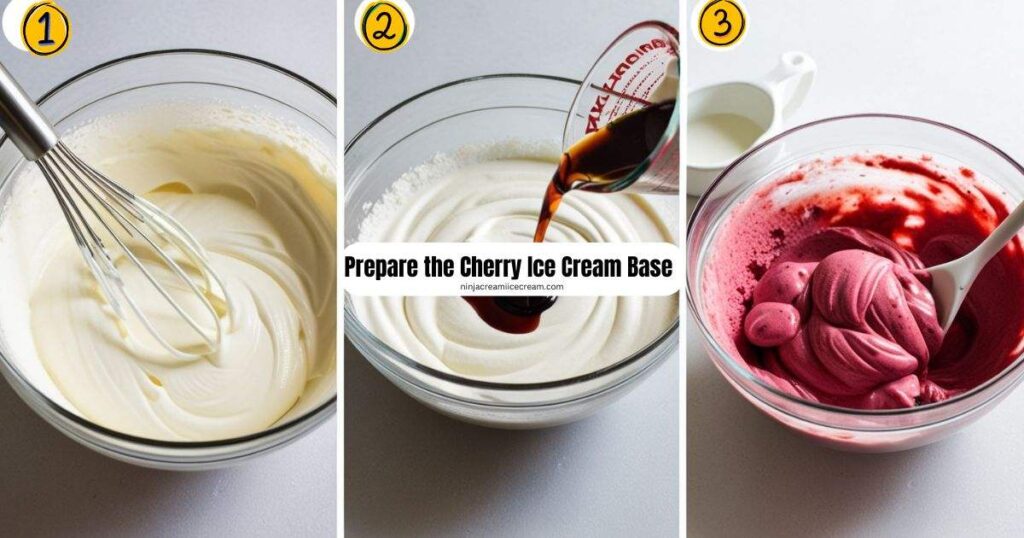
- Mix Ingredients: In a large mixing bowl, whisk together 1 cup heavy cream, 1 cup whole milk, and 1/2 cup granulated sugar until the sugar is completely dissolved.
- Add Flavor: Stir in 1 teaspoon of vanilla extract.
- Combine with Cherry Mixture: Fold the cooled cherry mixture into the ice cream base until well combined.
3. Freeze and Process Cherry Ice Cream:
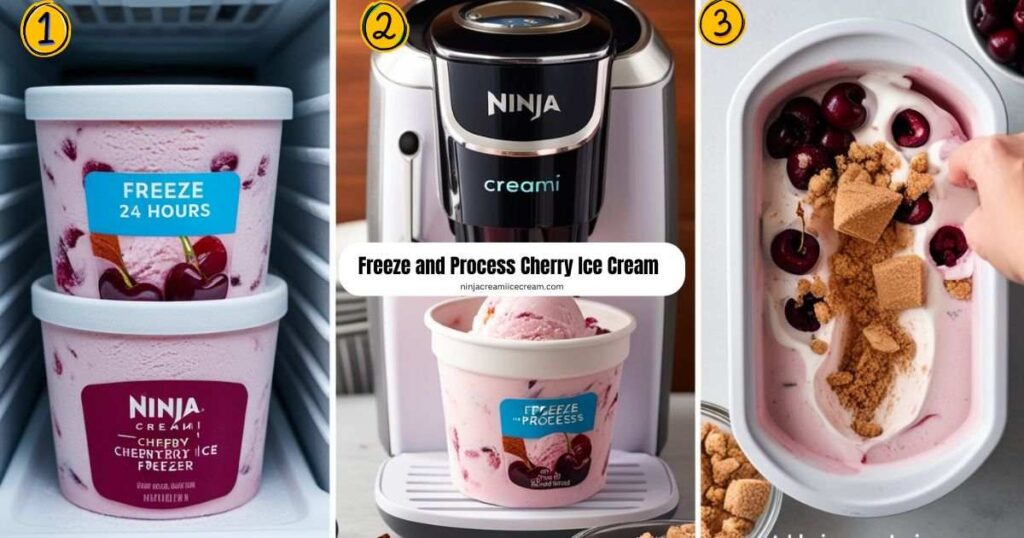
- Freeze: Pour the combined mixture into the Ninja Creami pint container. Place the container in the freezer and freeze for at least 24 hours or until the mixture is completely solid.
- Process: Once frozen, remove the pint container from the freezer and process the mixture in the Ninja Creami according to the manufacturer’s instructions.
- Add Pie Crust Pieces: After processing, gently fold in about 1 cup of crumbled pie crust pieces.
Once you’ve served the Ninja Creami Cherry Pie Ice Cream, savor the delightful blend of creamy vanilla ice cream, tangy cherry pie filling, and buttery pie crust pieces. This homemade treat is perfect for any occasion, whether you’re enjoying a sunny day or cozying up on a cooler evening. Store any leftovers in an airtight container in the freezer to keep it fresh and ready for another indulgent dessert. Enjoy every spoonful of this delicious twist on a classic favorite!
Maxi-Matic EIM-520 Automatic Easy, Homemade Electric Maker, Ingredient Chute, On/Off Switch, No Salt Needed, Creamy Ice Cream, Gelato, Frozen Yogurt, or Sorbet, 1 Quart, Blue
$24.14 (as of June 27, 2025 08:37 GMT +00:00 - More infoProduct prices and availability are accurate as of the date/time indicated and are subject to change. Any price and availability information displayed on [relevant Amazon Site(s), as applicable] at the time of purchase will apply to the purchase of this product.)Ninja CREAMi Pints 2 Pack, Compatible with NC299AMZ & NC300s Series CREAMi Ice Cream Makers, Genuine Ninja Pint, BPA-Free & Dishwasher Safe, Color Lids, 1 Pint Each, Clear/Lime/Aqua, XSKPLID2CD
$19.99 (as of June 27, 2025 08:37 GMT +00:00 - More infoProduct prices and availability are accurate as of the date/time indicated and are subject to change. Any price and availability information displayed on [relevant Amazon Site(s), as applicable] at the time of purchase will apply to the purchase of this product.)Ninja Creami Cherry Pie Ice Cream is a delectable fusion of classic cherry pie flavors transformed into a creamy, frozen delight. This treat combines the smooth, rich texture of homemade ice cream with a luscious cherry pie filling, creating a refreshing dessert that’s perfect for any time of year. The cherry mixture, simmered to a syrupy consistency and blended with a creamy ice cream base, delivers a perfect balance of sweetness and tartness.
Adding crumbled pie crust pieces to the mix gives this ice cream an extra layer of texture and flavor, mimicking the comforting crunch of a traditional pie. Whether you’re enjoying it on a hot summer day or indulging in a cozy evening treat, Ninja Creami Cherry Pie Ice Cream is sure to satisfy your dessert cravings and impress with its delightful blend of flavors and textures.
Ninja Creami Cherry Pie Ice Cream Nutrition Info
Here’s a basic nutrition table for Ninja Creami Cherry Pie Ice Cream. Keep in mind that the values are approximate and can vary based on the specific ingredients and quantities used.
| Nutrient | Per Serving (1/2 cup) |
| Calories | 210-315 kcal |
| Total Fat | 14-20 g |
| Saturated Fat | 8-12 g |
| Cholesterol | 45-65 mg |
| Sodium | 60-100 mg |
| Total Carbohydrates | 22-30 g |
| Dietary Fiber | 1-2 g |
| Sugars | 18-25 g |
| Protein | 2-4 g |
| Vitamin D | 10-15 IU |
| Calcium | 80-120 mg |
| Iron | 0.5-1 mg |
For precise nutritional information, use a nutrition calculator with the exact ingredients and quantities you use.
Here’s a combined nutrition table for each ingredient used in Ninja Creami Cherry Pie Ice Cream:
| Ingredient | Serving Size | Calories | Total Fat | Saturated Fat | Cholesterol | Sodium | Total Carbohydrates | Dietary Fiber | Sugars | Protein |
|---|---|---|---|---|---|---|---|---|---|---|
| Cherries | 1 cup (154 g) | 97 | 0.3 g | 0 g | 0 mg | 2 mg | 25 g | 3 g | 20 g | 1 g |
| Granulated Sugar | 1 tablespoon (12.5 g) | 49 | 0 g | 0 g | 0 mg | 0 mg | 13 g | 0 g | 13 g | 0 g |
| Lemon Juice | 1 tablespoon (15 ml) | 4 | 0 g | 0 g | 0 mg | 1 mg | 1 g | 0 g | 1 g | 0 g |
| Cornstarch | 1 tablespoon (8 g) | 30 | 0 g | 0 g | 0 mg | 0 mg | 7 g | 0 g | 0 g | 0 g |
| Vanilla Extract | 1 teaspoon (5 ml) | 12 | 0 g | 0 g | 0 mg | 0 mg | 1 g | 0 g | 1 g | 0 g |
| Heavy Cream | 1 cup (240 ml) | 820 | 88 g | 55 g | 330 mg | 80 mg | 6 g | 0 g | 6 g | 5 g |
| Whole Milk | 1 cup (240 ml) | 150 | 8 g | 5 g | 30 mg | 98 mg | 12 g | 0 g | 12 g | 8 g |
| Pie Crust | 1 cup crumbled (100 g) | 400 | 20 g | 10 g | 30 mg | 500 mg | 50 g | 2 g | 15 g | 3 g |
| Butter | 1 tablespoon (14 g) | 102 | 12 g | 7 g | 31 mg | 82 mg | 0 g | 0 g | 0 g | 0 g |
Ninja Creami Cherry Pie Ice Cream Recipe
Equipment
- Ninja Creami Ice Cream Maker Essential for processing and churning the frozen mixture into creamy ice cream.
- Saucepan For cooking the cherry mixture.
- Mixing Bowls: For preparing the ice cream base and combining ingredients.
- Whisk To mix the ice cream base and ensure the sugar is dissolved.
- Measuring Cups and Spoons: For accurate ingredient measurements.
- Pint Container - The Ninja Creami’s pint container for freezing the ice cream mixture.
- Spatula: For folding in the pie crust pieces and scraping down the sides of bowls.
- Knife and Cutting Board: For chopping cherries and breaking up pie crusts.
- Oven or Skillet: For toasting the pie crust pieces, if using a pre-made crust.
Ingredients
Cherry Mixture
- 2 cup fresh or frozen cherries, pitted and chopped
- ½ cup granulated sugar
- 1 tablespoon lemon juice
- 1 tablespoon cornstarch (optional, for thickening)
- 1 tsp vanilla extract
Ice Cream Base
- 1 cup heavy cream
- 1 cup whole milk
- 1/2 cup granulated sugar
- 1 teaspoon vanilla extract
Pie Crust Pieces
- pre-made pie crust or homemade pie crust
- 2 tablespoons butter, melted
- 1 tablespoon granulated sugar (optional, for sprinkling)
- ½ tablespoon ground cinnamon (optional, for sprinkling)
Instructions
- Prepare Cherry Mixture: Cook 2 cups chopped cherries with 1/2 cup sugar until syrupy. Thicken with cornstarch if desired, then stir in 1 tablespoon lemon juice and 1 teaspoon vanilla. Cool completely.
- Mix Ice Cream Base: Whisk together 1 cup heavy cream, 1 cup whole milk, and 1/2 cup sugar until dissolved. Add 1 teaspoon vanilla extract.
- Combine Ingredients: Fold the cooled cherry mixture into the ice cream base.
- Freeze: Pour the mixture into the Ninja Creami pint container and freeze for at least 24 hours.
- Process and Add Pie Crust: Process in the Ninja Creami, then fold in 1 cup crumbled pie crust pieces.
Notes
- Cherry Mixture Cooling: Make sure the cherry mixture is completely cooled before combining it with the ice cream base. This prevents the mixture from melting the ice cream base during freezing.
- Freezing Time: Ensure the mixture is frozen solid in the Ninja Creami pint container for at least 24 hours. This allows the ice cream to achieve the right texture.
- Cornstarch: Adding cornstarch to the cherry mixture is optional but recommended if you prefer a thicker consistency.
- Pie Crust: For the best texture, crumble the pie crust into small pieces and toast lightly. This adds a nice crunch and flavor to the ice cream.
- Processing Instructions: Follow the Ninja Creami manufacturer’s instructions carefully for processing the ice cream to achieve the desired creamy texture.
- Serving: For optimal texture, enjoy the ice cream soon after processing. Store leftovers in an airtight container in the freezer.

Hi, I’m Katelyn Williams, the expert behind Ninjacreamiicecream.com. With a deep passion for creating delectable ice cream recipes, I’m here to share my love for all things ice cream. I earned my Bachelor’s degree from Louisiana State University, and since then, I’ve been dedicated to perfecting the art of ice cream making. From classic flavors to innovative creations, my goal is to inspire you to make delicious and creamy treats at home effortlessly. Join me for the best recipes, tips, and techniques to elevate your ice cream game and indulge in delightful frozen desserts!

