
A Malted Milkshake is a deliciously creamy and nostalgic treat that brings back memories of classic diners and old-school ice cream parlors. This indulgent beverage blends together smooth ice cream and milk, with the addition of malted milk powder to create its signature rich and velvety texture. Loved by people of all ages, the malted milkshake is the perfect combination of sweetness and malty flavor, making it a timeless favorite. The key ingredient that gives this shake its unique taste is malted milk powder, which adds a subtle, sweet, and slightly toasted flavor, setting it apart from traditional milkshakes.
Disclosure: This post may contain affiliate links. As an Amazon Associate, I earn from qualifying purchases. Read more.
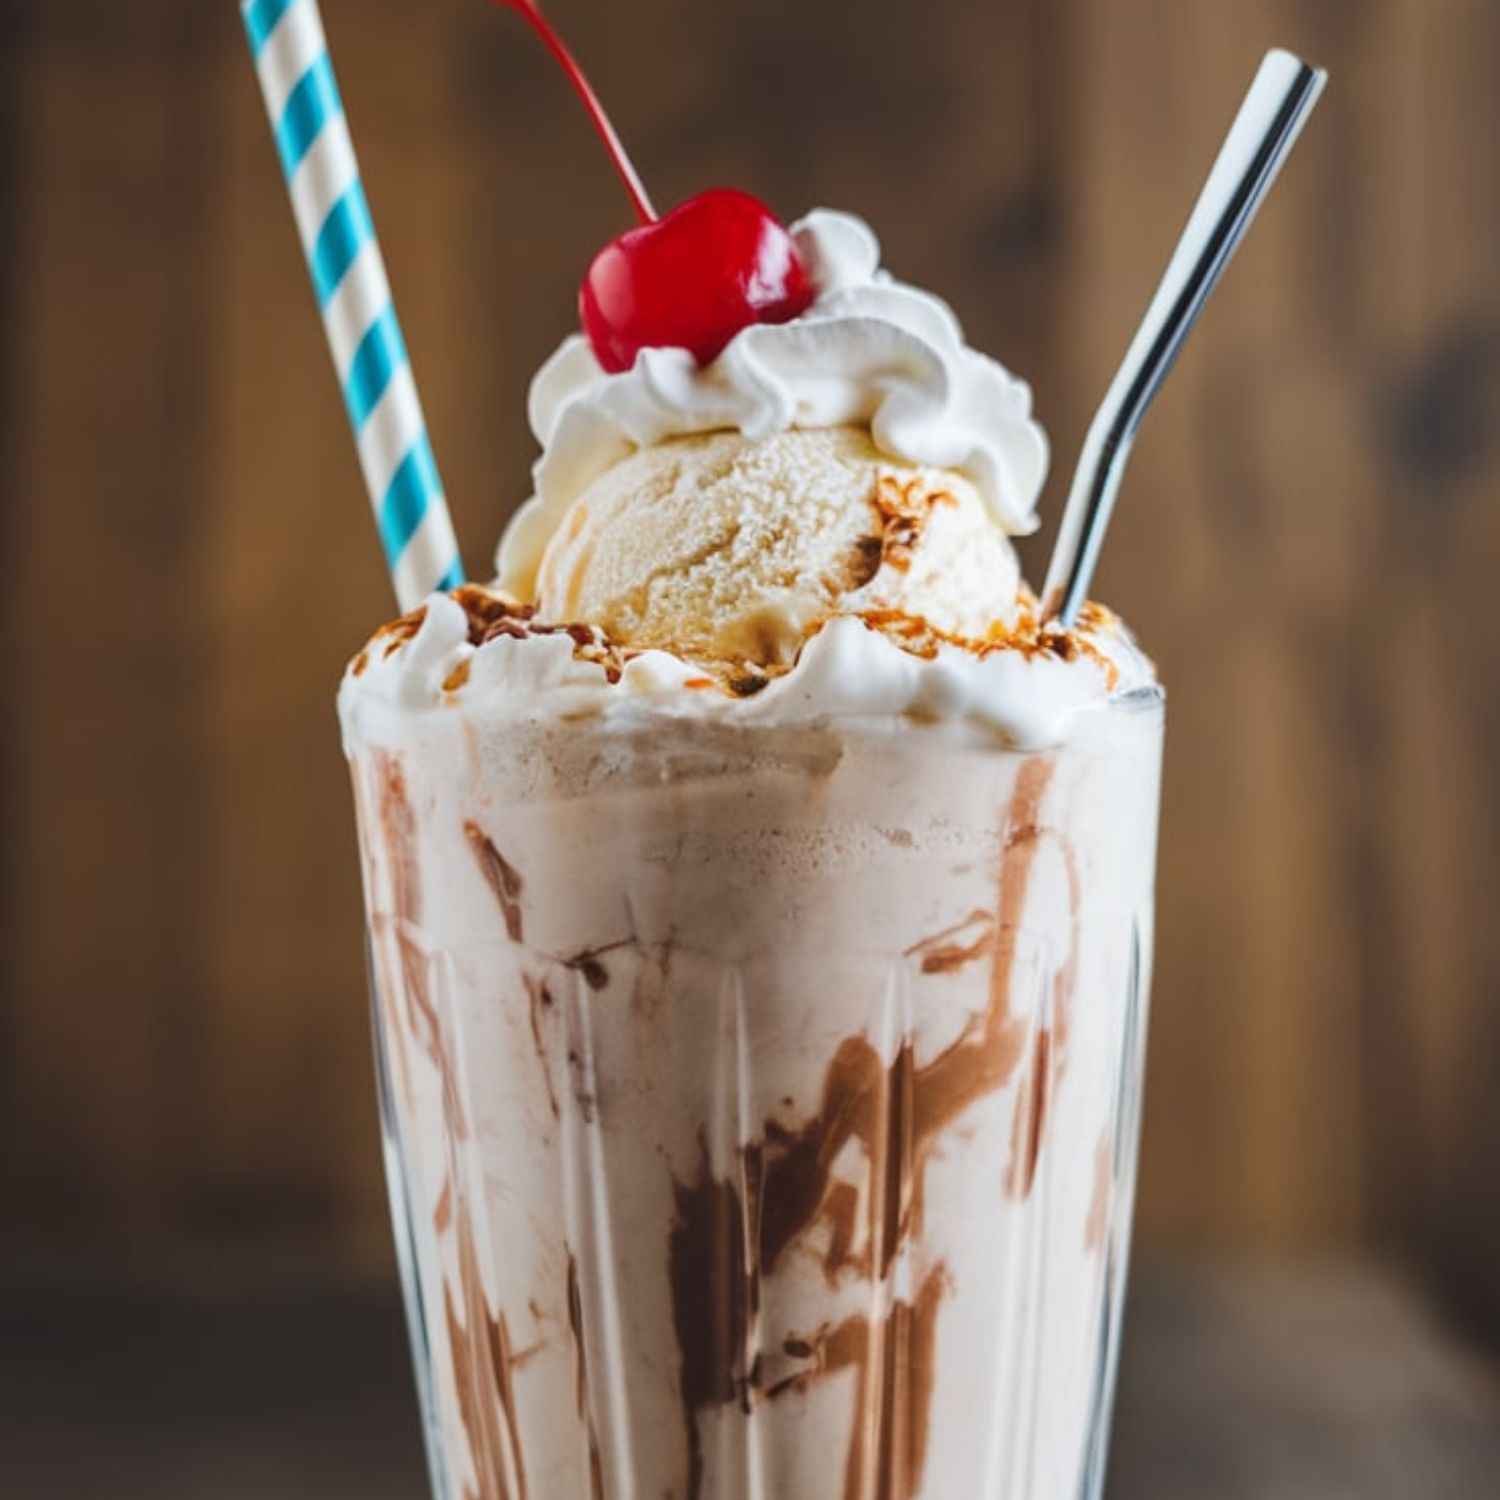
Malted Milkshake Recipe
- Add Ice Cream & Milk
- Start by scooping about 2-3 large scoops of your favorite ice cream into a blender. Vanilla is a classic choice, but you can also use chocolate or any flavor you like.
- Pour in 1 cup of milk. You can use whole milk for a rich, creamy texture, or opt for a dairy-free alternative like almond or oat milk for a different twist. The more milk you add, the thinner the milkshake will be, so adjust based on your desired consistency.
- Add Malted Milk Powder
- Sprinkle in 2 tablespoons of malted milk powder. This is the star ingredient that gives the milkshake its signature malted, slightly sweet flavor. You can find malted milk powder in most grocery stores, often in the baking or hot drink section.
- Blend to Perfection
- Place the lid securely on the blender and start blending on a low setting to mix the ingredients together. Gradually increase the speed to high to achieve a smooth and creamy consistency. Blend for about 30 seconds to 1 minute, depending on the power of your blender, until the ice cream is fully incorporated into the milk and the malted milk powder is evenly dissolved.
- Adjust Consistency
- If the milkshake is too thick for your liking, add a little more milk (about 1/4 cup at a time) and blend again. Continue adjusting the milk to your desired thickness. For a thicker milkshake, you can add an extra scoop of ice cream.
- Taste and Sweeten
- Take a quick taste to see if it’s sweet enough for you. If you prefer a sweeter milkshake, add a small amount of sugar or honey and blend once more. Typically, the malted milk powder provides enough sweetness, but you can adjust according to your taste.
- Serve
- Once you’re happy with the flavor and consistency, pour the milkshake into a tall glass. For an extra indulgent touch, consider swirling in some chocolate syrup or caramel sauce for added flavor and a fun presentation.
- Optional Toppings
- Top your milkshake with a generous amount of whipped cream, a maraschino cherry, or even a drizzle of chocolate or caramel syrup for that classic milkshake parlor experience. You can also sprinkle crushed malted milk balls or chocolate shavings on top for a fun crunch.
Enjoy your nostalgic, creamy malted milkshake!

Instructions for Cherry Sorbet Recipe
-
Prepare the Cherries
- Begin by washing the cherries thoroughly under cool running water to remove any dirt or debris.
- If you’re using fresh cherries, remove the pits using a cherry pitter or by cutting the cherries in half and carefully removing the pit with a knife. This step is crucial as the pits can negatively affect the texture and taste of the sorbet.
- Once pitted, you can roughly chop the cherries into smaller pieces if desired or leave them whole if using a powerful blender or food processor.
-
Make the Sugar Syrup
- In a medium-sized saucepan, combine the sugar and water. Stir them together to dissolve the sugar.
- Place the saucepan over medium heat and bring it to a gentle simmer. Stir occasionally to make sure the sugar completely dissolves into the water. You’ll know it’s ready when the mixture is clear and smooth, with no grains of sugar visible.
- Once the sugar has dissolved, remove the saucepan from the heat and set it aside to cool. Allow the syrup to reach room temperature before moving on to the next step.
-
Blend the Mixture
- Transfer the prepared cherries into a blender or food processor. Pour in the cooled sugar syrup and fresh lemon juice.
- Blend the ingredients together until the mixture is smooth and well-combined. The cherries should break down into a vibrant, thick puree.
- Taste the mixture and adjust the sweetness if necessary. If you like your sorbet sweeter, add a little more sugar or syrup. If you prefer a more tart flavor, you can add a bit more lemon juice.
- If you prefer a perfectly smooth texture, you can strain the mixture through a fine-mesh sieve to remove any remaining bits of cherry skin or pulp. This step is optional, but it does give the sorbet a finer consistency.
-
Freeze the Sorbet
- Pour the cherry mixture into a shallow, freezer-safe dish, such as a metal or glass baking dish. A shallow dish helps the sorbet freeze more evenly and quickly.
- Spread the mixture out evenly using a spatula to ensure it freezes uniformly.
- Cover the dish with a lid or plastic wrap to prevent ice crystals from forming on top.
- Place the dish in the freezer and allow the mixture to freeze for at least 4 hours. During the first 2 hours, stir the mixture every 30 minutes with a fork to break up any ice crystals and create a smoother texture. This step is important for achieving a creamy sorbet rather than a block of ice.
-
Serve the Sorbet
- After the sorbet has fully frozen and reached a slushy, scoopable consistency, remove it from the freezer. If it’s too hard, let it sit at room temperature for 5-10 minutes to soften slightly before scooping.
- Use an ice cream scooper or a large spoon to scoop the sorbet into bowls or cones. If you’d like, you can garnish each serving with a few whole cherries or fresh mint leaves for added flair.
Enjoy your homemade cherry sorbet as a refreshing, healthy dessert that’s sure to impress your guests or make for a cool treat on a warm day!

Malted Milkshake Recipe
Equipment
- Blender – To mix the ingredients into a smooth, creamy milkshake.
- Measuring Cups & Spoons – For accurately measuring milk, ice cream, and malted milk powder.
- Tall Glass – For serving the milkshake in a classic diner-style presentation.
- Straw & Spoon – A wide straw for easy sipping and a spoon for scooping up thick portions.
- Ice Cream Scoop – To easily measure and add ice cream to the blender.
Ingredients
- 2-3 scoops vanilla ice cream (or your preferred flavor)
- 1 cup whole milk (or milk of choice)
- 2 tablespoons malted milk powder
- 1 tablespoon chocolate syrup (optional, for extra flavor)
- Whipped cream (optional, for topping)
- 1 maraschino cherry (optional, for garnish)
- Crushed malted milk balls (optional, for extra crunch)
Instructions
- Blend the Base – In a blender, combine 2-3 scoops of vanilla ice cream, 1 cup of milk, and 2 tablespoons of malted milk powder.
- Mix Until Smooth – Blend on low speed to combine, then increase to high speed for about 30 seconds to 1 minute, until smooth and creamy.
- Adjust Consistency – If the milkshake is too thick, add a little more milk (¼ cup at a time) and blend again. If it’s too thin, add another scoop of ice cream
- Serve Immediately – Pour the milkshake into a tall glass. For extra flavor, drizzle chocolate syrup inside the glass before pouring.
- Garnish & Enjoy – Top with whipped cream, a maraschino cherry, and crushed malted milk balls if desired. Serve with a straw and enjoy your nostalgic treat!
Notes
- Use High-Quality Malted Milk Powder – For the best flavor, choose a high-quality malted milk powder, as some brands may have more sugar and less malt flavor.
- Adjust Sweetness – If you prefer a sweeter shake, add 1 teaspoon of sugar or honey, but the malted milk powder and ice cream usually provide enough sweetness.
- Experiment with Flavors – Try using chocolate, strawberry, or coffee ice cream for a fun twist. You can also blend in banana or peanut butter for extra richness.
- Make It Dairy-Free – Use non-dairy ice cream and milk (like almond, oat, or coconut milk) for a lactose-free version.
- Serve Immediately – The milkshake is best enjoyed fresh, as it may lose its creamy consistency if left sitting for too long.
Tips for the Best Malted Milkshake
- Use Full-Fat Ice Cream
For a rich, creamy texture, opt for full-fat ice cream. This will give your milkshake a velvety, indulgent mouthfeel. If you prefer a lighter version, you can use low-fat or non-dairy ice cream. - Experiment with Milk Types
While whole milk is the classic choice for a malted milkshake, don’t be afraid to get creative! Almond, oat, or coconut milk can add unique flavors and textures, especially if you want a dairy-free version. - Blend Thoroughly
To achieve the perfect smooth and creamy consistency, make sure to blend the ingredients well. Scrape down the sides of the blender if needed to ensure everything is fully mixed and there are no chunks of ice cream or unmixed malt powder. - Adjust Thickness
If you like your milkshake thicker, add more ice cream or use less milk. For a thinner consistency, add a little more milk at a time. The key is to blend slowly and adjust as needed to get your ideal texture. - Customize with Flavors
Get creative by adding extra flavors! A scoop of chocolate syrup, a handful of fresh fruit, or a pinch of vanilla extract can transform your malted milkshake into something uniquely yours. You could even try adding a shot of coffee for a fun twist. - Use a High-Quality Malted Milk Powder
Not all malted milk powders are created equal. Choose a high-quality malted milk powder for the best flavor. You can find options that are rich in malted flavor and low in added sugars, ensuring your milkshake has a more authentic taste. - Serve Immediately
Malted milkshakes are best enjoyed fresh, right after they’re made. If you need to store it for later, be aware that the texture may change as it freezes and thaws. To keep it thick, avoid letting it melt too much before serving. - Top It Off with Fun Garnishes
For the full malted milkshake experience, go beyond whipped cream! Try adding a maraschino cherry, crumbled malted milk balls, sprinkles, or even a drizzle of caramel or hot fudge for extra flavor and visual appeal. - Use a Tall Straw or Milkshake Spoon
Malted milkshakes are thick and creamy, so make sure you have a wide straw or milkshake spoon to help you enjoy it fully without any mess.
With these tips, you’ll make a malted milkshake that’s rich, flavorful, and perfectly creamy every time!
Conclusion
A malted milkshake is more than just a drink—it’s a nostalgic treat that brings back the charm of classic diners and soda fountains. With its creamy texture, rich flavor, and the unique addition of malted milk powder, this milkshake stands out from the rest. Whether you enjoy it plain or customize it with chocolate, coffee, or fruit, it’s a versatile recipe that’s easy to make and guaranteed to satisfy your sweet tooth.
The best part about making a malted milkshake at home is that you can tailor it to your preferences, from the type of milk and ice cream to fun toppings and mix-ins. So grab your blender, whip up a delicious, malted milkshake, and enjoy a sip of old-fashioned goodness in the comfort of your own home!

Hi, I’m Katelyn Williams, the expert behind Ninjacreamiicecream.com. With a deep passion for creating delectable ice cream recipes, I’m here to share my love for all things ice cream. I earned my Bachelor’s degree from Louisiana State University, and since then, I’ve been dedicated to perfecting the art of ice cream making. From classic flavors to innovative creations, my goal is to inspire you to make delicious and creamy treats at home effortlessly. Join me for the best recipes, tips, and techniques to elevate your ice cream game and indulge in delightful frozen desserts!