
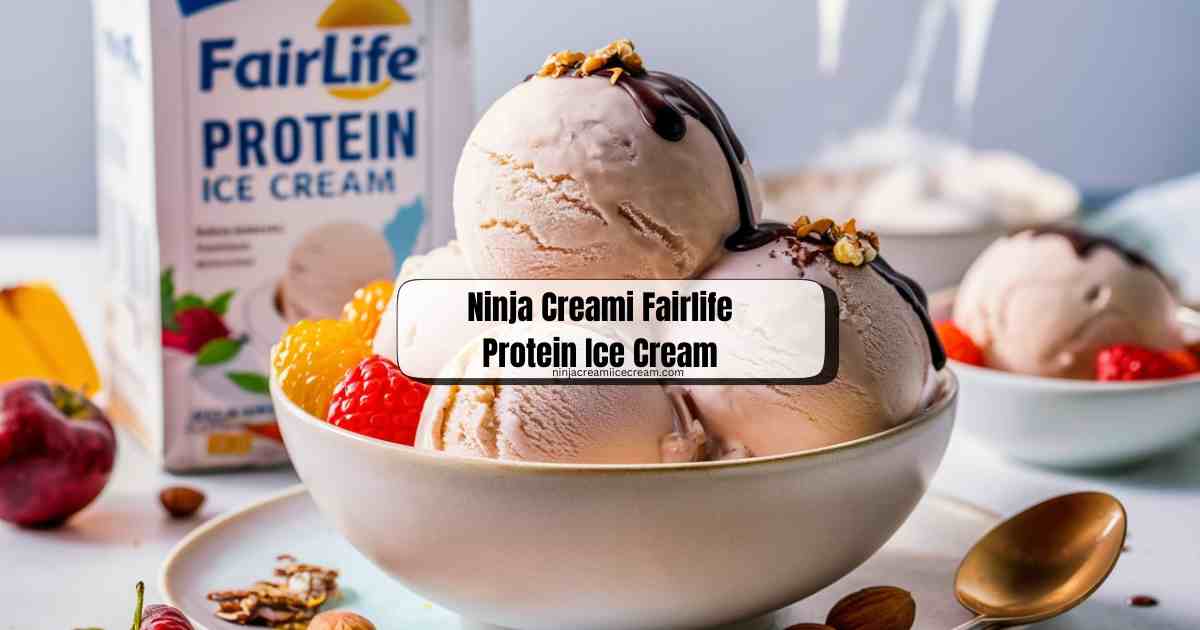
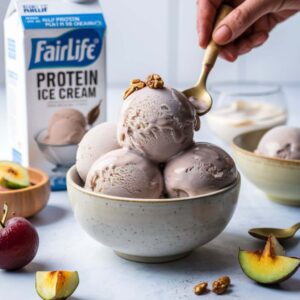
The Ninja Creami Fairlife Protein Ice Cream is a delicious and nutritious treat that combines the convenience of the Ninja Creami machine with the high-protein content of Fairlife milk. This recipe allows you to create a creamy, satisfying ice cream that fits perfectly into a healthy lifestyle. With just a few simple ingredients and steps, you can enjoy a homemade dessert that rivals store-bought varieties in both taste and nutritional value.
Disclosure: This post may contain affiliate links. As an Amazon Associate, I earn from qualifying purchases. Read more.
Fairlife protein ice cream leverages the benefits of Fairlife protein milk, known for its higher protein content and lower sugar levels compared to regular milk. Fairlife milk is ultra-filtered, providing a richer, creamier texture that’s ideal for making ice cream. By using Fairlife milk as the base, this ice cream not only tastes indulgent but also offers a significant protein boost, making it an excellent choice for those looking to increase their protein intake in a delicious way.
Making protein ice cream at home offers numerous advantages. Firstly, it allows complete control over the ingredients, ensuring that the ice cream is free from unnecessary additives and preservatives commonly found in store-bought versions. You can customize the sweetness, flavor, and texture to suit your personal preferences and dietary needs. Additionally, homemade protein ice cream can be a cost-effective alternative, saving money in the long run. It’s also an excellent way to incorporate additional protein into your diet, supporting muscle recovery and overall health. Lastly, the satisfaction of creating a delicious, healthy treat from scratch adds a rewarding and enjoyable aspect to your culinary experience.

Ninja Creami Fairlife Protein Ice Cream Recipe
Ingredients
- Fairlife Protein Milk: This ultra-filtered milk is the star ingredient, providing a rich, creamy base with higher protein content and lower sugar levels compared to regular milk. It’s available in various types such as fat-free, low-fat, or whole, allowing you to choose according to your dietary preferences.
- Sweetener (Optional): Sweeteners enhance the taste of your ice cream. You can use natural options like honey, agave syrup, or maple syrup. Artificial sweeteners like Stevia, erythritol, or monk fruit extract can be used for a low-calorie alternative. Adjust the amount to taste.
- Flavorings: To customize your ice cream, add flavorings such as:
- Vanilla Extract: Classic and versatile, it pairs well with almost any add-in.
- Cocoa Powder or Chocolate Syrup: For a rich chocolate flavor.
- Fruit Extracts: Such as strawberry, mango, or raspberry, to add a fruity twist.
- Coffee: A small amount of espresso or coffee extract for a coffee-flavored treat.
- Add-ins: Enhance your ice cream with various mix-ins for texture and extra flavor:
- Nuts: Chopped almonds, walnuts, pecans, or any of your favorite nuts.
- Chocolate Chips: Mini or regular-sized, dark, milk, or white chocolate chips.
- Fruit Pieces: Fresh or dried fruit like strawberries, blueberries, mango, or banana.
- Cookie Dough or Brownie Bites: For a decadent treat.
- Stabilizers or Thickeners (Optional): These can improve the texture and prevent ice crystals from forming:
- Guar Gum: A natural thickener that enhances creaminess.
- Xanthan Gum: Another thickening agent that provides a smooth texture.
- Gelatin: Can be used to give the ice cream a firmer consistency.
Specific Measurements:
- 2 cups Fairlife protein milk
- 1-2 tablespoons sweetener (optional, to taste)
- 1 teaspoon vanilla extract (or other flavoring of choice)
- 1/4 cup cocoa powder (for chocolate flavor, optional)
- 1/4 cup fruit puree or diced fruit (optional)
- 1/4 cup mix-ins (e.g., nuts, chocolate chips, fruit pieces, optional)
- 1 teaspoon guar gum or xanthan gum (optional, for improved texture)
By carefully selecting and combining these ingredients, you can create a protein-rich, delicious ice cream tailored to your taste and dietary needs.
Instructions
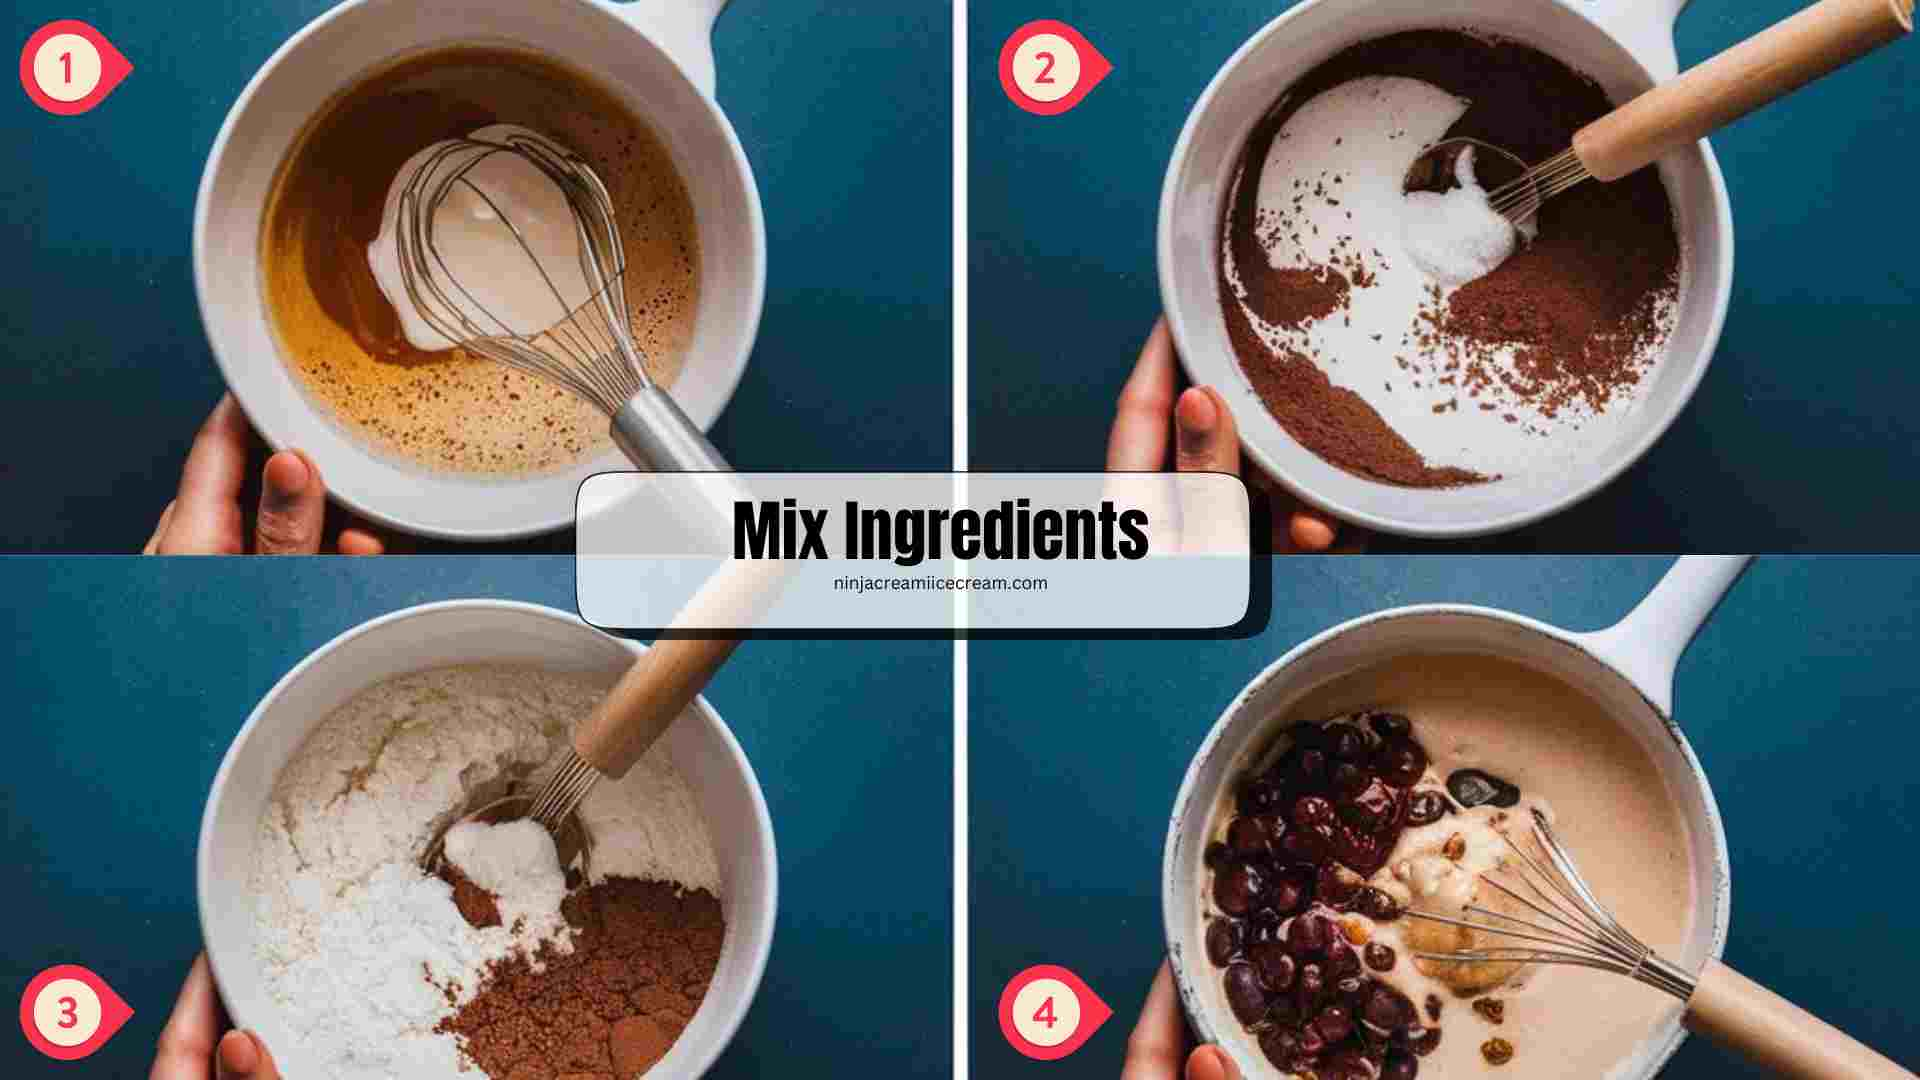
Step 1: Mix Ingredients
- Prepare Ingredients:
- Measure 2 cups of Fairlife protein milk and pour it into a mixing bowl.
- If you’re using a sweetener, add 1-2 tablespoons of your choice (e.g., honey, agave syrup, Stevia). Adjust the amount based on your sweetness preference.
- Add 1 teaspoon of vanilla extract or another chosen flavoring like cocoa powder (1/4 cup for chocolate flavor) or fruit puree (1/4 cup for a fruity twist).
- Optional Add-ins:
- If you’re incorporating stabilizers or thickeners for a creamier texture, add 1 teaspoon of guar gum or xanthan gum to the mixture.
- Whisk or blend the ingredients thoroughly to ensure they are well combined and smooth.
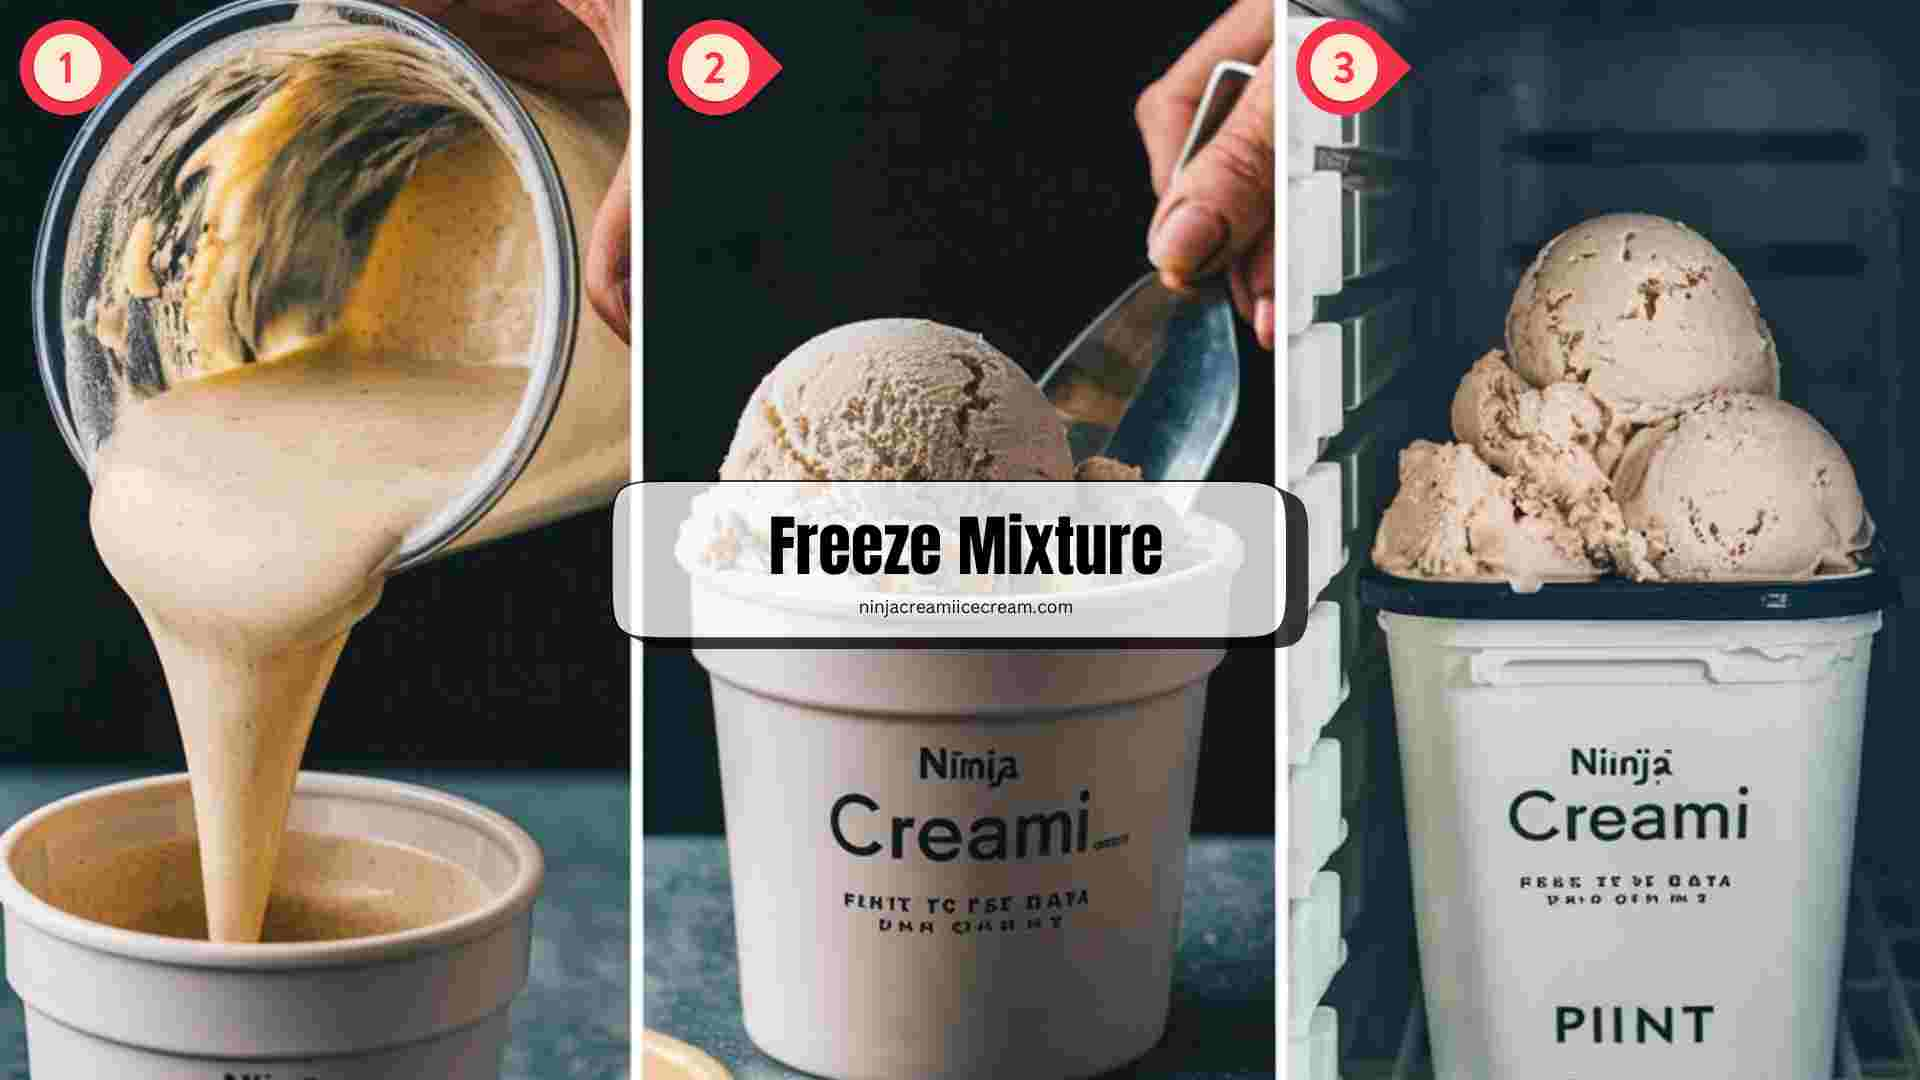
Step 2: Freeze Mixture
- Transfer Mixture:
- Pour the well-mixed ice cream base into the Ninja Creami pint container.
- Ensure the mixture is evenly spread and level in the container to promote even freezing.
- Freeze:
- Seal the pint container with its lid.
- Place the container in the freezer and let it freeze for at least 24 hours until the mixture is completely solid. Plan ahead to allow sufficient freezing time.
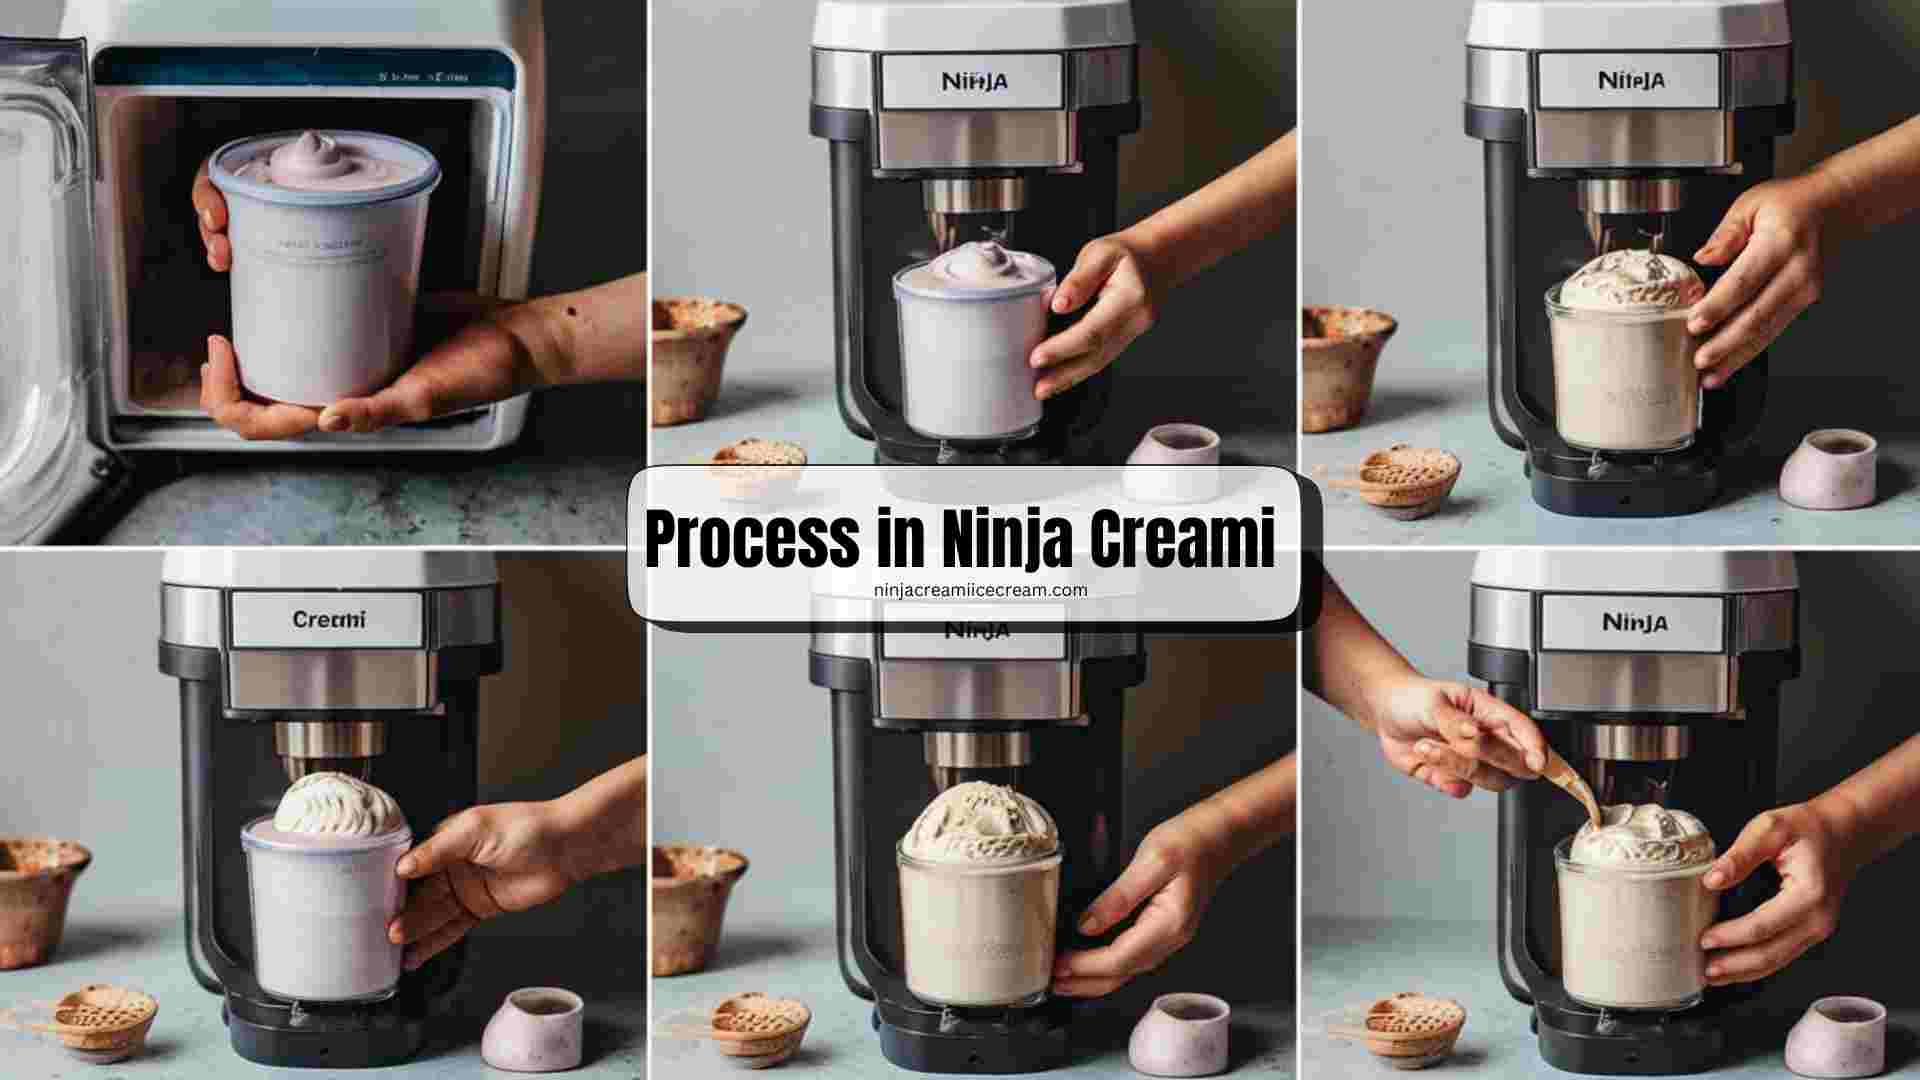
Step 3: Process in Ninja Creami
- Prepare the Machine:
- Remove the pint container from the freezer after 24 hours.
- Follow the Ninja Creami machine’s instructions to install the pint container securely in the machine.
- Process the Mixture:
- Select the “Ice Cream” setting on the Ninja Creami machine.
- Start the machine and allow it to process the frozen mixture. This usually takes about 5 minutes.
- If the texture is too icy or not creamy enough, you can reprocess the ice cream. Repeat the processing cycle until the desired consistency is achieved.
Step 4: Customize and Serve
- Add Mix-ins:
- Once the ice cream has reached the desired texture, you can fold in additional ingredients like nuts, chocolate chips, or fruit pieces. Use a spoon or spatula to gently mix them in.
- Serve:
- Serve the ice cream immediately for the best texture and flavor.
- If you have leftovers, store them in an airtight container in the freezer. Before serving stored ice cream, let it sit at room temperature for a few minutes to soften slightly.

These instructions guide you through creating creamy and nutritious Ninja Creami Fairlife Protein Ice Cream at home. By starting with quality Fairlife protein milk and adding optional sweeteners and flavorings, you tailor the ice cream to your taste. After freezing the mixture for at least 24 hours, the Ninja Creami transforms it into smooth ice cream in just a few minutes. Customizable with add-ins like nuts or fruit, this recipe offers a wholesome dessert option that’s both satisfying and easy to prepare using your Ninja Creami machine.
This recipe allows you to create velvety-smooth ice cream at home, emphasizing higher protein content and lower sugar levels compared to traditional ice cream options. By starting with Fairlife milk, known for its ultra-filtered richness, and adding customizable flavors and textures, you can enjoy a guilt-free dessert that meets your dietary preferences and fitness goals.
With the Ninja Creami, preparing this protein-packed treat is both effortless and rewarding. Simply mix your chosen ingredients, freeze the mixture overnight, and let the Ninja Creami do the rest. In just minutes, it churns the frozen base into a creamy delight, perfect for topping with nuts, chocolate chips, or fresh fruit pieces. Whether you’re looking to boost your protein intake or indulge in a healthier dessert alternative, Ninja Creami Fairlife Protein Ice Cream offers a delicious solution that’s sure to satisfy cravings without compromising on taste or nutrition.
Ninja Creami Fairlife Protein Ice Cream Nutrition Info
Here’s a nutrition table for Ninja Creami Fairlife Protein Ice Cream, based on the basic ingredients and approximate measurements provided:
| Nutrient |
Amount per Serving (1 cup)
|
| Calories |
Approximately 150-250 calories
|
| Protein |
Approximately 10-15 grams
|
| Fat |
Varies based on milk choice
|
| Carbohydrates |
Varies based on sweetener
|
| Sugar |
Varies based on sweetener
|
| Fiber | Minimal |
| Sodium | Varies |
| Calcium |
Varies based on milk type
|
Note: The exact nutritional content will depend on specific ingredients used (e.g., type of Fairlife milk, amount of sweetener, and any add-ins). Adjustments should be made based on actual measurements and additional ingredients incorporated into the recipe.
Here’s a combined nutrition table for each main ingredient typically used in Ninja Creami Fairlife Protein Ice Cream, based on standard serving sizes and nutritional values:
| Ingredient | Serving Size | Calories | Protein (g) | Fat (g) | Carbohydrates (g) | Sugar (g) | Fiber (g) | Calcium (mg) | Sodium (mg) |
|---|---|---|---|---|---|---|---|---|---|
| Fairlife Protein Milk | 1 cup (240ml) | 80 | 13 | 0.5 | 6 | 6 | 0 | 400 | 125 |
| Honey | 1 tablespoon (21g) | 60 | 0 | 0 | 17 | 17 | 0 | - | - |
| Cocoa Powder | 1 tablespoon (5g) | 10 | 1 | 0.5 | 3 | - | 2 | - | - |
| Vanilla Extract | 1 teaspoon (4.2g) | 12 | - | - | 1 | - | - | - | - |
| Nuts (Almonds) | 1/4 cup (30g) | 170 | 6 | 15 | 6 | 1 | 4 | - | - |
| Chocolate Chips | 1/4 cup (45g) | 210 | 2 | 11 | 30 | 27 | - | - | - |
| Fruit Puree (Strawberries) | 1/4 cup (60g) | 15 | 0.5 | 0 | 3.5 | 2 | 1 | - | - |
| Guar Gum | 1 teaspoon (2g) | 5 | - | - | 1 | - | 1 | - | - |
| Xanthan Gum | 1 teaspoon (2g) | 5 | - | - | 1.5 | - | 1.5 | - | - |
Values are approximate and can vary based on specific brands and variations in ingredients. Some nutrients like calcium and sodium may not be listed for certain ingredients depending on their composition. Adjustments should be made based on the actual products and quantities used in your recipe.
Tips for Best Results
To achieve the best results when making Ninja Creami Fairlife Protein Ice Cream, consider these tips:
- Use Quality Ingredients: Start with fresh, high-quality Fairlife protein milk and choose fresh or premium ingredients for flavorings and add-ins. This ensures better taste and nutritional value.
- Pre-Chill Ingredients: For optimal texture, chill your mixture before pouring it into the Ninja Creami machine. This helps the ice cream churn faster and results in a creamier consistency.
- Freeze Overnight: Allow the ice cream base to freeze for at least 24 hours before processing it in the Ninja Creami. This ensures the mixture is fully solidified, leading to smoother ice cream.
- Follow Machine Instructions: Adhere to the manufacturer’s instructions for your Ninja Creami machine. This includes assembly, processing times, and any specific settings recommended for ice cream.
- Add Mix-Ins Thoughtfully: If adding nuts, chocolate chips, or fruit pieces, fold them in gently after the initial churning process to evenly distribute them without overmixing.
- Adjust Sweetness: Taste the mixture before freezing to adjust sweetness levels with your chosen sweetener. Remember, freezing dulls sweetness, so a slightly sweeter mixture initially can balance the final product.
- Serve Immediately or Store Properly: For the best texture, serve the ice cream immediately after processing. If storing, transfer it to an airtight container and allow it to soften slightly at room temperature before serving.
By following these tips, you’ll enhance the flavor, texture, and overall satisfaction of your homemade Ninja Creami Fairlife Protein Ice Cream, making it a delightful and healthier dessert option.
Ninja Creami Fairlife Protein Ice Cream Recipe
Equipment
- Ninja Creami Machine Essential for churning and freezing the ice cream.
- Measuring Cups and Spoons: For accurate measurement of ingredients.
- Mixing Bowls: To mix and prepare the ice cream base.
- Whisk or Blender To thoroughly mix the ingredients, especially if adding flavorings or sweeteners.
- Ninja Creami pint container To freeze and store the ice cream mixture.
- Freezer Required for freezing the ice cream mixture for at least 24 hours before processing.
- Stabilizers or Thickeners: If desired, for enhancing texture.(Optional)
Ingredients
- 2 Cup Fairlife Protein Milk
- 1-2 Tablespoons Sweetener (optional, to taste; can use honey, agave syrup, or a sugar substitute)
- 1 Teaspoon Vanilla extract (or other flavoring of choice)
Optional Add-ins:
- 1/4 Cup Cocoa powder (for chocolate flavor)
- 1/4 Cup Fruit puree or diced fruit (e.g., strawberries, mango, etc.)
- 1/4 Cup Mix-ins (e.g., nuts, chocolate chips, fruit pieces)
Optional Stabilizers or Thickeners:
- 1 Teaspoon Guar Gum or Xanthan Gum (optional, for a creamier texture)
Instructions
- Mix Ingredients: In a bowl, combine 2 cups Fairlife protein milk, 1-2 tablespoons sweetener (optional), and 1 teaspoon vanilla extract. Add any optional flavorings like 1/4 cup cocoa powder or fruit puree. Mix well.
- Freeze Mixture: Pour the mixture into the Ninja Creami pint container and freeze for at least 24 hours until solid.
- Process in Ninja Creami: Remove the container from the freezer and process in the Ninja Creami machine on the "Ice Cream" setting. Reprocess if needed for the desired texture.
- Serve and Enjoy: Optionally mix in nuts, chocolate chips, or fruit pieces. Serve immediately or store in the freezer.
Notes
- Ingredient Quality: Use high-quality Fairlife protein milk and fresh ingredients for the best taste and texture. Ensure the sweetener and flavorings are well-mixed to avoid clumps.
- Freezing Time: The mixture needs to be frozen for at least 24 hours to ensure it is solid enough for processing. Plan ahead to allow sufficient freezing time.
- Reprocessing: If the ice cream is too icy or not creamy enough after the first processing, reprocess it using the Ninja Creami machine until the desired consistency is achieved.
- Customization: Feel free to experiment with different flavors and mix-ins. Add nuts, chocolate chips, or fruit pieces after processing for a personalized touch.
- Texture Adjustments: If the ice cream is too soft, you can add a small amount of guar gum or xanthan gum to the mixture before freezing to improve the texture.
- Serving and Storage: For the best texture, serve the ice cream immediately after processing. If storing, keep it in an airtight container in the freezer and let it soften for a few minutes at room temperature before serving.
- Nutritional Information: Be mindful of the calories and nutritional content, especially if adding sweeteners and mix-ins. Adjust the recipe to fit your dietary needs and preferences.
- Safety: Follow the Ninja Creami machine's instructions and safety guidelines to prevent accidents and ensure proper operation.
Delicious Topping Ideas
Here are some delicious topping ideas to enhance your Ninja Creami Fairlife Protein Ice Cream:
- Fresh Fruit: Add slices of strawberries, raspberries, blueberries, or bananas for a burst of freshness and natural sweetness.
- Nutty Crunch: Sprinkle chopped almonds, walnuts, pecans, or pistachios for added texture and a nutty flavor.
- Chocolate Lover’s Dream: Drizzle with chocolate syrup, hot fudge sauce, or sprinkle dark chocolate shavings for a rich, indulgent treat.
- Cookie Crumbles: Crushed cookies like Oreos, graham crackers, or chocolate chip cookies add crunch and flavor.
- Caramel Sauce: Drizzle with caramel sauce or dulce de leche for a sweet, buttery finish.
- Healthy Options: Top with granola, chia seeds, or shredded coconut for a nutritious twist.
- Whipped Cream: Dollop with whipped cream or coconut whipped cream for an airy, creamy addition.
- Sprinkles and Confetti: Colorful sprinkles, edible glitter, or rainbow sprinkles add a festive touch.
- Minty Fresh: Garnish with fresh mint leaves or a sprinkle of crushed peppermint candy for a refreshing finish.
- Nut Butter: Swirl in a spoonful of almond butter, peanut butter, or Nutella for a creamy, nutty flavor.
These toppings can complement the creamy texture and customizable flavors of your Ninja Creami Fairlife Protein Ice Cream, turning it into a delightful dessert experience for any occasion.
FAQ
What is Fairlife protein milk?
Fairlife protein milk is a premium dairy product renowned for its unique filtration process that enhances its nutritional profile. Produced by Fairlife, LLC, this milk undergoes ultra-filtration, which separates the milk into its fundamental components—water, lactose, protein, minerals, and fats—allowing for precise control over its composition. As a result, Fairlife protein milk contains significantly more protein and calcium and less sugar than traditional milk. It’s also lactose-free, making it easier to digest for those with lactose intolerance.
Beyond its nutritional benefits, Fairlife protein milk is celebrated for its creamy texture and rich flavor, making it a versatile ingredient in various culinary applications. It’s commonly used in beverages, baking, and as a base for nutritious dairy products like yogurt and ice cream. Whether enjoyed on its own or incorporated into recipes, Fairlife protein milk offers a wholesome alternative that appeals to health-conscious consumers seeking higher protein intake and reduced sugar content without compromising on taste or quality.
How do I use Ninja Creami to make ice cream?
Using the Ninja Creami to make ice cream is a straightforward process that begins with preparing your ice cream mixture. Start by combining your chosen ingredients such as Fairlife protein milk, sweeteners, flavorings like vanilla extract or cocoa powder, and any desired add-ins such as nuts or chocolate chips. Ensure the mixture is well-blended and smooth before pouring it into the freezer-safe container provided with your Ninja Creami.
Next, freeze the mixture overnight or for at least 24 hours until it is solid. Once frozen, insert the container into the Ninja Creami machine, ensuring it is securely in place. Follow the machine’s instructions for assembly and operation, which typically involve selecting the desired setting for ice cream and starting the churning process. The Ninja Creami will churn and freeze the mixture simultaneously, transforming it into a creamy ice cream within minutes. Once churned to the desired consistency, scoop out the ice cream and serve immediately for optimal freshness and texture.
Is Ninja Creami Fairlife Protein Ice Cream healthier than store-bought options?
Ninja Creami Fairlife Protein Ice Cream can often be a healthier alternative to many store-bought ice cream options due to several key factors. Firstly, when preparing ice cream at home with Ninja Creami, you have control over the ingredients used. This allows you to select high-quality Fairlife protein milk, reduce or eliminate added sugars, and avoid artificial additives and preservatives commonly found in commercial ice creams. By opting for natural sweeteners or reducing sugar content altogether, you can create a dessert that aligns more closely with your nutritional goals.
Secondly, Fairlife protein milk, a main ingredient in this recipe, contains more protein and less sugar than traditional dairy milk. This higher protein content not only contributes to a more satiating treat but also supports muscle health and recovery. Additionally, homemade ice cream allows for customization to accommodate dietary preferences such as low-carb, keto, or dairy-free diets. While moderation is key in enjoying any dessert, Ninja Creami Fairlife Protein Ice Cream offers a nutritious alternative to store-bought varieties that may be laden with excessive sugars and additives.
Can I make dairy-free versions with Ninja Creami?
Yes, you can absolutely make dairy-free versions of ice cream using the Ninja Creami. The versatility of the Ninja Creami machine allows you to substitute dairy milk with alternative milk options such as almond milk, coconut milk, soy milk, or oat milk. These dairy-free alternatives can be used as the base for your ice cream mixture, providing a creamy texture similar to traditional dairy ice cream.
To achieve the best results with dairy-free options in the Ninja Creami, it’s essential to ensure the alternative milk is well-chilled before blending and freezing. This helps in achieving a smooth consistency during the churning process. Additionally, you can still customize dairy-free ice creams with flavorings like vanilla extract, cocoa powder, or fruit purees, and add-ins such as nuts or dairy-free chocolate chips to suit your taste preferences. By using alternative milk and carefully selecting ingredients, you can create delicious dairy-free ice creams at home with the Ninja Creami, catering to dietary preferences and restrictions while enjoying a creamy frozen treat.

Hi, I’m Katelyn Williams, the expert behind Ninjacreamiicecream.com. With a deep passion for creating delectable ice cream recipes, I’m here to share my love for all things ice cream. I earned my Bachelor’s degree from Louisiana State University, and since then, I’ve been dedicated to perfecting the art of ice cream making. From classic flavors to innovative creations, my goal is to inspire you to make delicious and creamy treats at home effortlessly. Join me for the best recipes, tips, and techniques to elevate your ice cream game and indulge in delightful frozen desserts!