
Indulging in homemade desserts has never been easier than with the Ninja Creami Chocolate Ice Cream recipe. Utilizing the innovative Ninja Creami machine, this recipe promises to deliver a velvety-smooth chocolate ice cream that rivals any store-bought counterpart. The Ninja Creami stands out for its ability to transform simple ingredients into creamy delights with minimal effort, making it an ideal appliance for both novice and seasoned home chefs alike.
Disclosure: This post may contain affiliate links. As an Amazon Associate, I earn from qualifying purchases. Read more.
The Ninja Creami’s versatility lies in its ability to handle a wide range of frozen treats, from rich ice creams to refreshing sorbets and creamy frozen yogurts. With intuitive controls and preset settings like “Ice Cream” and “Mix-In,” preparing decadent desserts becomes a straightforward process. This simplicity allows users to experiment with various flavors and add-ins, ensuring every batch of chocolate ice cream can be customized to personal taste preferences.
Beyond its functionality, the Ninja Creami simplifies the traditional ice cream-making process by eliminating the need for constant monitoring and manual churning. By automating these steps, it frees up time for users to focus on other aspects of meal preparation or simply enjoy the anticipation of a freshly churned batch of chocolate ice cream. Whether preparing for a special occasion or simply craving a sweet treat, the Ninja Creami Chocolate Ice Cream recipe promises to satisfy with its rich flavor and effortless preparation.

Ninja Creami Chocolate Ice Cream Recipe
Ingredients
- Heavy Cream:
- Amount: 2 cups (480 ml)
- Purpose: Provides richness and creamy texture to the ice cream.
- Whole Milk:
- Amount: 1 cup (240 ml)
- Purpose: Adds additional creaminess and helps balance the richness of the heavy cream.
- Unsweetened Cocoa Powder:
- Amount: 1/2 cup (50 g)
- Purpose: Provides the chocolate flavor and dark color to the ice cream base.
- Granulated Sugar or Sweetener of Choice:
- Amount: 3/4 cup (150 g), adjust to taste
- Purpose: Sweetens the ice cream base. Choose a sweetener that dissolves easily for smooth texture.
- Vanilla Extract:
- Amount: 1 teaspoon
- Purpose: Enhances the flavor profile with a hint of vanilla.
- Pinch of Salt:
- Purpose: Balances the sweetness and enhances the overall flavor.
- Optional Mix-Ins:
- Chocolate Chips, Nuts, or Other Desired Add-Ins
- Purpose: Adds texture and additional flavors to the ice cream. Customize according to personal preference.
Preparing Ninja Creami Chocolate Ice Cream requires these ingredients to ensure smooth preparation and delicious results. Adjust ingredients and add-ins according to personal preferences for a custom dessert experience.
Instructions
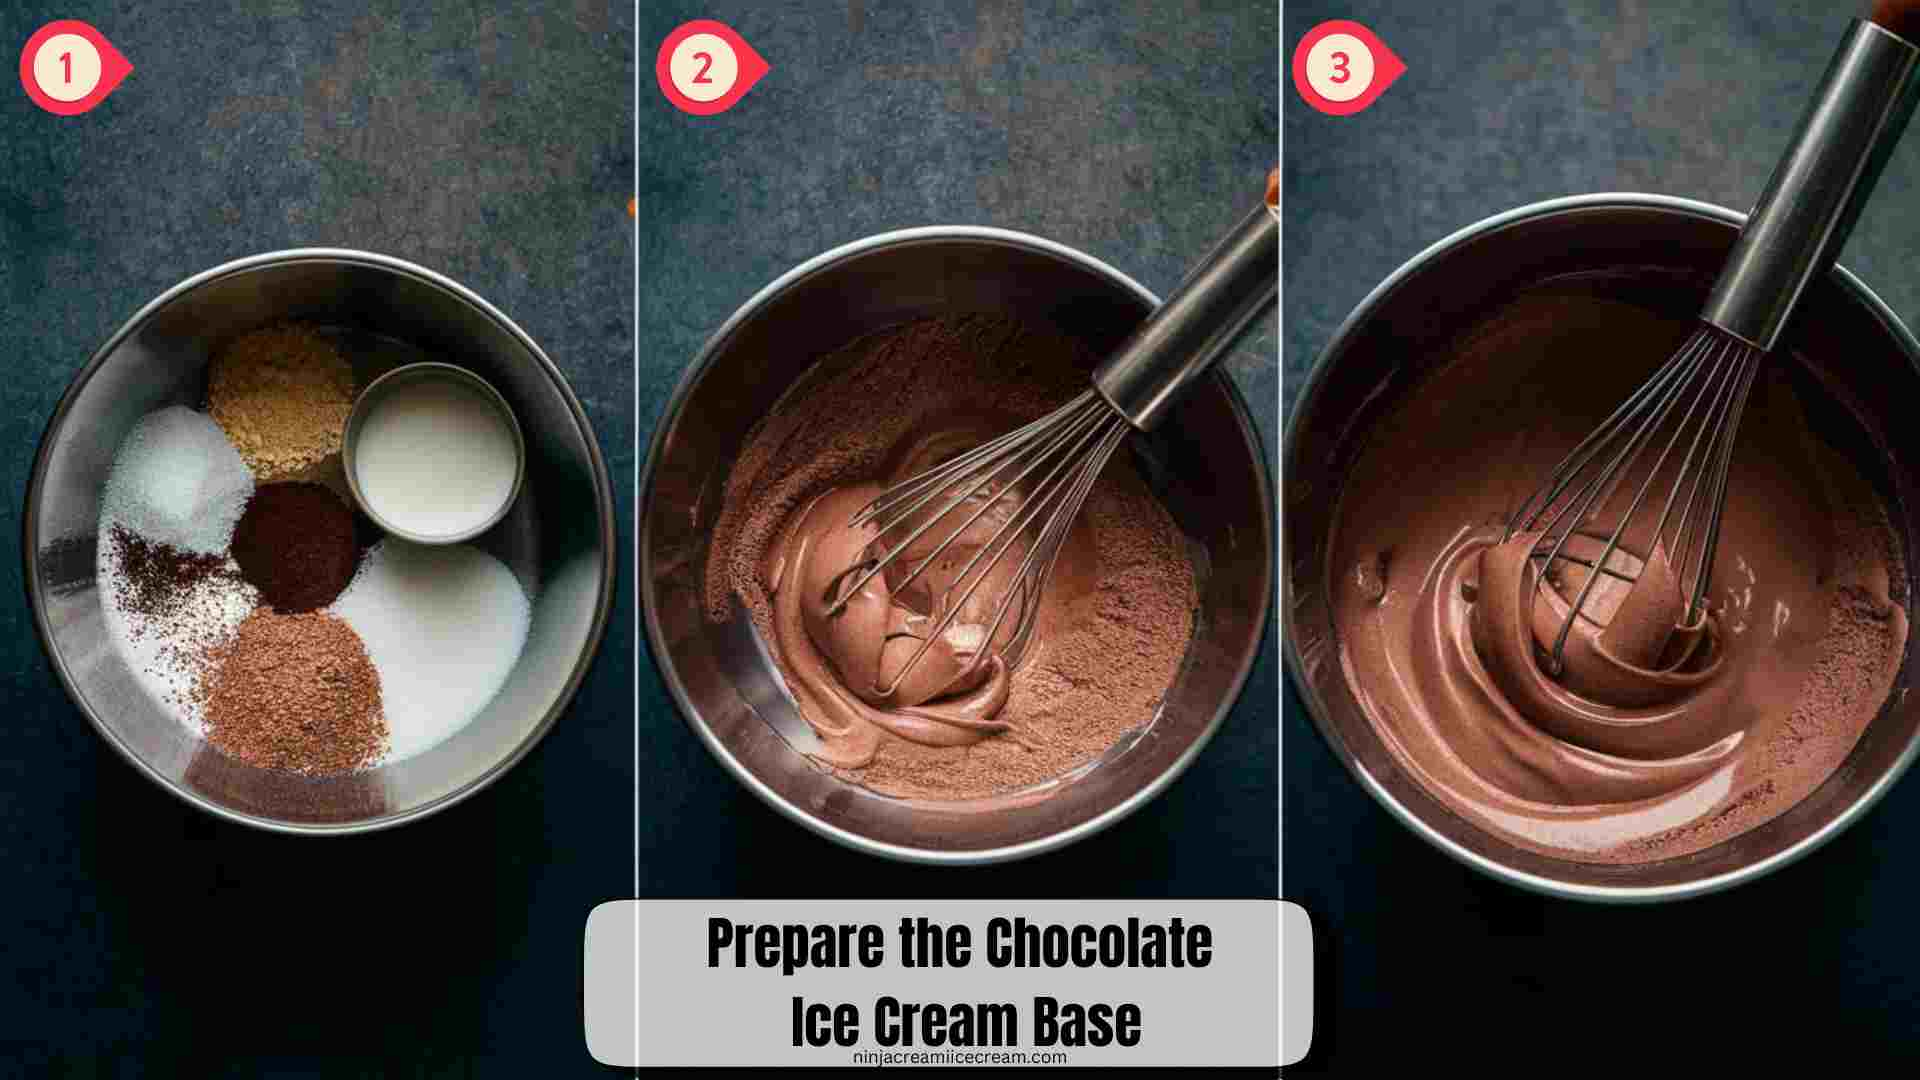
1. Prepare the Chocolate Ice Cream Base:
-
- In a mixing bowl, combine 2 cups of heavy cream, 1 cup of whole milk, 3/4 cup of granulated sugar (adjust to taste), 1/2 cup of unsweetened cocoa powder, 1 teaspoon of vanilla extract, and a pinch of salt.
- Whisk together until the sugar and cocoa powder are fully dissolved and the mixture is smooth and well combined.
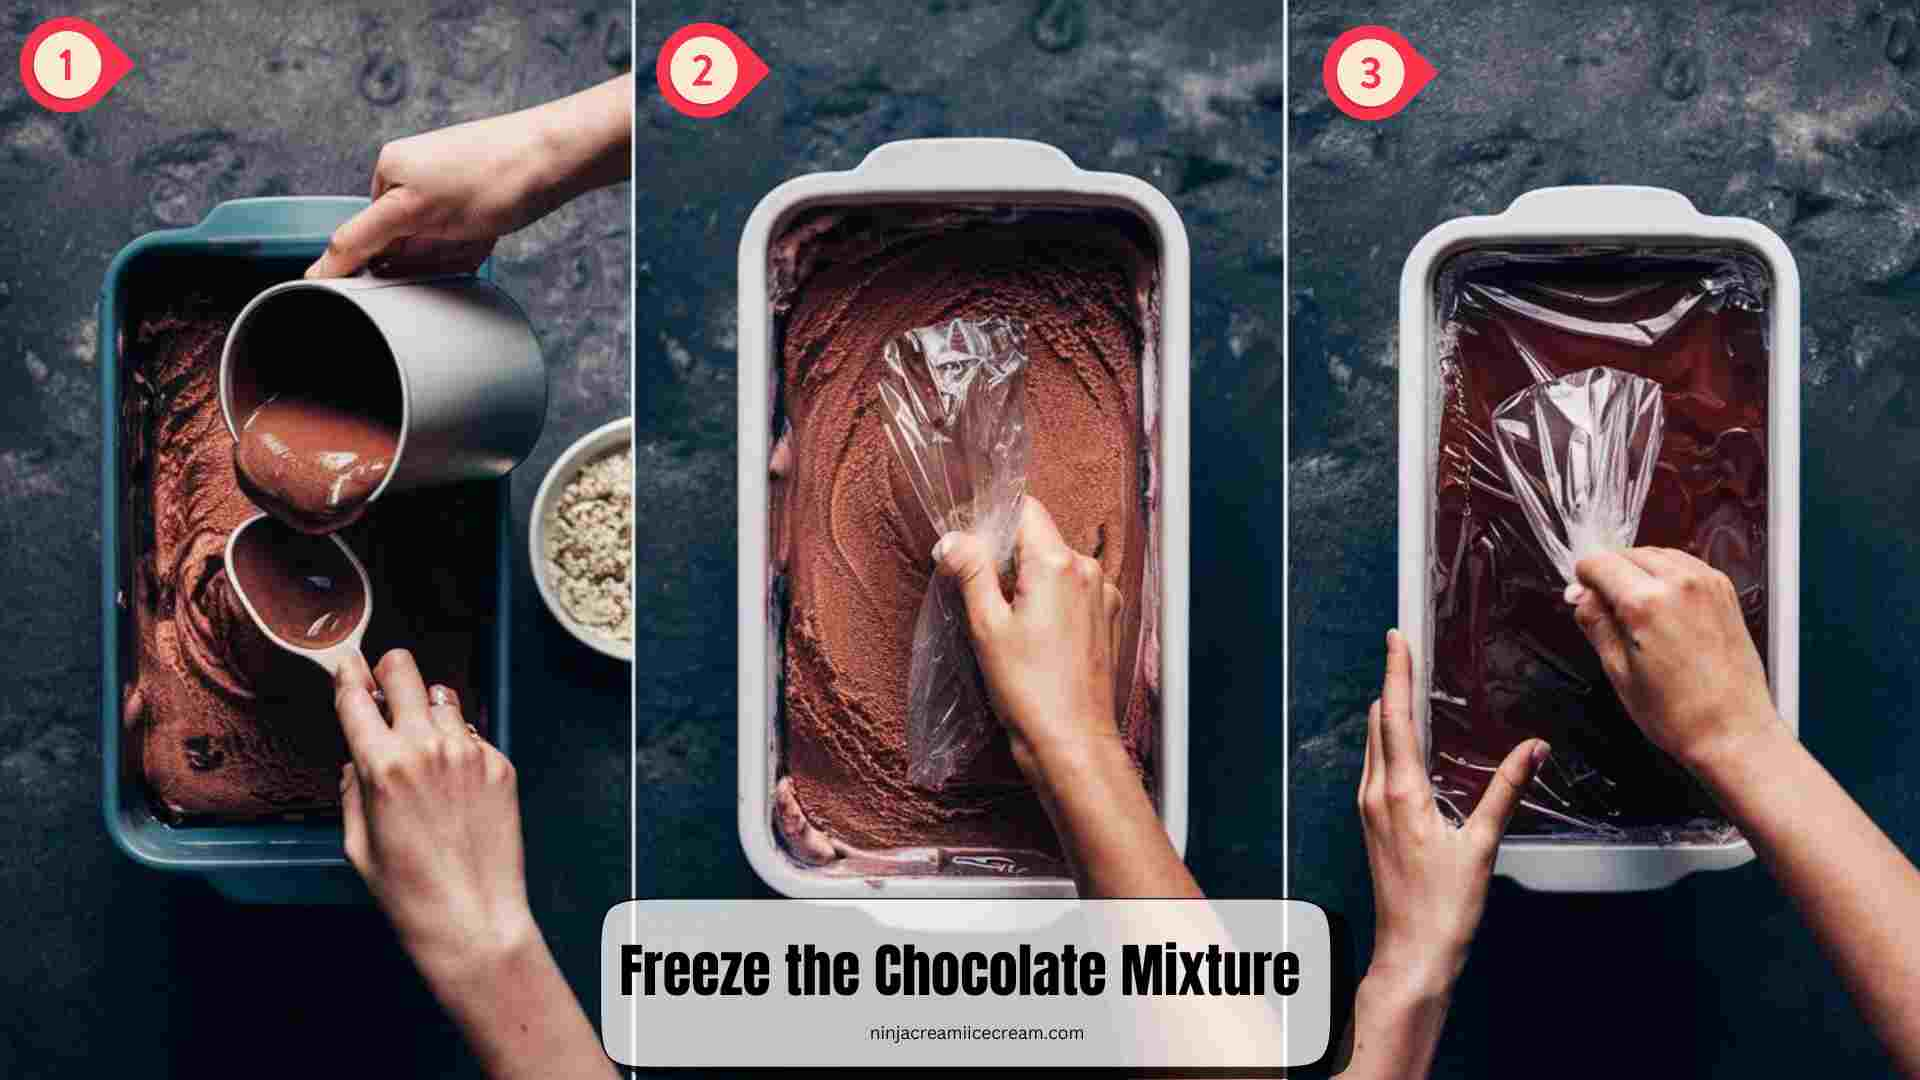
2. Freeze the Chocolate Mixture:
-
- Pour the prepared chocolate ice cream base into a freezer-safe container.
- Cover the container with a lid or plastic wrap to prevent ice crystals from forming.
- Place the container in the freezer and freeze for at least 24 hours, or until the mixture is solid and thoroughly chilled.
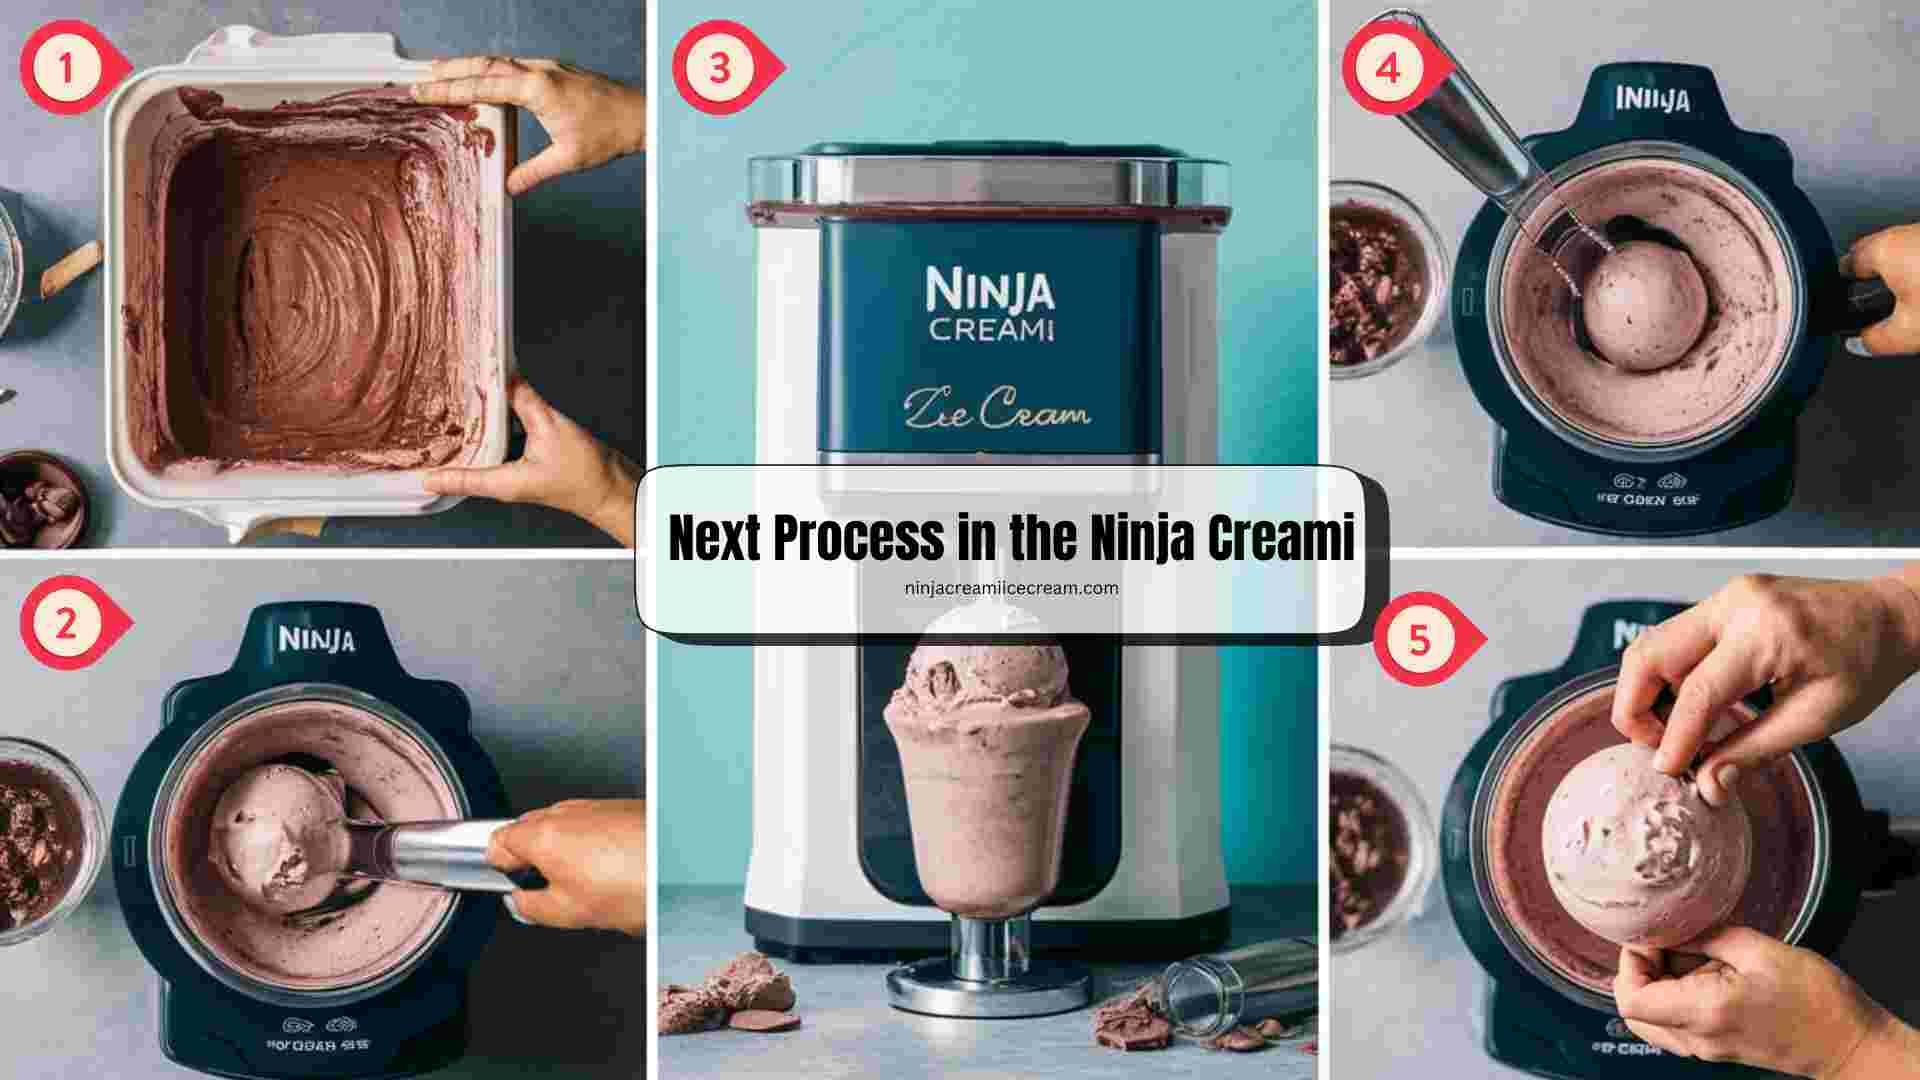
3. Next Process in the Ninja Creami:
-
- Remove the frozen chocolate ice cream mixture from the freezer.
- Attach the container to the Ninja Creami machine.
- Select the “Ice Cream” setting on the Ninja Creami and start the machine.
- Allow the Ninja Creami to churn and process the frozen mixture until it reaches a smooth and creamy consistency, typically about 5 minutes.
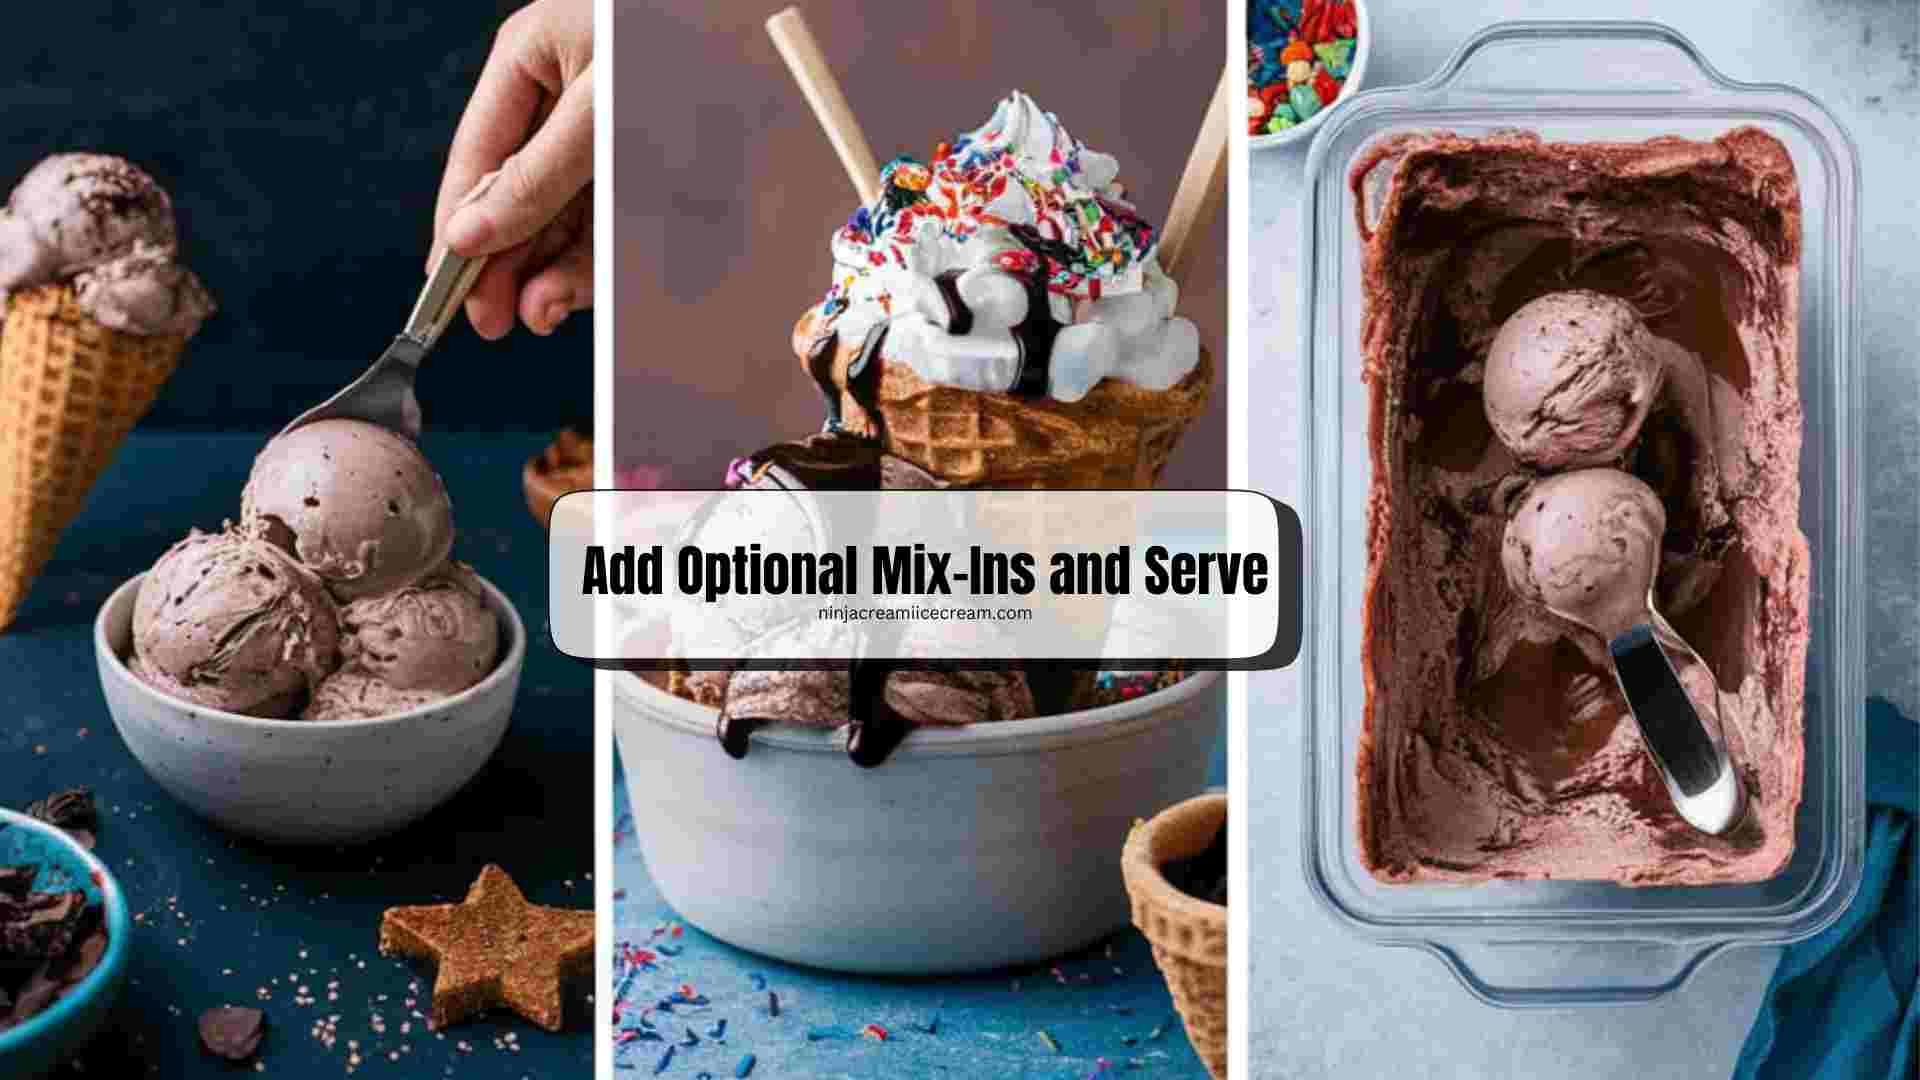
4. Add Optional Mix-Ins and Serve:
-
- If desired, add optional mix-ins like chocolate chips, nuts, or other favorites during the last few minutes of churning using the “Mix-In” setting.
- Once the ice cream reaches the desired consistency, scoop it into bowls or cones.
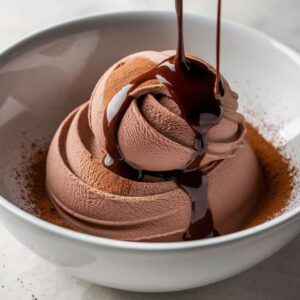
- Garnish with additional toppings if desired, such as whipped cream, chocolate sauce, or sprinkles.
- Enjoy your homemade Ninja Creami Chocolate Ice Cream immediately, or store any leftovers in an airtight container in the freezer for up to 2 weeks.
These instructions guide you through creating rich and creamy Ninja Creami Chocolate Ice Cream with ease. Beginning with mixing together heavy cream, milk, cocoa powder, sugar, vanilla, and salt ensures a smooth base. After freezing the mixture overnight, the Ninja Creami effortlessly churns it into velvety ice cream. Optional mix-ins like chocolate chips can be added for extra texture and flavor. Serve immediately for a delightful treat or store for later enjoyment. These steps promise delicious homemade ice cream that’s perfect for any occasion, showcasing the simplicity and versatility of the Ninja Creami machine.
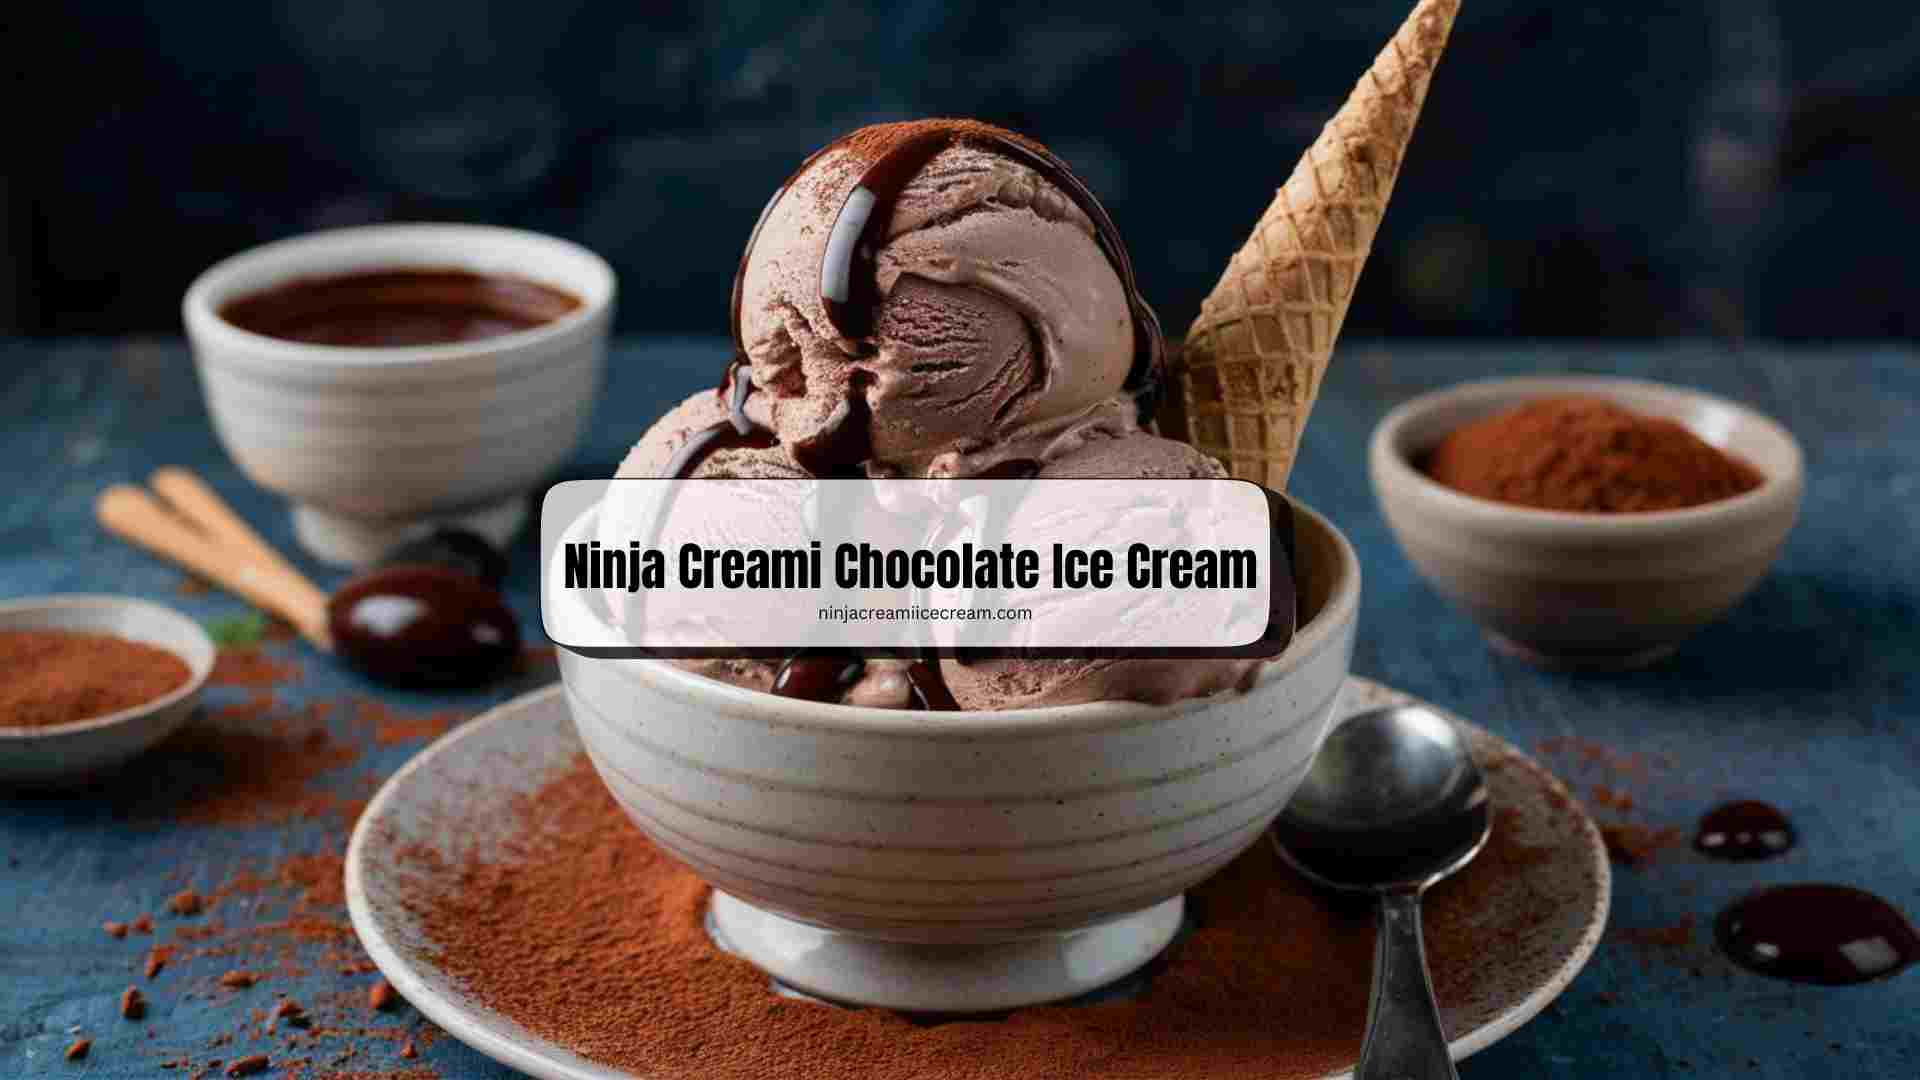
Ninja Creami Chocolate Ice Cream offers a luxurious homemade dessert experience, crafted effortlessly with the Ninja Creami machine. This recipe combines heavy cream, whole milk, cocoa powder, sugar, vanilla extract, and a pinch of salt to create a decadent base that promises smooth texture and rich chocolate flavor. After a thorough overnight freeze, the Ninja Creami transforms the chilled mixture into creamy perfection, making it ideal for indulgent treats at home.
Versatile and user-friendly, the Ninja Creami simplifies the traditional ice cream-making process with its intuitive settings and automated churning. Whether served plain or adorned with favorite toppings like chocolate chips or nuts, this chocolate ice cream is sure to satisfy cravings and impress guests with its homemade charm and delicious results. Enjoy the magic of homemade ice cream with the convenience of the Ninja Creami, turning everyday ingredients into a delightful dessert for all occasions.
Ninja Creami Chocolate Ice Cream Nutrition Info
Creating a nutrition table for Ninja Creami Chocolate Ice Cream involves estimating based on standard ingredients and typical serving sizes. Here’s an approximate nutrition breakdown per serving (assuming 6 servings):
| Nutrient |
Amount per Serving
|
| Calories |
Approximately 383 kcal
|
| Total Fat | 31 g |
| – Saturated Fat | 19 g |
| Cholesterol | 114 mg |
| Sodium | 59 mg |
| Total Carbohydrates | 27 g |
| – Dietary Fiber | 2 g |
| – Sugars | 21 g |
| Protein | 4 g |
Note: Nutritional values may vary based on specific brands of ingredients and optional mix-ins used. Adjustments should be made for dietary preferences and precise measurements.
Here is a consolidated nutrition table for each ingredient used in Ninja Creami Chocolate Ice Cream, based on standard serving sizes and nutritional information:
| Ingredient | Amount | Calories | Total Fat (g) | Saturated Fat (g) | Cholesterol (mg) | Sodium (mg) | Total Carbohydrates (g) | Sugars (g) | Protein (g) | Fiber (g) |
|---|---|---|---|---|---|---|---|---|---|---|
| Heavy Cream | 2 cups (480 ml) | 1,600 | 176 | 110 | 640 | 160 | 12 | 12 | 8 | 0 |
| Whole Milk | 1 cup (240 ml) | 150 | 8 | 5 | 24 | 98 | 12 | 12 | 8 | 0 |
| Unsweetened Cocoa Powder | 1/2 cup (50 g) | 180 | 10 | 6 | 0 | 20 | 26 | 0 | 12 | 16 |
| Granulated Sugar | 3/4 cup (150 g) | 600 | 0 | 0 | 0 | 0 | 150 | 150 | 0 | 0 |
| Vanilla Extract | 1 teaspoon | 12 | 0 | 0 | 0 | 0 | 0.6 | 0.6 | 0 | 0 |
| Salt | Pinch | 0 | 0 | 0 | 0 | 590 | 0 | 0 | 0 | 0 |
These values provide an approximate nutritional profile for each ingredient used in the Ninja Creami Chocolate Ice Cream recipe. Adjustments may be needed based on specific brands or measurements used in your preparation.
Tips for Best Results
- Ensure Proper Freezing: Freeze the ice cream mixture in a flat, freezer-safe container to ensure even freezing and easier processing in the Ninja Creami.
- Thorough Mixing: Whisk the cocoa powder and sugar into the dairy base thoroughly to avoid lumps and ensure a smooth texture.
- Chill Ingredients: For faster freezing and smoother consistency, ensure all ingredients are well chilled before mixing and freezing.
- Use Quality Ingredients: Opt for high-quality cocoa powder and fresh dairy products to enhance the flavor and texture of your chocolate ice cream.
- Add Mix-Ins Thoughtfully: If adding chocolate chips or nuts, incorporate them towards the end of churning to evenly distribute them without over-mixing.
- Follow Ninja Creami Instructions: Utilize the appropriate settings on the Ninja Creami machine, such as the “Ice Cream” setting for churning and the “Mix-In” setting for adding extras.
- Serve Fresh: Enjoy the ice cream freshly churned for the best texture and flavor. Store leftovers tightly covered in the freezer to maintain freshness.
- Experiment with Flavors: Customize your chocolate ice cream by experimenting with different cocoa intensities or adding extracts like mint or almond for unique variations.
- Plan Ahead: Allow ample time for freezing and churning, as the process typically takes several hours to overnight for optimal results.
- Enjoy Creatively: Serve your Ninja Creami Chocolate Ice Cream in bowls, cones, or as part of dessert creations like sundaes or milkshakes for delightful indulgence.
Following these tips ensures your Ninja Creami Chocolate Ice Cream turns out creamy, flavorful, and satisfying, making it a perfect homemade treat for any occasion.
Ninja Creami Chocolate Ice Cream Recipe
Equipment
- Ninja Creami Machine
- Mixing Bowls:
- Whisk or Hand Mixer
- Measuring Cups and Spoons:
- Freezer-Safe Container:
- Spoon or Spatula (for mixing and transferring the mixture)
- Ice Cream Scoop (for serving)
Ingredients
- 2 Cups Heavy cream
- 1 Cup Whole Milk
- ¾ Cup Granulated Sugar
- ½ Cup Unsweetened Cocoa Powder
- 1 Teaspoon Vanilla Extract
- Pinch of salt
Optional Mix-Ins:
- Chocolate chips, nuts, or other desired add-ins
Instructions
- Prepare the Base:In a mixing bowl, whisk together 2 cups of heavy cream, 1 cup of whole milk, 3/4 cup of granulated sugar, 1/2 cup of unsweetened cocoa powder, 1 teaspoon of vanilla extract, and a pinch of salt until smooth and well combined.
- Freeze the Mixture:Pour the chocolate mixture into a freezer-safe container. Cover it and freeze for at least 24 hours, or until it is completely solid.
- Process the Ice Cream:Remove the frozen mixture from the freezer and attach the container to your Ninja Creami. Select the "Ice Cream" setting and start the machine, processing the mixture until it is smooth and creamy.
- Add Mix-Ins and Serve:Optionally, add mix-ins like chocolate chips or nuts and use the “Mix-In” setting to incorporate them. Scoop the ice cream into bowls or cones, add toppings, and enjoy. Store any leftovers in an airtight container in the freezer for up to 2 weeks.
Notes
- Freezing Time: Ensure the chocolate mixture is frozen solid (at least 24 hours) before processing in the Ninja Creami for the best texture.
- Mixing Consistency: Whisk the ingredients thoroughly to dissolve sugar and cocoa powder completely for a smooth base.
- Ninja Creami Settings: Use the "Ice Cream" setting for processing the frozen mixture and the "Mix-In" setting if adding optional mix-ins.
- Storage: Store any leftover ice cream in an airtight container in the freezer. Consume within 2 weeks for best quality.
- Variations: Experiment with different cocoa powders or sweeteners to adjust the flavor. Consider adding mix-ins like chocolate chips or nuts for added texture and taste.
- Serving Suggestions: Serve the chocolate ice cream with favorite toppings like whipped cream, chocolate sauce, or sprinkles for a delightful treat.
- Calories: The calorie content may vary depending on ingredients and serving size. Adjust portions accordingly for dietary preferences.
- Enjoyment: Homemade ice cream is best enjoyed freshly made, but leftovers can still be delicious after proper storage and handling.
Delicious Topping Ideas
- Whipped Cream: Dollop a generous amount of freshly whipped cream on top of your chocolate ice cream for added creaminess and flavor.
- Chocolate Sauce: Drizzle rich chocolate sauce over the ice cream for an extra chocolatey experience.
- Chopped Nuts: Sprinkle chopped nuts like almonds, walnuts, or pecans for a crunchy texture contrast.
- Fresh Berries: Top with fresh berries such as strawberries, raspberries, or blueberries for a fruity and refreshing twist.
- Caramel Drizzle: Add a swirl of caramel sauce for a sweet and gooey complement to the chocolate base.
- Cookie Crumbles: Crushed chocolate cookies or biscotti provide a delightful crunch and flavor boost.
- Toasted Coconut Flakes: Sprinkle toasted coconut flakes for a tropical touch and added texture.
- Mini Marshmallows: Scatter mini marshmallows for a fun and fluffy topping reminiscent of s’mores.
- Sprinkles: Colorful sprinkles add a festive touch and whimsical flair to your ice cream creation.
- Chocolate Chips: For extra chocolate goodness, scatter a handful of chocolate chips or chunks over the ice cream.
- Mint Leaves: Garnish with fresh mint leaves for a refreshing and aromatic finish.
- Cocoa Powder Dusting: Lightly dust the top with cocoa powder for a classic and elegant presentation.
These topping ideas can be mixed and matched to create your own signature dessert masterpiece with Ninja Creami Chocolate Ice Cream, ensuring every bite is a delightful treat for your taste buds.
FAQ
How long does it take to churn the ice cream in the Ninja Creami?
The time it takes to churn ice cream in the Ninja Creami can vary based on factors like the specific model of the machine, the temperature of the ingredients, and the desired consistency of the ice cream. Generally, it takes approximately 5 to 10 minutes for the Ninja Creami to churn ice cream to a smooth and creamy texture. However, this can vary slightly depending on the recipe and the amount of ice cream being churned. It’s recommended to follow the manufacturer’s instructions for best results and to achieve the desired texture.
Can I use different types of milk or cream in this recipe?
Yes, you can definitely use different types of milk or cream in the Ninja Creami Chocolate Ice Cream recipe to suit your dietary preferences or needs. Here are a few options you can consider:
- Whole Milk: Provides a creamy texture and rich flavor, commonly used in traditional ice cream recipes.
- Low-Fat Milk: Offers a lighter option with less fat content while still contributing to a creamy texture.
- Half-and-Half: A combination of equal parts milk and cream, providing a richer texture than whole milk but lighter than heavy cream.
- Alternative Milks: Such as almond milk, coconut milk, or soy milk can be used for dairy-free or vegan versions of chocolate ice cream. Make sure to choose unsweetened varieties to control sweetness levels.
- Heavy Cream: For an indulgent and ultra-creamy texture, heavy cream adds richness and smoothness to the ice cream.
When substituting different types of milk or cream, keep in mind that the fat content and consistency may affect the final texture and flavor of the ice cream. Adjust the recipe accordingly to achieve the desired results, and enjoy experimenting with different options to find your favorite variation of Ninja Creami Chocolate Ice Cream!
Can I adjust the sweetness level of the ice cream?
Yes, you can adjust the sweetness level of Ninja Creami Chocolate Ice Cream to suit your taste preferences. Here are a few ways to do so:
- Decrease Sugar: If you prefer less sweetness, reduce the amount of granulated sugar or sweetener used in the recipe. Start by decreasing it gradually, tasting the mixture, and adjusting until it reaches your desired sweetness level.
- Use Alternative Sweeteners: Instead of granulated sugar, you can use alternative sweeteners like honey, maple syrup, agave nectar, or stevia. These options provide different levels of sweetness and flavors, so adjust quantities accordingly.
- Taste and Adjust: Before freezing the ice cream mixture, taste it to assess the sweetness. Keep in mind that flavors can intensify after freezing, so it’s better to slightly under-sweeten the mixture if you’re unsure.
- Add Sweet Mix-Ins: Consider adding sweeter mix-ins like chocolate chips, caramel swirls, or chunks of candy if you prefer a sweeter ice cream without increasing the base sweetness level too much.
- Balance with Flavors: Enhance the chocolate flavor to balance sweetness by using high-quality cocoa powder or adding a touch of vanilla extract or espresso powder, which can deepen the taste without adding more sugar.
By adjusting the sweetness level, you can personalize Ninja Creami Chocolate Ice Cream to perfectly match your taste preferences, ensuring a delightful homemade dessert experience.
Is this recipe suitable for lactose-intolerant individuals?
The suitability of Ninja Creami Chocolate Ice Cream for lactose-intolerant individuals depends on the specific ingredients used in the recipe. Here are some considerations:
- Dairy Substitutes: You can make this recipe lactose-free by substituting dairy milk and cream with lactose-free alternatives such as almond milk, soy milk, coconut milk, or lactose-free dairy milk. Ensure these substitutes are unsweetened and suitable for freezing.
- Lactase Enzyme: Some lactose-intolerant individuals can tolerate small amounts of lactose. Using lactase enzyme drops or tablets when using dairy milk or cream can help break down lactose and make the ice cream more digestible.
- Store-Bought Alternatives: There are commercially available lactose-free ice cream bases that can be used in place of dairy milk and cream in homemade recipes. These bases are specifically formulated to be lactose-free while maintaining a creamy texture.
- Check Ingredients: Always read ingredient labels carefully, especially for store-bought products and any mix-ins or toppings added to the ice cream, to ensure they are lactose-free.
- Personal Tolerance: Individual tolerance levels vary among lactose-intolerant individuals. It may be helpful to start with small servings and gradually increase to gauge personal tolerance.
By making these adjustments, Ninja Creami Chocolate Ice Cream can be made suitable for individuals with lactose intolerance, allowing everyone to enjoy a delicious homemade dessert.

Hi, I’m Katelyn Williams, the expert behind Ninjacreamiicecream.com. With a deep passion for creating delectable ice cream recipes, I’m here to share my love for all things ice cream. I earned my Bachelor’s degree from Louisiana State University, and since then, I’ve been dedicated to perfecting the art of ice cream making. From classic flavors to innovative creations, my goal is to inspire you to make delicious and creamy treats at home effortlessly. Join me for the best recipes, tips, and techniques to elevate your ice cream game and indulge in delightful frozen desserts!