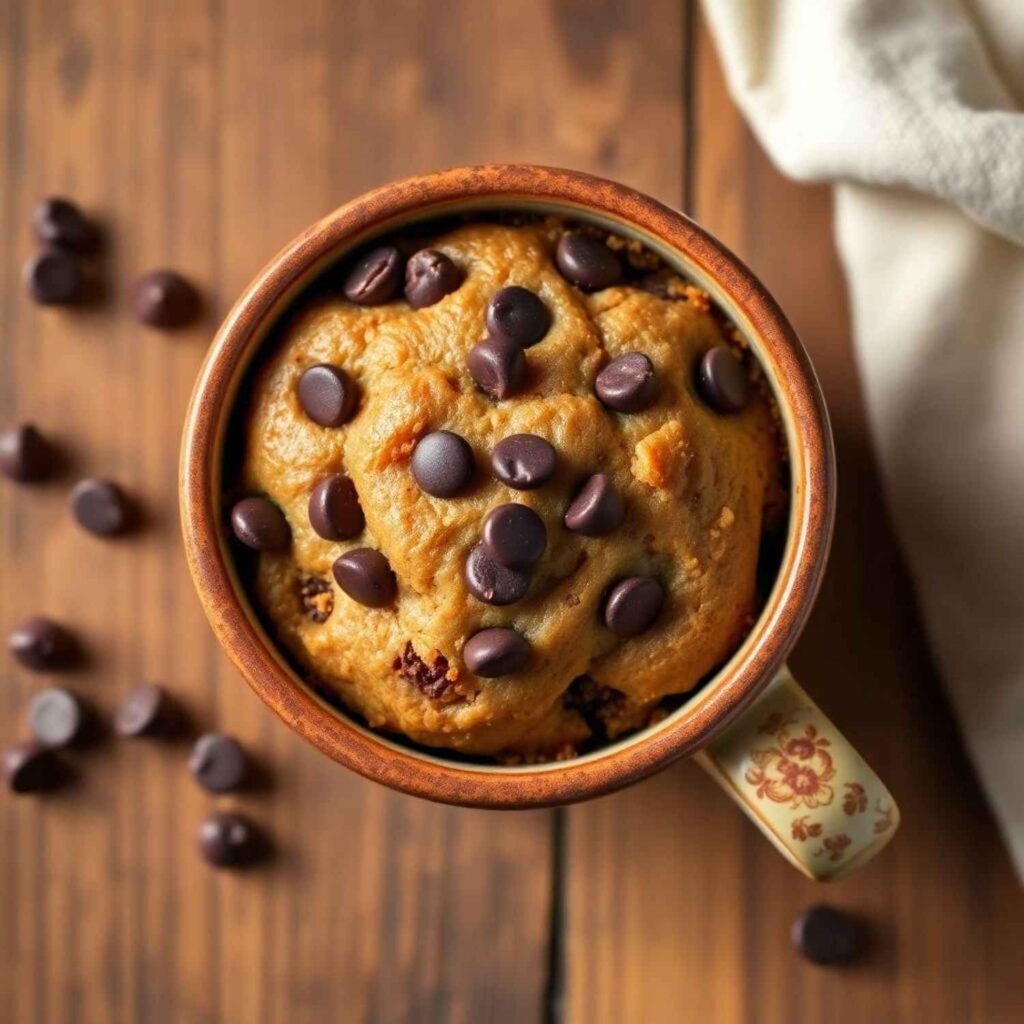
A Mug Cake is a delightful single-serving dessert that’s prepared and cooked right in a mug, offering the ultimate solution for quick and hassle-free indulgence. Perfect for those moments when a dessert craving strikes, this quick and convenient treat can be made in just minutes using simple pantry staples. The best part? Mug cakes are highly customizable, allowing you to tailor the flavors to your preferences—whether you’re in the mood for a rich chocolate delight, a tangy lemon burst, or a sweet vanilla classic.
Disclosure: This post may contain affiliate links. As an Amazon Associate, I earn from qualifying purchases. Read more.
Mug Cake Recipe
Ingredients for Mug Cake
- All-Purpose Flour (4 tablespoons)
- Forms the base of the cake, providing structure.
- For a gluten-free option, substitute with almond flour or gluten-free flour blend.
- Granulated Sugar (2 tablespoons)
- Adds sweetness to the cake.
- Can be replaced with brown sugar for a richer flavor or a sugar substitute for a lower-calorie option.
- Unsweetened Cocoa Powder (2 tablespoons) (Optional for chocolate mug cake)
- Gives a rich chocolate flavor.
- Can be omitted or replaced with flavored powders like matcha or instant coffee for variations.
- Baking Powder (1/4 teaspoon)
- Helps the cake rise and become fluffy.
- Ensure its fresh for the best results.
- Salt (A pinch)
- Enhances the overall flavor by balancing sweetness.
- Milk (3 tablespoons)
- Adds moisture to the batter.
- Use dairy or plant-based milk (e.g., almond, oat, or soy) depending on dietary needs.
- Vegetable Oil or Melted Butter (1 tablespoon)
- Provides fat for a soft and tender texture.
- Coconut oil or applesauce can be used as alternatives for a healthier twist.
- Vanilla Extract (1/4 teaspoon)
- Adds depth of flavor to the cake.
- Feel free to experiment with almond or peppermint extract for unique flavors.
- Chocolate Chips (1 tablespoon) (Optional)
- Melts into the cake for gooey chocolate pockets.
- Substitute with nuts, dried fruits, or sprinkles for variety.
- Water (1–2 teaspoons) (Optional for adjusting batter consistency)
- Helps thin the batter if it’s too thick.
Optional Toppings
- Whipped cream, powdered sugar, ice cream, or a drizzle of chocolate or caramel sauce to elevate the dessert.
Instructions for Making a Mug Cake
-
Prepare Your Mug
- Select a microwave-safe mug (at least 12 oz or larger) to prevent overflow.
- Lightly grease the inside of the mug with cooking spray or a small amount of butter to ensure the cake doesn’t stick.
-
Mix the Dry Ingredients
- Add 4 tablespoons of all-purpose flour, 2 tablespoons of granulated sugar, 2 tablespoons of unsweetened cocoa powder (if making a chocolate mug cake), 1/4 teaspoon of baking powder, and a pinch of salt to the mug.
- Use a spoon or small whisk to stir the dry ingredients until they are well combined and free of lumps.
-
Add the Wet Ingredients
- Pour in 3 tablespoons of milk, 1 tablespoon of vegetable oil or melted butter, and 1/4 teaspoon of vanilla extract.
- Mix the ingredients thoroughly until a smooth batter forms. Ensure there are no pockets of dry ingredients at the bottom of the mug.
-
Optional Add-Ins
- Fold in 1 tablespoon of chocolate chips, nuts, or other add-ins if desired. These will add texture and flavor to your mug cake.
-
Microwave the Mug Cake
- Place the mug in the center of the microwave and cook on high power for 60–90 seconds.
- Start with 60 seconds, then check the cake. If it’s still wet in the center, microwave for an additional 10–15 seconds at a time until it’s fully set. Avoid overcooking, as it can make the cake dry.
-
Check for Doneness
- Insert a toothpick or skewer into the center of the cake. If it comes out clean or with a few moist crumbs, the cake is done.
-
Cool and Serve
- Let the mug cake cool for 1–2 minutes before serving. This prevents burns and allows the flavors to settle.
- Top with whipped cream, powdered sugar, ice cream, or a drizzle of chocolate or caramel sauce for an extra indulgent touch.
-
Enjoy
- Grab a spoon and savor your freshly made mug cake straight from the mug. Perfect for satisfying those dessert cravings in no time!

Mug Cake Recipe
Equipment
- Microwave-safe Mug
- Spoon or Small Whisk
- Microwave
- Measuring Spoons
- Optional: Cooking Spray or Butter
Ingredients
- 4 tablespoons All-Purpose Flour
- 2 tablespoons Granulated Sugar
- 2 tablespoons Unsweetened Cocoa Powder (optional for chocolate flavor)
- 1/4 teaspoon Baking Powder
- Salt – A pinch
- 3 tablespoons Milk (can be dairy or plant-based)
- 1 tablespoon Vegetable Oil or Melted Butter
- ¼ tablespoon Vanilla Extract
- 1 tablespoon Chocolate Chips (optional for extra chocolatey goodness)
- 1-2 teaspoons Water (optional to adjust batter consistency)
Optional Toppings
- Whipped cream, powdered sugar, ice cream, or a drizzle of chocolate/caramel sauce.
Instructions
- Prepare the MugGrease a microwave-safe mug with cooking spray or a little butter. Make sure it’s at least 12 oz to prevent overflow.
- Mix Dry IngredientsAdd 4 tablespoons of all-purpose flour, 2 tablespoons of granulated sugar, 2 tablespoons of cocoa powder (if using), 1/4 teaspoon of baking powder, and a pinch of salt to the mug. Stir until well combined.
- Add Wet IngredientsPour in 3 tablespoons of milk, 1 tablespoon of vegetable oil or melted butter, and 1/4 teaspoon of vanilla extract. Mix until smooth.
- Add Optional IngredientsIf desired, fold in 1 tablespoon of chocolate chips or any other add-ins you like.
- Cook in the MicrowaveMicrowave the mug on high for 60–90 seconds. Start with 60 seconds, then check the cake. If it’s not done, microwave in 10-15 second intervals until fully cooked. Let cool for 1-2 minutes, then enjoy!
Notes
-
Microwave Variability
- Microwaves vary in power, so cooking times may differ. Start with 60 seconds and check the cake's doneness, adding additional time in 10-15 second increments as needed. Overcooking can result in a dry, rubbery cake.
-
Mug Size
- Use a microwave-safe mug that is at least 12 oz in size to avoid overflow during cooking. A smaller mug can cause the batter to spill over.
-
Ingredient Substitutions
- You can use plant-based milk (almond, soy, oat) if preferred. For a lower-calorie version, substitute oil with applesauce or use a sugar substitute.
- You can swap all-purpose flour with gluten-free flour for a gluten-free option, though texture may vary slightly.
-
Flavor Customization
- Feel free to experiment with different flavor combinations. Add-ins like nuts, fruit, or even a swirl of peanut butter or Nutella can elevate the flavor.
- For a chocolate mug cake, increase the cocoa powder or add more chocolate chips for extra richness.
-
Mixing
- Make sure the ingredients are well combined, especially around the bottom of the mug, to avoid dry flour pockets in your cake. Stir thoroughly but gently to prevent overworking the batter.
-
Toppings
- Enhance the mug cake with whipped cream, ice cream, or a drizzle of caramel or chocolate sauce for added indulgence. A scoop of vanilla ice cream pairs wonderfully with the warm cake.
-
Serving Size
- This recipe is designed for a single serving. If you need to make multiple cakes, prepare separate mugs for each person to ensure even cooking.
Tips for Making the Perfect Mug Cake
- Choose the Right Mug
- Use a microwave-safe mug that is at least 12 oz in size to prevent the batter from overflowing.
- Avoid using thin or delicate mugs as they can get too hot or crack during microwaving.
- Mix Thoroughly
- Ensure all the ingredients are well combined, especially at the bottom of the mug, to avoid pockets of dry flour or uneven texture.
- Avoid Overcooking
- Microwave in short intervals if needed, starting with 60 seconds and adding 10–15 seconds as necessary. Overcooking can make the mug cake dry or rubbery.
- Adjust for Microwave Wattage
- The cooking time can vary depending on your microwave’s wattage. If your microwave is high-powered, reduce the cooking time slightly.
- Experiment with Flavors
- Try adding spices like cinnamon, nutmeg, or cardamom for unique flavor twists.
- Incorporate flavored extracts like almond, peppermint, or coconut for variety.
- Add Moisture with Toppings
- If your mug cake turns out slightly dry, top it with whipped cream, ice cream, or a drizzle of sauce to add moisture and enhance flavor.
- Customize with Add-Ins
- Mix in chocolate chips, crushed cookies, sprinkles, nuts, or dried fruits to make the cake more exciting and personalized.
- Let It Cool Slightly
- Allow the mug cake to cool for a minute or two after microwaving. This prevents burns and helps the flavors settle.
- Clean-Up Tip
- Grease the mug lightly before adding the batter for easier cleanup after enjoying your treat.
- Make It Healthier
- Use whole wheat flour or oat flour for added nutrition.
- Replace sugar with honey, maple syrup, or a sugar substitute, and use applesauce instead of oil for a lower-calorie option.
- Double-Check Your Ingredients
- Use fresh baking powder for the best rise and texture.
- Ensure the milk or plant-based alternatives are not past their expiration date.
- Don’t Skip the Pinch of Salt
- Even in a sweet dessert, a pinch of salt enhances the overall flavor and balances the sweetness.
With these tips, your mug cake will turn out perfectly moist, fluffy, and delicious every time!
Conclusion
Mug cakes are a game-changer for anyone who craves a quick and easy dessert without the hassle of traditional baking. With just a few simple ingredients and a microwave, you can create a warm, fluffy treat in under five minutes. Whether it’s a last-minute indulgence or a fun activity with friends and family, mug cakes are the perfect solution for satisfying your sweet tooth instantly.
One of the best things about mug cakes is their versatility. You can easily customize them to suit your preferences, from adding chocolate chips or sprinkles to experimenting with unique flavors like matcha or peanut butter. They also offer a wonderful opportunity to cater to dietary needs, with options for gluten-free, vegan, or low-sugar variations. These single-serving desserts are not only practical but also encourage creativity in the kitchen.

Hi, I’m Katelyn Williams, the expert behind Ninjacreamiicecream.com. With a deep passion for creating delectable ice cream recipes, I’m here to share my love for all things ice cream. I earned my Bachelor’s degree from Louisiana State University, and since then, I’ve been dedicated to perfecting the art of ice cream making. From classic flavors to innovative creations, my goal is to inspire you to make delicious and creamy treats at home effortlessly. Join me for the best recipes, tips, and techniques to elevate your ice cream game and indulge in delightful frozen desserts!


