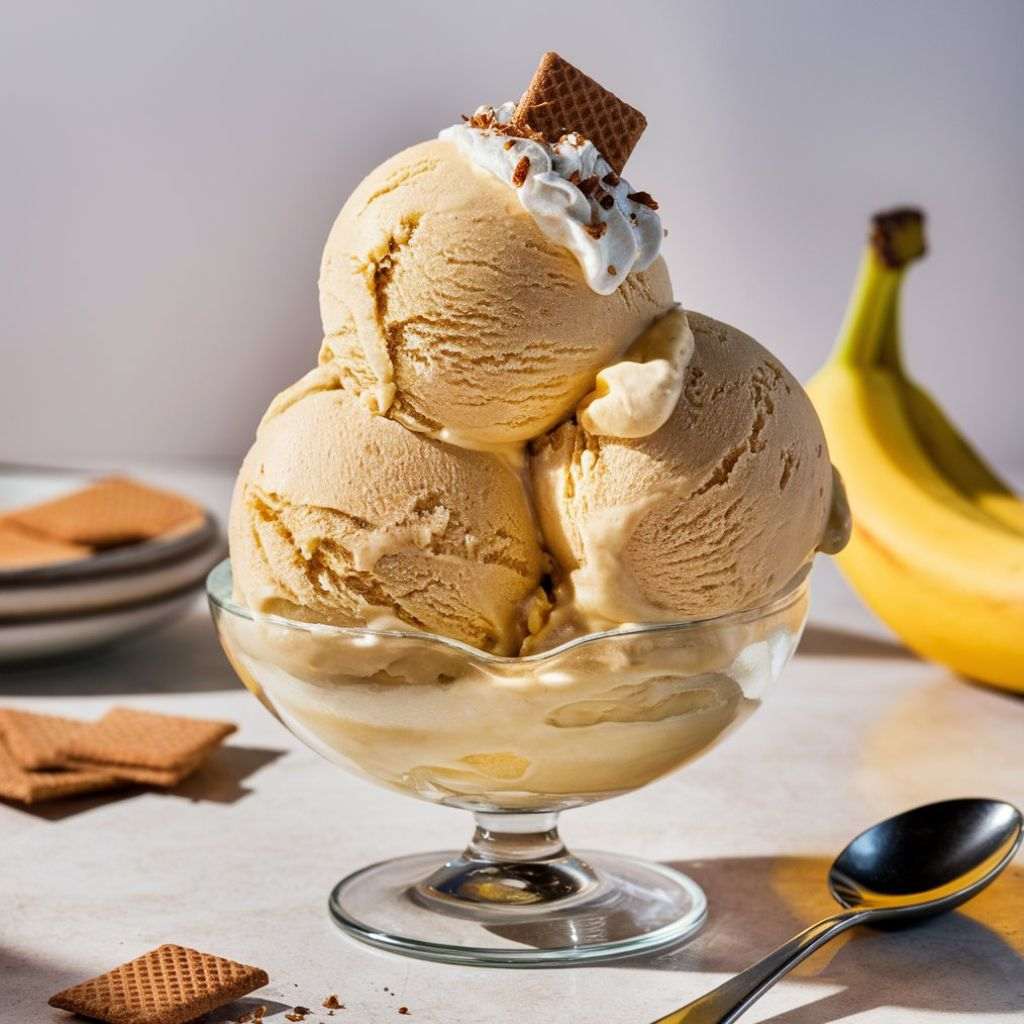
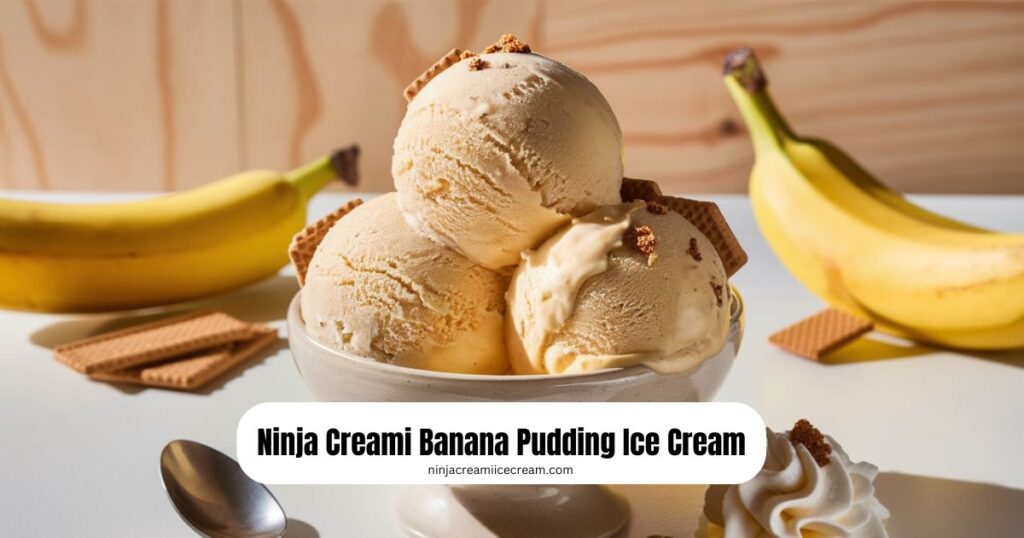
Ninja Creami Banana Pudding Ice Cream combines the beloved flavors of classic banana pudding into a refreshing and creamy frozen treat. This dessert captures the essence of traditional banana pudding, with its rich and velvety banana flavor enhanced by a touch of vanilla and creamy pudding. Using the Ninja Creami machine, this recipe transforms simple ingredients into a decadent ice cream that’s perfect for any occasion.
Disclosure: This post may contain affiliate links. As an Amazon Associate, I earn from qualifying purchases. Read more.
Banana pudding is a cherished American dessert known for its sweet, creamy layers and comforting flavors. By converting this classic into ice cream, we create a delightful twist that maintains the essence of the original dessert. The result is a frozen treat that offers the same luscious banana and vanilla flavors with a smooth, creamy texture, making it a perfect way to enjoy a nostalgic favorite in a new form.
The Ninja Creami is an innovative kitchen appliance designed to make creating homemade ice cream, gelato, and sorbet easy and convenient. Its unique processing technology allows for the transformation of frozen bases into smooth, creamy frozen desserts. With features tailored for achieving the perfect texture and consistency, the Ninja Creami is ideal for making delicious and creamy banana pudding ice cream right at home.
Ninja Creami Banana Pudding Ice Cream Recipe
Ingredients
- 2 Ripe Bananas
- Description: Use fully ripe bananas for optimal sweetness and flavor. They should be yellow with some brown spots for the best results.
- Preparation: Peel and mash the bananas until smooth. If you prefer a finer texture, you can also blend them.
- 1/2 Cup Vanilla Pudding Mix
- Description: This ingredient provides the pudding-like texture and flavor that is key to the recipe. Use instant or cook-and-serve vanilla pudding mix, depending on your preference.
- Note: Ensure the pudding mix is fully dissolved in the mixture to avoid lumps.
- 1/2 Cup Milk or Heavy Cream
- Description: Choose milk for a lighter option or heavy cream for a richer, creamier texture. Whole milk will give a smoother consistency, while heavy cream will add extra richness.
- Variation: For a dairy-free option, substitute with almond milk, coconut milk, or any plant-based milk of your choice.
- 1/4 Cup Sweetened Condensed Milk
- Description: This ingredient adds sweetness and a creamy texture to the ice cream. It also helps to enhance the flavor and maintain a smooth consistency.
- Note: For a less sweet option, you can adjust the amount of sweetened condensed milk or use a lighter alternative.
- 1 Teaspoon Vanilla Extract
- Description: Vanilla extract enhances the flavor profile, adding a subtle depth to the ice cream. Use pure vanilla extract for the best flavor.
- Note: Avoid imitation vanilla extract, as it may not provide the same quality of flavor.
- Optional Toppings:
- Crushed Nilla Wafers or Graham Crackers: Adds a delightful crunch and mimics the traditional banana pudding crust. Crush them into small pieces for easy mixing or sprinkling.
- Whipped Cream: Adds a light and airy topping that complements the creamy texture of the ice cream. Use freshly whipped cream for best results or store-bought whipped topping.
Ingredients
Here are the detailed instructions for the Ninja Creami Banana Pudding Ice Cream in three steps:
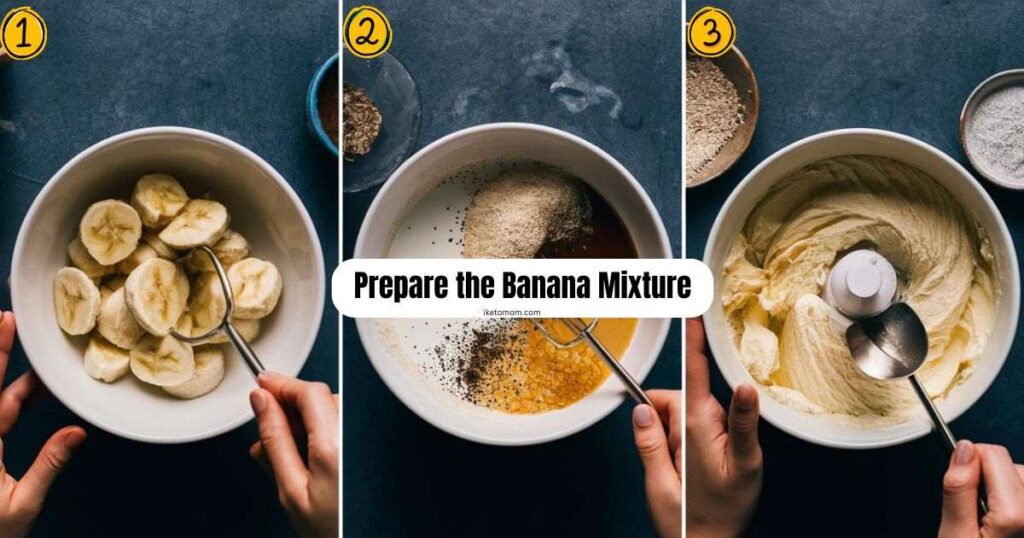
1. Prepare the Banana Mixture
- Mash the Bananas: Peel and place the ripe bananas in a mixing bowl. Use a fork or potato masher to mash the bananas until smooth, with only small lumps remaining.
- Combine Ingredients: In the same bowl, add 1/2 cup of vanilla pudding mix, 1/2 cup of milk (or heavy cream), 1/4 cup of sweetened condensed milk, and 1 teaspoon of vanilla extract. Mix well until all ingredients are thoroughly combined and the pudding mix is fully dissolved.
- Blend (Optional): For a smoother texture, you can transfer the mixture to a blender or food processor and blend until completely smooth. This step ensures a creamy consistency in the final ice cream.
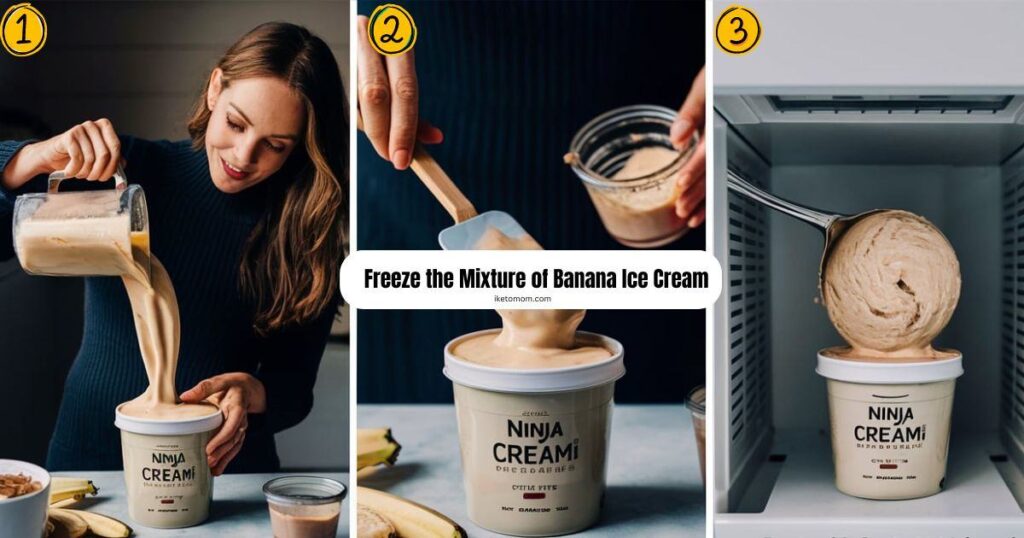
2. Freeze the Mixture of Banana Ice Cream
- Transfer to Container: Pour the banana mixture into the Ninja Creami pint container or another freezer-safe container. Smooth the top with a spatula to ensure an even surface.
- Freeze: Place the container in the freezer and freeze for at least 24 hours, or until the mixture is completely solid. This freezing time is crucial for achieving the right texture when processing in the Ninja Creami.
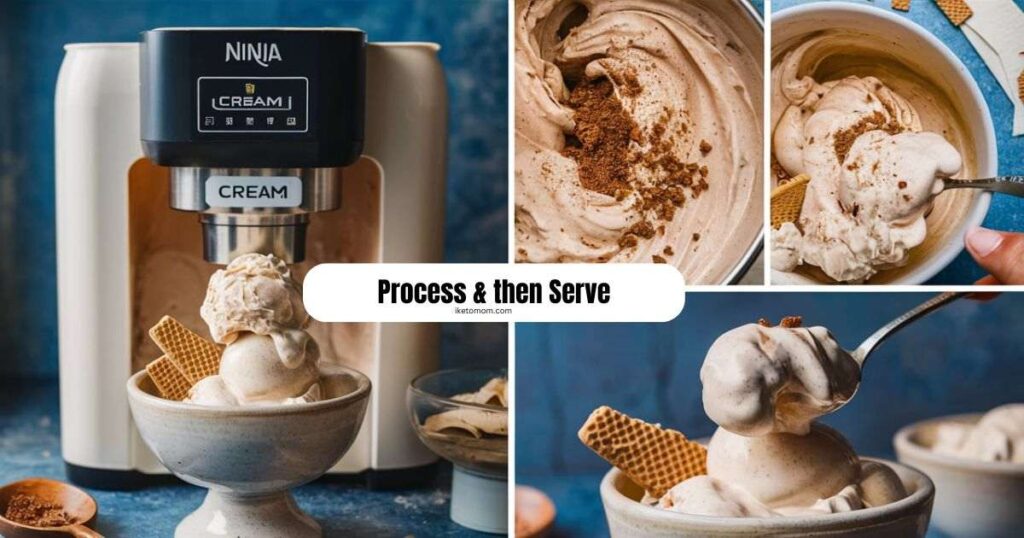
3. Process & then Serve
- Process in Ninja Creami: After the mixture has frozen solid, remove the container from the freezer. Attach the container to the Ninja Creami machine and select the “Ice Cream” function. Process until the mixture reaches a creamy, ice cream-like consistency.
- Add Mix-Ins (Optional): If you’d like to add mix-ins like crushed Nilla wafers, do so by gently stirring them into the ice cream after processing, or during the last minute of processing in the Ninja Creami.
- Serve: Scoop the finished ice cream into bowls or cones. For extra indulgence, top with more crushed Nilla wafers or graham crackers and a dollop of whipped cream if desired.
Once you’ve scooped the Ninja Creami Banana Pudding Ice Cream into bowls or cones, it’s ready to be enjoyed. For an extra touch, top with additional crushed Nilla wafers or a dollop of whipped cream. This creamy, indulgent treat is perfect for any occasion, offering a delightful twist on a classic favorite. Enjoy every spoonful of this delicious homemade ice cream, and savor the flavors of banana pudding in a new, frozen form!
Ninja Creami Banana Pudding Ice Cream brings the nostalgic flavors of classic banana pudding into a creamy, frozen dessert. With ripe bananas, vanilla pudding mix, and sweetened condensed milk, this recipe captures the essence of the beloved dessert in an indulgent ice cream form. The result is a smooth, velvety treat that perfectly balances the sweet, rich taste of banana pudding with the refreshing coolness of ice cream.
The Ninja Creami machine is key to achieving this delectable treat, as it transforms the frozen banana mixture into a perfectly creamy consistency. Its innovative processing technology ensures that the ice cream has a luxurious texture without any ice crystals. Whether enjoyed on a hot day or as a comforting dessert, this Banana Pudding Ice Cream is a delightful twist on a classic, making it a perfect treat for any occasion.
Ninja Creami Banana Pudding Ice Cream Nutrition Info
This nutrition table provides an estimate of the nutritional values for the Ninja Creami Banana Pudding Ice Cream based on a single serving (approximately 1/2 cup). Please note that these values can vary depending on specific ingredient brands and portion sizes. This table helps you understand the calorie and nutrient content of this delicious homemade ice cream.
| Nutrient |
Per Serving (1/2 cup)
|
| Calories | 203 kcal |
| Total Fat | 8 g |
| Saturated Fat | 4.5 g |
| Cholesterol | 30 mg |
| Sodium | 80 mg |
| Total Carbohydrates | 30 g |
| Dietary Fiber | 1 g |
| Sugars | 26 g |
| Protein | 3 g |
| Vitamin D | 0 IU |
| Calcium | 80 mg |
| Iron | 0.5 mg |
This table includes only basic nutritional information; for detailed analysis, consider using a nutrition calculator or consult with a nutritionist.
Here’s a combined nutrition table for each ingredient used in the Ninja Creami Banana Pudding Ice Cream recipe:
| Ingredient | Serving Size | Calories | Total Fat | Saturated Fat | Cholesterol | Sodium | Total Carbohydrates | Dietary Fiber | Sugars | Protein |
|---|---|---|---|---|---|---|---|---|---|---|
| Ripe Bananas | 1 medium (118 g) | 105 kcal | 0.3 g | 0.1 g | 0 mg | 1 mg | 27 g | 3 g | 14 g | 1.3 g |
| Vanilla Pudding Mix (Instant) | 1/4 cup (30 g) | 200 kcal | 0 g | 0 g | 0 mg | 260 mg | 50 g | 0 g | 32 g | 2 g |
| Milk (Whole) | 1/2 cup (122 g) | 75 kcal | 4 g | 2.5 g | 20 mg | 60 mg | 6 g | 0 g | 6 g | 4 g |
| Sweetened Condensed Milk | 1/4 cup (83 g) | 315 kcal | 8 g | 5 g | 30 mg | 130 mg | 50 g | 0 g | 50 g | 7 g |
| Vanilla Extract | 1 tsp (5 ml) | 12 kcal | 0 g | 0 g | 0 mg | 0 mg | 0 g | 0 g | 0 g | 0 g |
This table provides a detailed nutritional breakdown for each ingredient used in the Ninja Creami Banana Pudding Ice Cream.

Ninja Creami Banana Pudding Ice Cream Recipe
Equipment
- Ninja Creami Machine Essential for processing the frozen mixture into creamy ice cream.
- Blender or Food Processor: Optional, for blending the banana mixture to a smooth consistency.
- Mixing Bowls: For combining ingredients like bananas, pudding mix, and milk.
- Spatula: To scrape down the sides of the bowl and ensure all ingredients are well mixed.
- Freezer-Safe Container: Preferably the Ninja Creami pint container, for freezing the banana mixture.
- Measuring Cups and Spoons: For accurately measuring ingredients like milk and vanilla extract.
- Ice Cream Scoop For serving the finished ice cream.
Ingredients
- 2 ripe bananas (about 1 cup mashed)
- 1/2 cup vanilla pudding mix (instant or cooked)
- 1/2 cup milk or heavy cream
- 1/4 cup sweetened condensed milk
- 1 teaspoon vanilla extract
Optional toppings:
- Crushed Nilla wafers or graham crackers
- Whipped cream
Instructions
- Prepare Mixture: Mash 2 ripe bananas and mix with 1/2 cup vanilla pudding mix, 1/2 cup milk, 1/4 cup sweetened condensed milk, and 1 tsp vanilla extract. Blend until smooth if desired.
- Freeze: Pour the mixture into a Ninja Creami container and freeze for at least 24 hours until solid.
- Process: Attach the frozen mixture to the Ninja Creami and select the “Ice Cream” function. Process until creamy.
- Add Mix-Ins: Stir in crushed Nilla wafers or graham crackers if desired.
- Serve: Scoop into bowls or cones, and top with more crushed wafers or whipped cream if desired.
Notes
- Banana Ripeness: Use ripe bananas for the best flavor and natural sweetness. Overripe bananas work especially well.
- Blending: Blending the mixture ensures a smooth texture, but it’s optional. If you prefer a chunkier texture, you can skip this step.
- Freezing Time: Ensure the mixture is frozen solid for at least 24 hours before processing. Incomplete freezing can affect the final texture.
- Mix-Ins: If adding mix-ins like crushed Nilla wafers, stir them in gently after processing to maintain a creamy consistency.
- Adjust Sweetness: If you prefer a sweeter ice cream, adjust the amount of sweetened condensed milk or add a bit of honey or maple syrup.
- Storage: Store leftover ice cream in an airtight container in the freezer. It may need a few minutes to soften before serving.
- Ninja Creami Functions: Follow the manufacturer's instructions for the best results. Use the “Ice Cream” function for the creamiest texture.
- Substitutions: For a dairy-free version, use non-dairy milk and replace sweetened condensed milk with a plant-based alternative.
Delicious Topping Ideas
- Crushed Nilla Wafers: Sprinkle crushed Nilla wafers on top for a crunchy, classic touch that complements the banana pudding flavor.
- Whipped Cream: Add a dollop of freshly whipped cream for a light and airy topping that enhances the creamy texture of the ice cream.
- Caramel Sauce: Drizzle warm caramel sauce over the ice cream for a rich, sweet addition that pairs beautifully with banana flavor.
- Chocolate Chips: Scatter mini chocolate chips or shavings on top for a touch of chocolatey goodness that adds contrast and texture.
- Chopped Nuts: Top with chopped nuts like pecans or walnuts for added crunch and a nutty flavor that complements the sweetness of the ice cream.
- Fresh Banana Slices: Garnish with extra banana slices for a fresh, fruity touch that amplifies the banana flavor.
- Toasted Coconut: Sprinkle toasted coconut flakes for a tropical twist and added texture.
- Berry Compote: Add a spoonful of berry compote or fresh berries for a fruity contrast that balances the richness of the ice cream.
FAQ
Can I use ripe bananas that are overripe?
Can I make this recipe with a dairy-free alternative?
Yes, you can easily make this recipe with dairy-free alternatives. Here’s how you can adjust the ingredients:
- Milk: Substitute whole milk with almond milk, coconut milk, oat milk, or any other plant-based milk. Choose a variety that is unsweetened if you want to control the sweetness of the ice cream.
- Sweetened Condensed Milk: Use a dairy-free sweetened condensed milk, such as coconut condensed milk, which is available in many grocery stores or online.
By using these dairy-free options, you can enjoy a delicious banana pudding ice cream that fits your dietary preferences or needs.
How long does the banana mixture need to freeze before processing?
The banana mixture needs to freeze for at least 24 hours until it is completely solid before processing in the Ninja Creami. This ensures that the mixture is firm enough to achieve the desired creamy texture when processed. Make sure the mixture is spread evenly in the container to freeze uniformly.
What should I do if the ice cream turns out too hard after freezing?

Hi, I’m Katelyn Williams, the expert behind Ninjacreamiicecream.com. With a deep passion for creating delectable ice cream recipes, I’m here to share my love for all things ice cream. I earned my Bachelor’s degree from Louisiana State University, and since then, I’ve been dedicated to perfecting the art of ice cream making. From classic flavors to innovative creations, my goal is to inspire you to make delicious and creamy treats at home effortlessly. Join me for the best recipes, tips, and techniques to elevate your ice cream game and indulge in delightful frozen desserts!

