
Ninja Creami Coffee Ice Cream combines the rich, aromatic essence of coffee with the creamy delight of homemade ice cream, crafted using the innovative Ninja Creami machine. This recipe offers a delightful blend of flavors and textures, perfect for coffee enthusiasts and ice cream lovers alike.

De'Longhi Rivelia Automatic Espresso Machine
One-Touch Espresso | Dual Bean Hoppers | Built-in Milk Frother
$1,499.95 (price may change)
Buy Now on AmazonCoffee ice cream is celebrated for its robust coffee flavor balanced with the smoothness of cream. It captures the essence of freshly brewed coffee, delivering a satisfying indulgence in every scoop. Its popularity spans across coffeehouses and dessert menus globally, appreciated for its distinct taste and versatility in various desserts.
Disclosure: This post may contain affiliate links. As an Amazon Associate, I earn from qualifying purchases. Read more.
The purpose of this guide is to empower you to create homemade coffee ice cream effortlessly with the Ninja Creami machine. By following these steps, you can enjoy a premium ice cream experience at home, tailored to your taste preferences and dietary needs. Whether you seek a classic coffee ice cream or wish to experiment with decadent mix-ins, this recipe provides a straightforward approach to crafting creamy, flavorful ice cream that rivals your favorite dessert shop.
This guide ensures you achieve optimal results with the Ninja Creami, offering tips and techniques to enhance your ice cream-making journey. Embrace the joy of creating and savoring this delightful treat, perfect for any occasion or simply as a comforting indulgence.

Ninja Creami Coffee Ice Cream Recipe
Ingredients
Base Ingredients:
- 1 cup freshly brewed strong coffee or espresso, cooled to room temperature
- Tip: Brew a strong coffee or espresso for a robust flavor profile.
- 1 cup heavy cream
- Tip: Opt for high-fat heavy cream for a creamy texture.
- 1 cup whole milk
- Tip: Whole milk adds richness to the ice cream base.
- 3/4 cup granulated sugar
- Tip: Adjust sugar amount based on desired sweetness.
- 1 teaspoon vanilla extract
- Tip: Enhances the overall flavor profile with a hint of vanilla.
Optional Add-Ins (Customizable):
- 1/2 cup chocolate chips
- Tip: Adds a delightful chocolatey crunch to the ice cream.
- 1/2 cup caramel swirls
- Tip: Provides a sweet, caramelized swirl throughout the ice cream.
These ingredients form the foundation of Ninja Creami Coffee Ice Cream, allowing you to tailor the recipe to your taste preferences by adjusting sweetness levels or incorporating additional mix-ins for a personalized treat.
Instructions
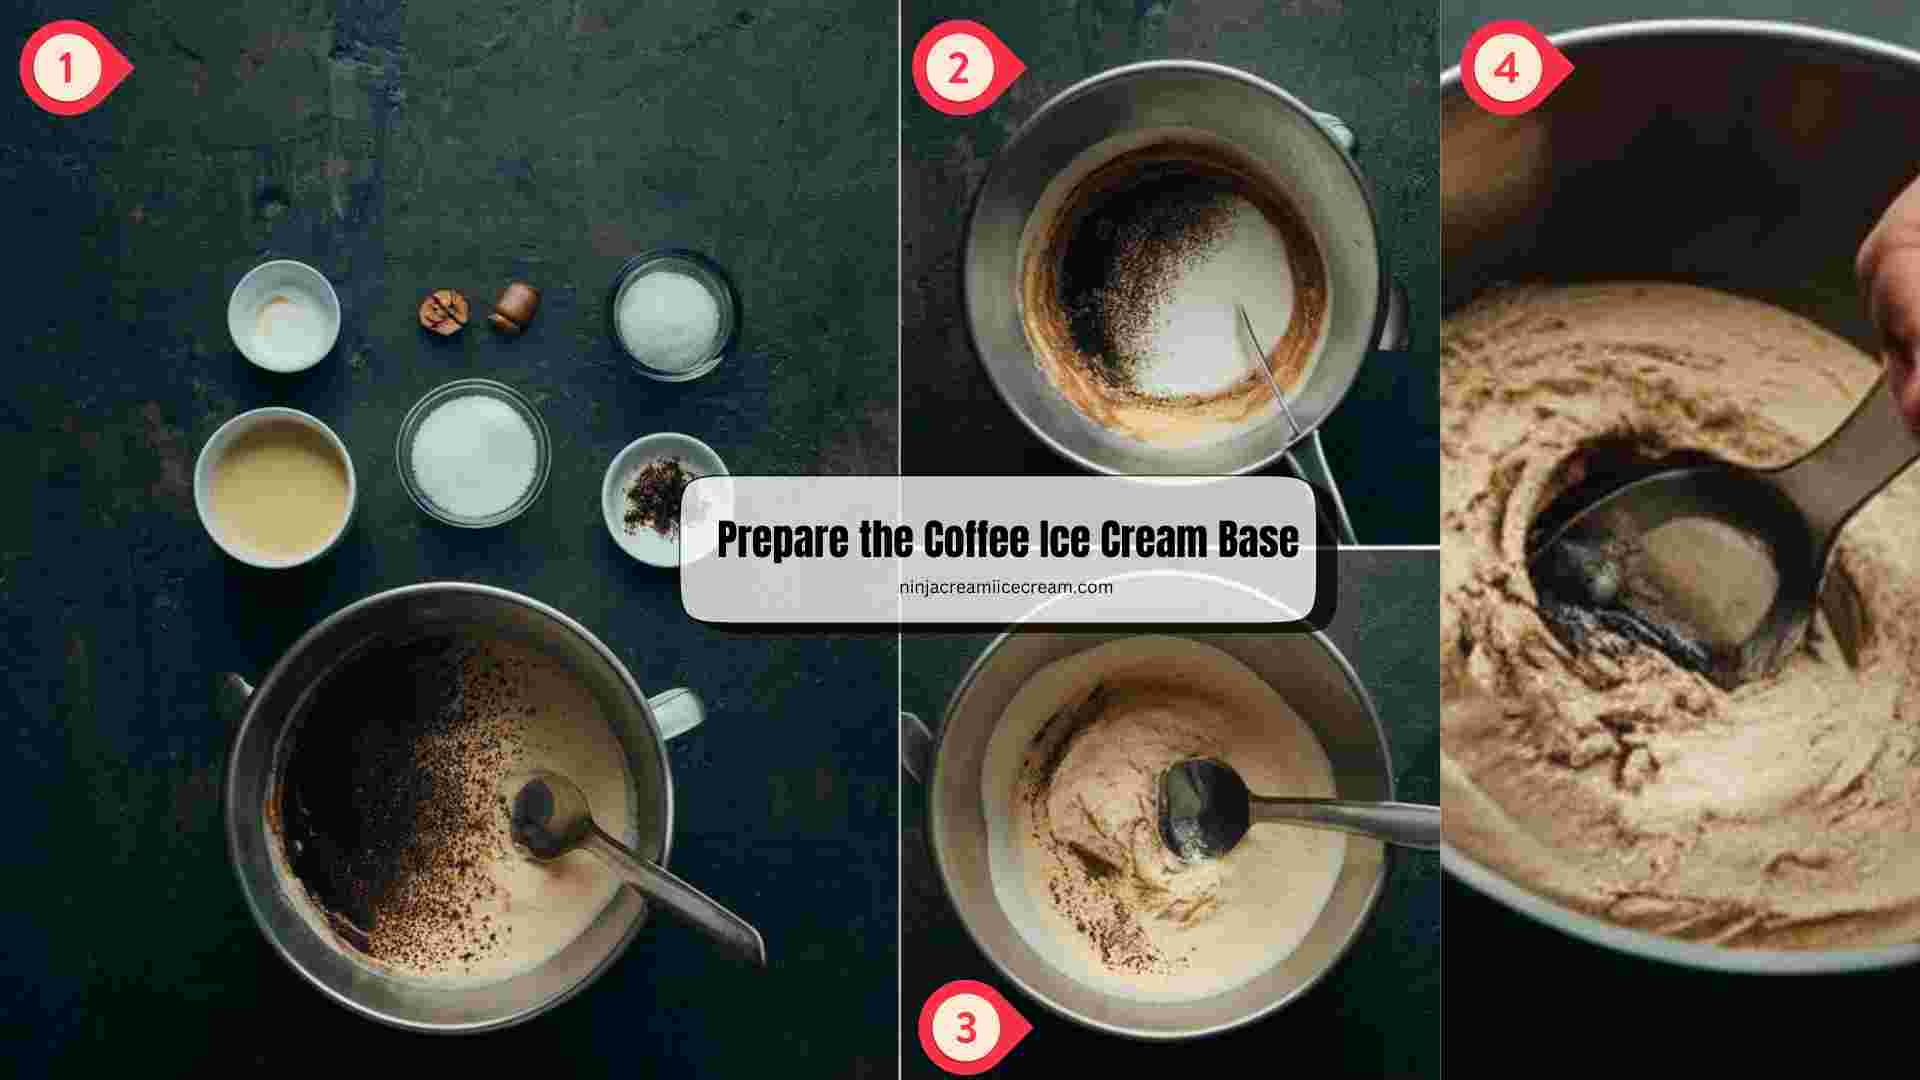
Step 1: Prepare the Coffee Ice Cream Base
- In a mixing bowl, combine 1 cup of freshly brewed strong coffee or espresso (cooled), 1 cup of heavy cream, 1 cup of whole milk, and 3/4 cup of granulated sugar.
- Stir the mixture until the sugar is completely dissolved.
- Add 1 teaspoon of vanilla extract and mix well.
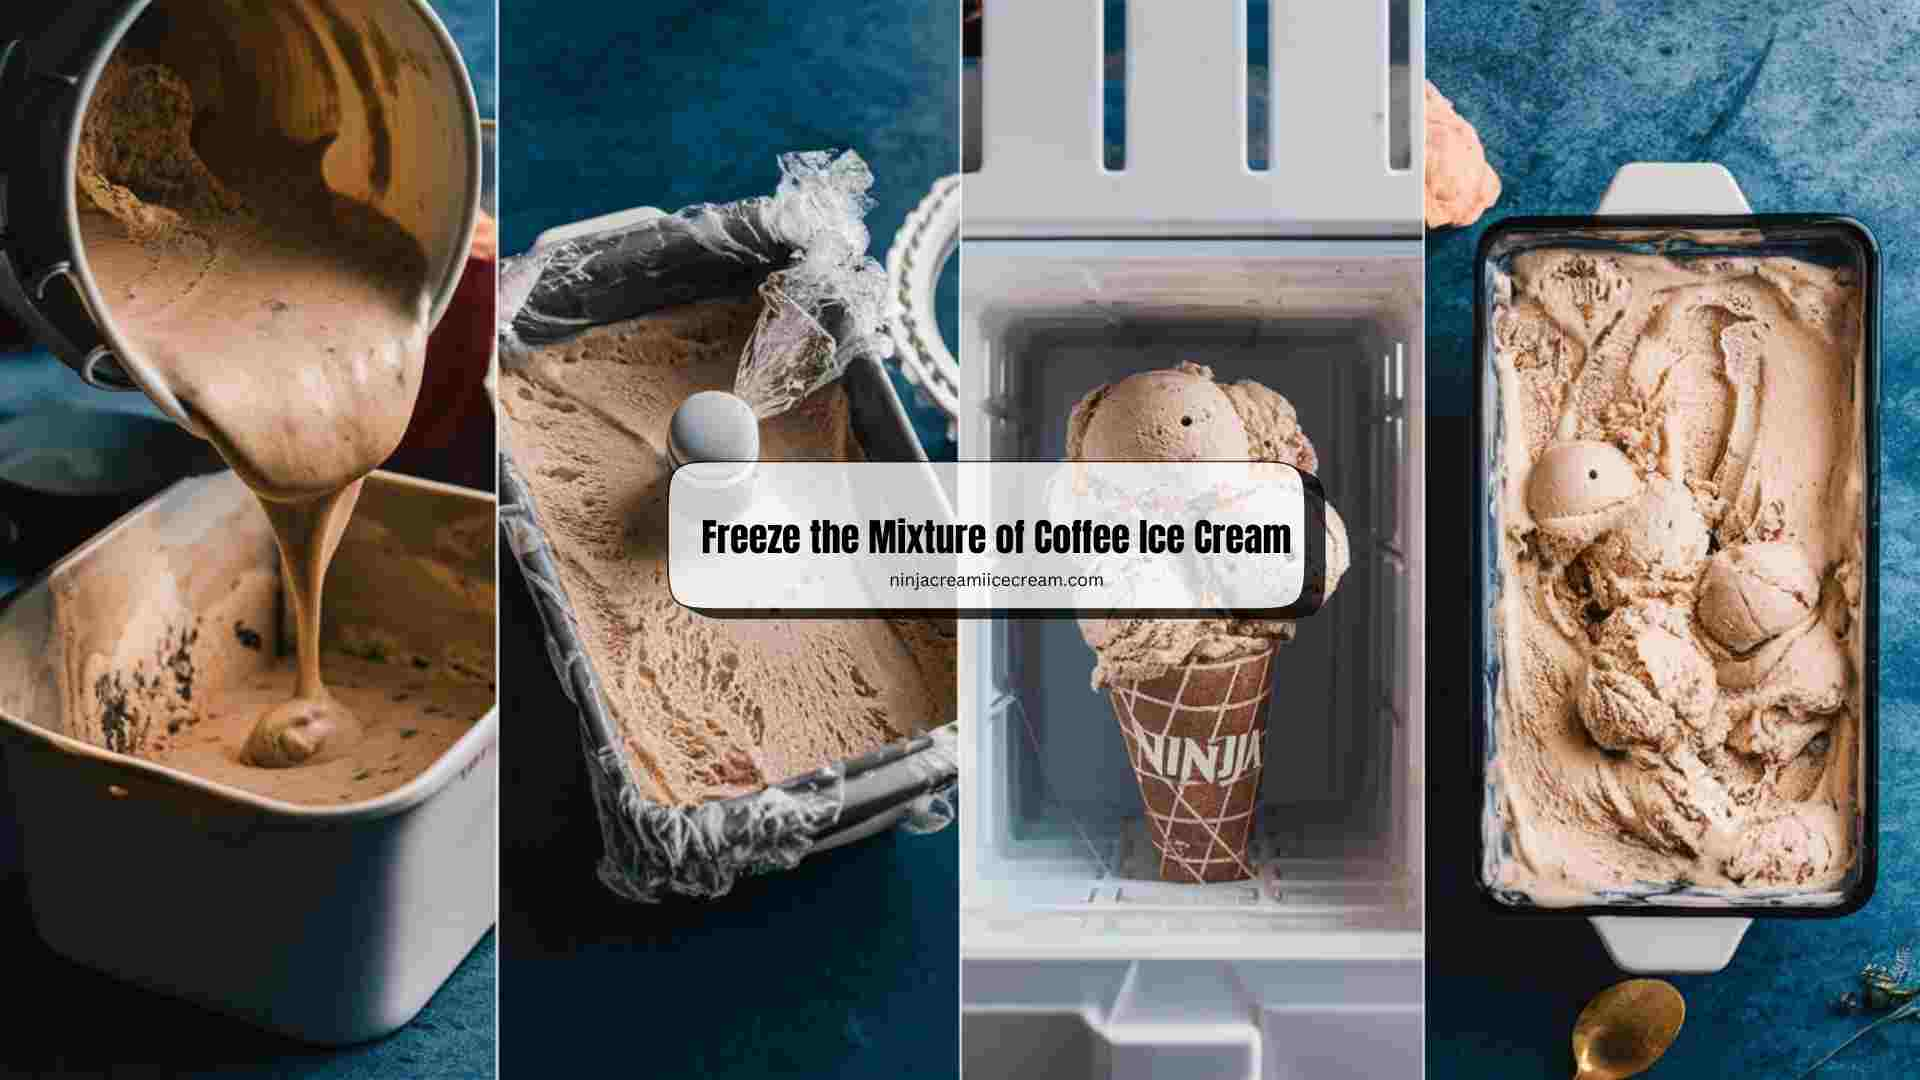
Step 2: Freeze the Mixture
- Pour the prepared ice cream base into a freezer-safe container.
- Cover the container tightly with a lid or plastic wrap.
- Place the container in the freezer and let it freeze for at least 24 hours until solid.
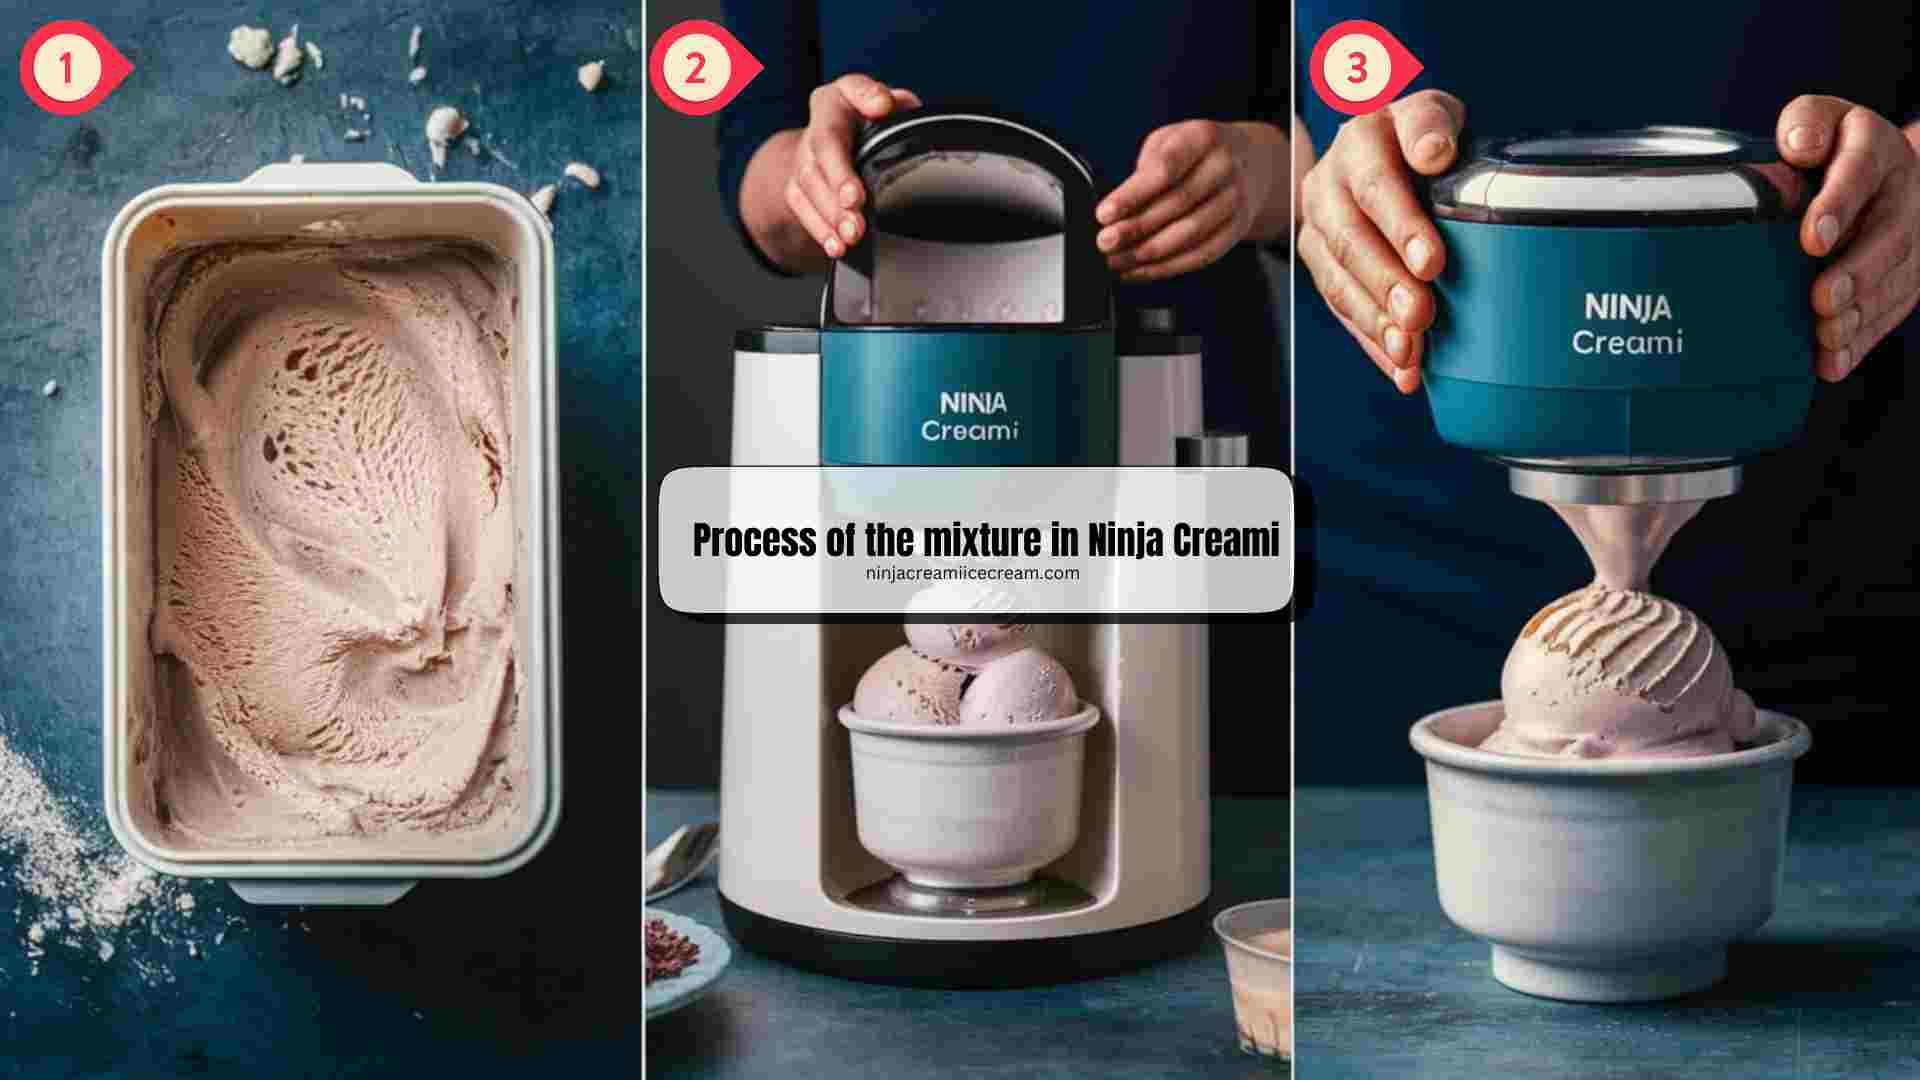
Step 3: Process of the mixture in Ninja Creami
- Remove the frozen mixture from the freezer and let it sit at room temperature for a few minutes.
- Transfer the frozen mixture into the Ninja Creami machine.
- Follow the manufacturer’s instructions to churn the mixture until it reaches a smooth and creamy consistency.
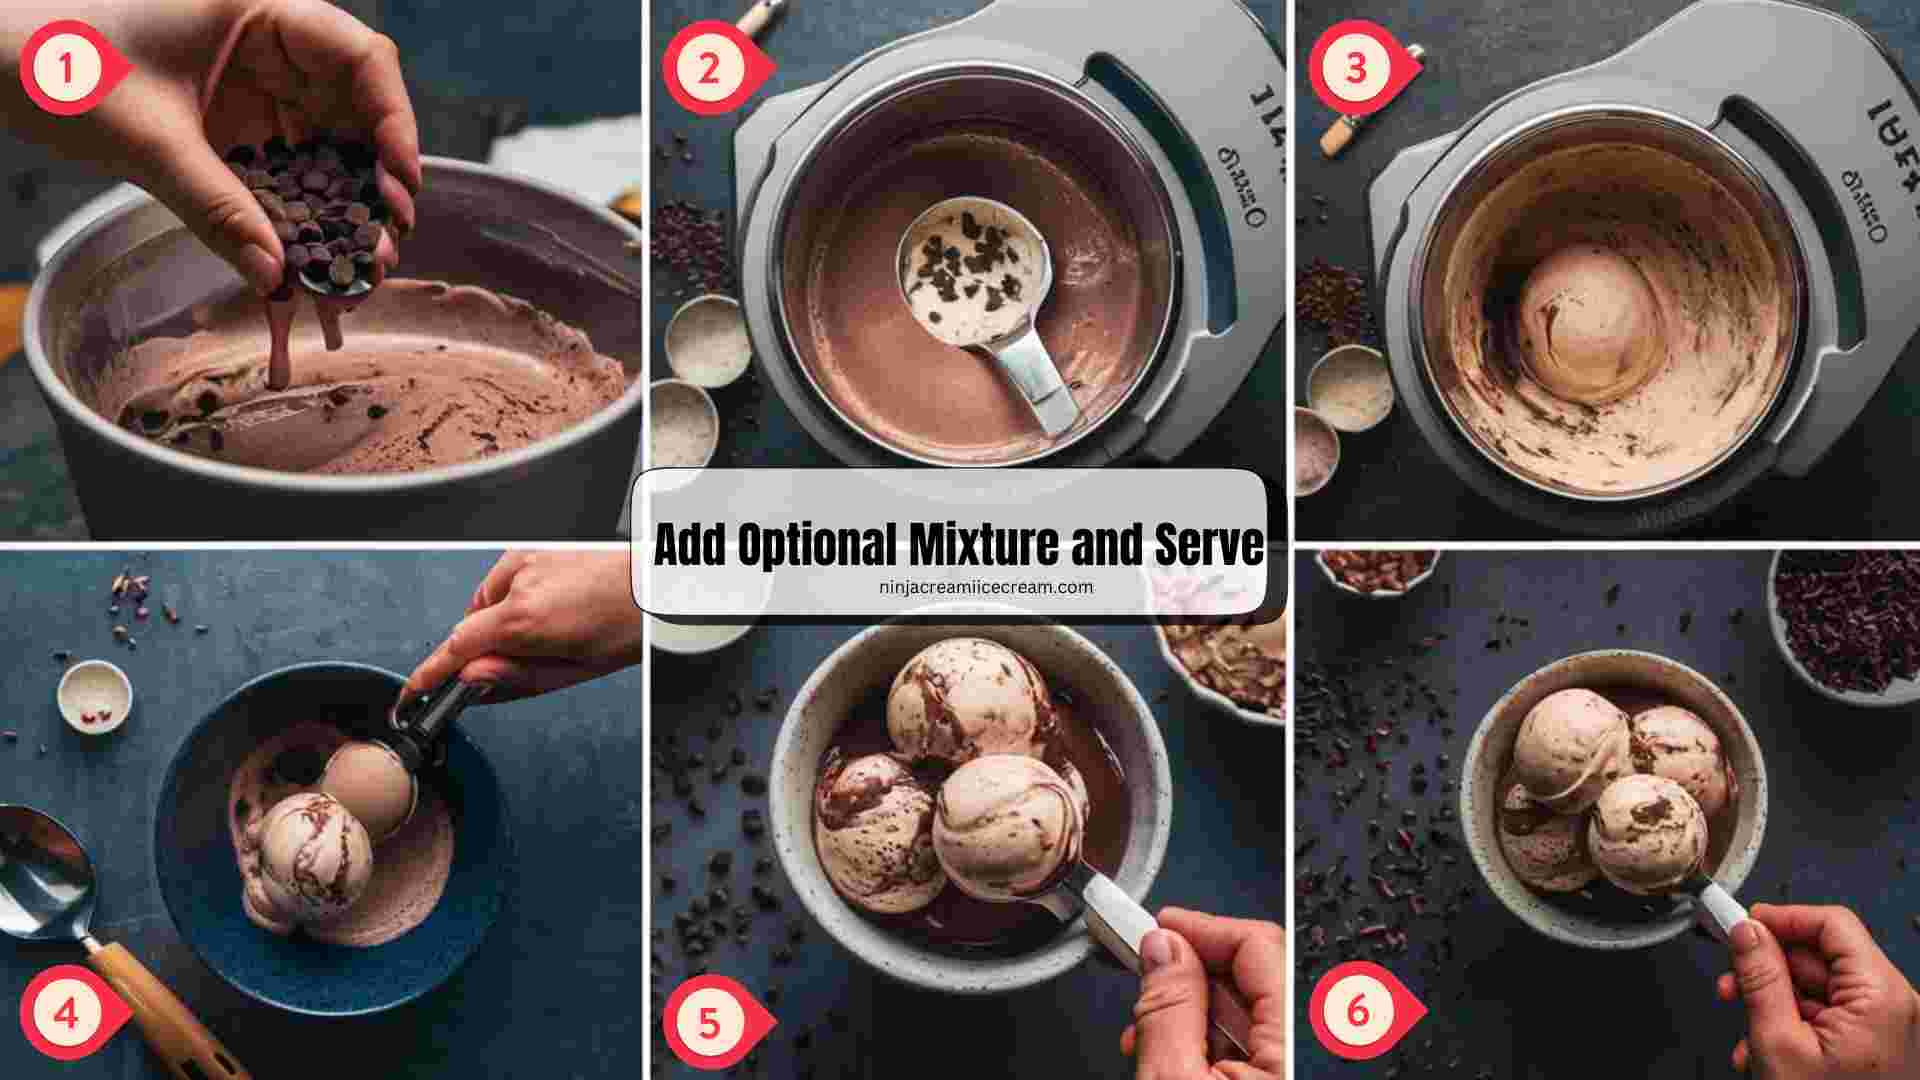
Step 4: Add Optional Mixture and Serve
- If desired, add optional mix-ins such as chocolate chips or caramel swirls during the last few minutes of churning.
- Once the ice cream reaches the desired consistency, scoop it into bowls or cones using an ice cream scoop.
- Serve immediately and enjoy your homemade Ninja Creami Coffee Ice Cream!
These steps will guide you through creating delicious coffee-flavored ice cream using your Ninja Creami machine. Adjust sweetness or add-ins according to your taste preferences for a personalized treat!
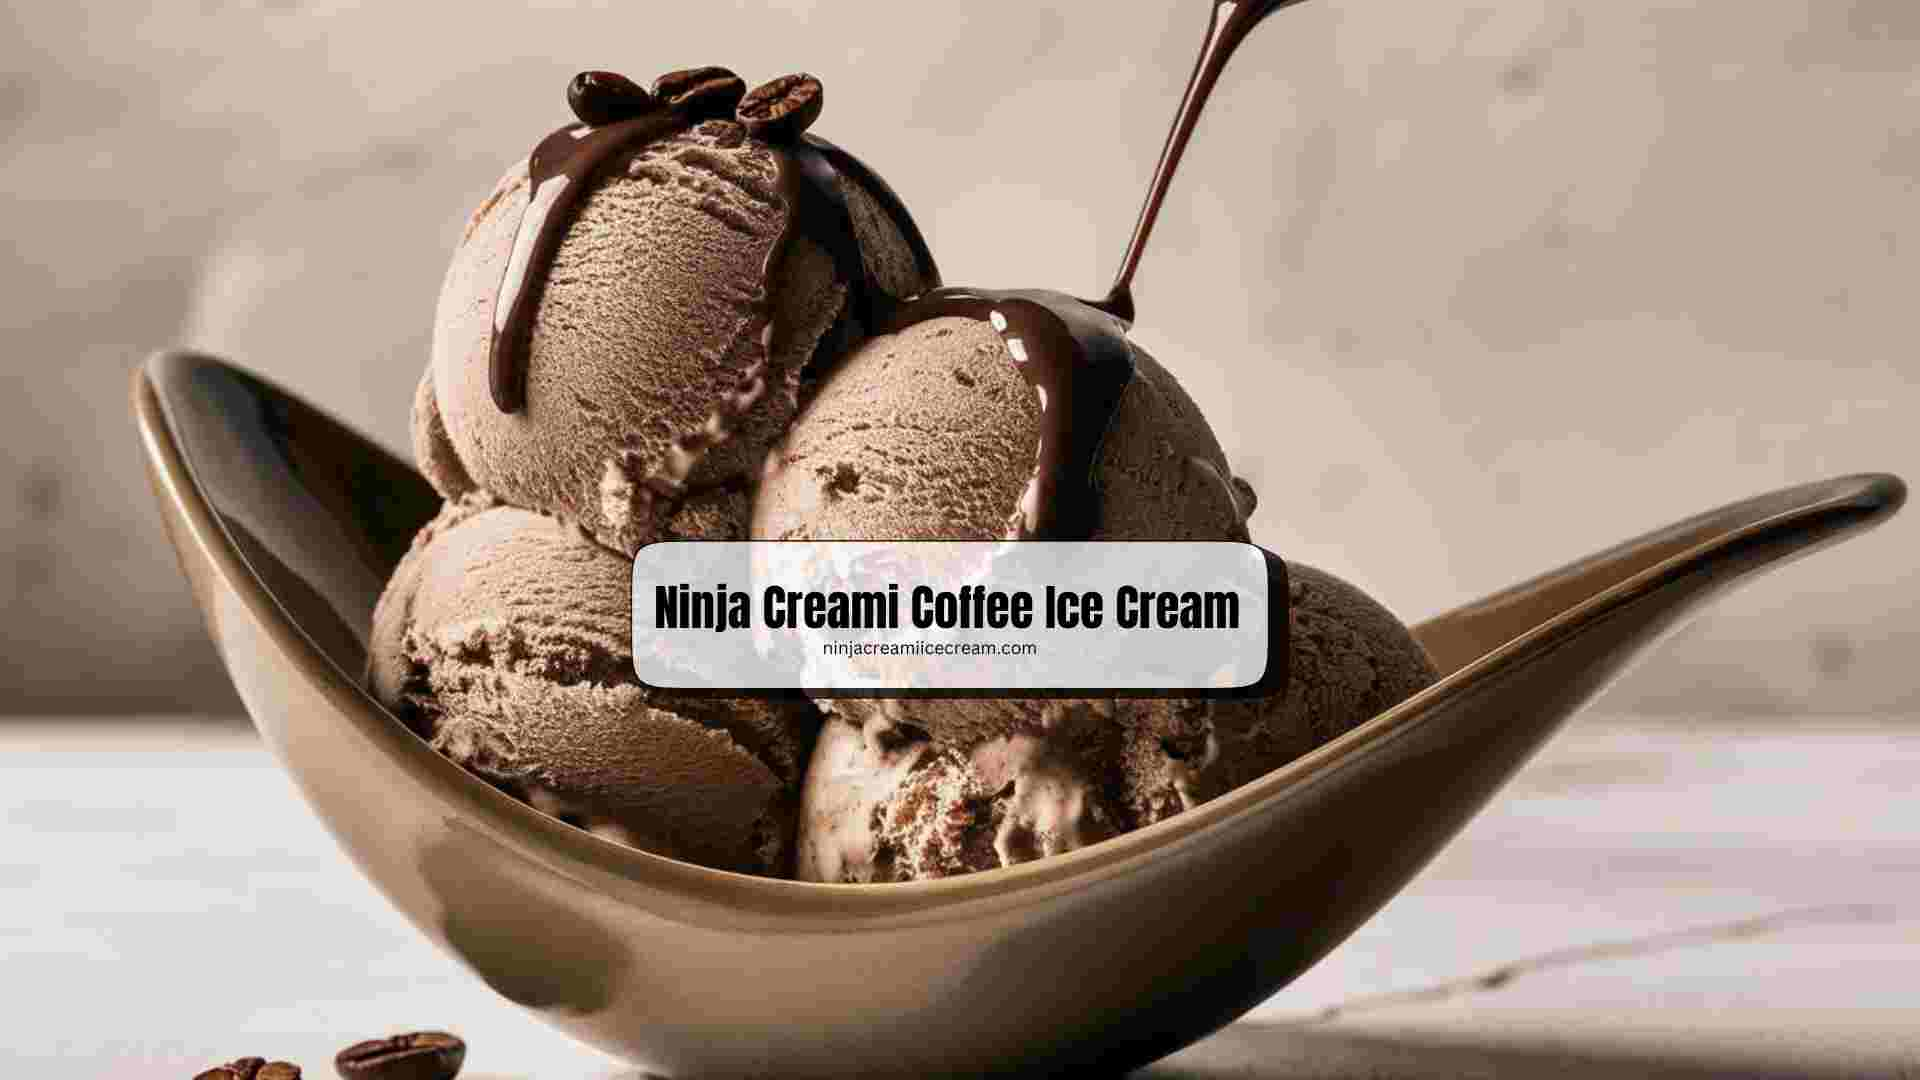
Ninja Creami Coffee Ice Cream blends the bold flavors of freshly brewed coffee or espresso with the creamy texture of homemade ice cream, all crafted effortlessly using the Ninja Creami machine. This recipe transforms simple ingredients—like heavy cream, whole milk, sugar, and vanilla extract—into a decadent dessert that captures the essence of a coffeehouse favorite. The Ninja Creami’s innovative technology ensures a smooth and creamy consistency, perfect for those who crave a rich coffee flavor in their frozen treats.
Coffee ice cream holds a cherished place among dessert aficionados for its robust taste and versatility. It embodies the essence of coffee, offering a satisfying blend of bitter and sweet notes that harmonize beautifully with the creaminess of the base. Whether enjoyed solo or adorned with chocolate chips or caramel swirls, Ninja Creami Coffee Ice Cream promises a luxurious indulgence that rivals the best ice cream parlors. This recipe guide not only simplifies the process of making homemade ice cream but also invites creativity, allowing enthusiasts to experiment with flavors and textures in the comfort of their own kitchen.
Ninja Creami Coffee Ice Cream Nutrition Info
Creating a nutrition table for Ninja Creami Coffee Ice Cream involves estimating the calorie content based on the ingredients used. Here’s a simplified nutrition table per serving (assuming 6 servings):
| Nutrient |
Amount per Serving
|
| Calories |
Approximately 244 kcal
|
| Total Fat | 17.3 g |
| – Saturated Fat | 10.8 g |
| Cholesterol | 61 mg |
| Sodium | 36 mg |
| Total Carbohydrates | 21.7 g |
| – Sugars | 20.8 g |
| Protein | 2.2 g |
These values are approximate and can vary based on specific brands and quantities of ingredients used. For more precise nutritional information, it’s recommended to calculate using a nutrition calculator based on the exact ingredients and serving sizes.
Here’s a consolidated nutrition table for each ingredient used in Ninja Creami Coffee Ice Cream, based on typical values per specified amount (1 cup for liquids, 3/4 cup for sugar, and 1 teaspoon for vanilla extract):
| Ingredient | Amount | Calories | Total Fat (g) | Saturated Fat (g) | Cholesterol (mg) | Sodium (mg) | Total Carbohydrates (g) | Sugars (g) | Protein (g) |
|---|---|---|---|---|---|---|---|---|---|
| Freshly Brewed Strong Coffee or Espresso | 1 cup, cooled | 2 | 0 | 0 | 0 | 5 | 0 | 0 | 0.3 |
| Heavy Cream | 1 cup | 821 | 88 | 55 | 326 | 85 | 7 | 7 | 5 |
| Whole Milk | 1 cup | 149 | 7.7 | 4.6 | 24 | 98 | 11.7 | 12.8 | 7.7 |
| Granulated Sugar | 3/4 cup | 480 | 0 | 0 | 0 | 0 | 124 | 124 | 0 |
| Vanilla Extract | 1 teaspoon | 12 | 0 | 0 | 0 | 0 | 0.6 | 0.6 | 0 |
| Optional Add-Ins: | |||||||||
| Chocolate Chips | 1/2 cup | 805 | 45 | 27 | 7 | 90 | 102 | 91 | 9 |
| Caramel Swirls | 1/2 cup | 326 | 10.6 | 6.6 | 23 | 256 | 58 | 58 | 1.6 |
Note: Nutritional values are approximate and can vary based on specific brands and preparation methods. Adjust quantities and ingredients to meet dietary preferences and requirements.
Tips for Best Results
- Use Quality Ingredients: Opt for fresh, high-quality coffee and creamy dairy products like heavy cream and whole milk for the best flavor and texture.
- Cool Coffee Completely: Ensure your brewed coffee or espresso is completely cooled before mixing with other ingredients to prevent unwanted ice crystals.
- Freeze Thoroughly: Allow the ice cream base to freeze in a freezer-safe container for at least 24 hours before churning in the Ninja Creami for a smoother consistency.
- Follow Ninja Creami Instructions: Consult the manufacturer’s instructions for your Ninja Creami machine to ensure proper churning and texture development.
- Add Mix-Ins Wisely: If incorporating optional add-ins like chocolate chips or caramel swirls, add them during the final minutes of churning to evenly distribute them without overworking the ice cream.
- Adjust Sweetness: Taste the ice cream base before freezing and adjust the sugar level to suit your personal preference for sweetness.
- Serve Fresh: For optimal creaminess, serve Ninja Creami Coffee Ice Cream immediately after churning or allow it to soften slightly at room temperature before scooping.
By following these tips, you’ll achieve delicious homemade coffee ice cream with the Ninja Creami, perfect for enjoying as a refreshing dessert or a special treat any time of day.
Ninja Creami Coffee Ice Cream Recipe
Equipment
- Ninja Creami Machine
- Measuring Cups and Spoons:
- Mixing bowl
- Whisk or electric mixer
- Freezer-Safe Container:
- Ice Cream Scoop
- Spoon or spatula (for adding mix-ins, if desired)
Ingredients
- 1 Cup Freshly brewed strong coffee or espresso (cooled)
- 1 Cup Heavy cream
- 1 Cup Whole milk
- 3/4 Cup Granulated sugar
- 1 Teaspoon Vanilla Extract
Optional add-ins:
- 1/2 Cup Chocolate chips
- 1/2 Cup Caramel swirls
Instructions
- Mix Ingredients: Combine cooled brewed coffee, heavy cream, whole milk, sugar, and vanilla extract in a bowl until sugar dissolves.
- Freeze: Pour mixture into a freezer-safe container. Freeze for 24 hours until solid.
- Churn: Transfer frozen mixture to Ninja Creami. Follow machine instructions to churn until creamy.
- Add Mix-Ins (Optional) and Serve: Add chocolate chips or caramel swirls during last minutes of churning if desired. Scoop into bowls and enjoy immediately!
Notes
- Brewed Coffee: Use strong coffee or espresso for robust flavor. Ensure it's cooled completely before mixing.
- Freezing Time: Freeze the ice cream base for at least 24 hours to achieve a firm texture suitable for churning.
- Ninja Creami Usage: Follow the manufacturer's instructions for your Ninja Creami machine to churn the ice cream to the desired consistency.
- Optional Add-Ins: Customize your ice cream with chocolate chips, caramel swirls, or other mix-ins during the last few minutes of churning.
- Storage: Store leftover ice cream in a freezer-safe container with a tight lid to maintain freshness and texture.
- Adjusting Sweetness: Taste the ice cream base before freezing to adjust sugar levels according to personal preference.
- Serving: For best results, serve the ice cream immediately after churning for a creamy texture. If firmer, let it soften slightly at room temperature before scooping.
Here are some delicious topping ideas to elevate your Ninja Creami Coffee Ice Cream:
- Whipped Cream: Top your coffee ice cream with a generous dollop of homemade or store-bought whipped cream for added creaminess and a light texture.
- Chocolate Sauce: Drizzle rich chocolate sauce over the ice cream to complement the coffee flavor with a touch of sweetness and decadence.
- Caramel Sauce: Add a luscious caramel sauce for a buttery and slightly salty contrast to the coffee ice cream.
- Chopped Nuts: Sprinkle chopped almonds, pecans, or walnuts for a crunchy texture and nutty flavor that pairs well with the creamy base.
- Shaved Chocolate: Use a vegetable peeler to create delicate shavings of dark or milk chocolate for a sophisticated chocolatey twist.
- Coffee Beans: Garnish with whole coffee beans for a crunchy and aromatic decoration that enhances the coffee flavor.
- Cookie Crumbles: Crushed chocolate cookies or biscotti add a delightful crunch and a hint of chocolate to your ice cream.
- Toffee Bits: Sprinkle toffee bits over the ice cream for a sweet, buttery crunch that complements the coffee flavor.
- Fresh Berries: Add a pop of freshness with fresh raspberries, strawberries, or blueberries for a fruity contrast.
- Sprinkles: Colorful sprinkles or chocolate sprinkles can add a fun and festive touch to your coffee ice cream.
These topping ideas can be mixed and matched according to your preferences to create a personalized and delicious ice cream treat with Ninja Creami Coffee Ice Cream. Enjoy experimenting with different combinations for a delightful dessert experience!
FAQ
Can I use instant coffee or espresso powder instead of brewed coffee?
Yes, you can use instant coffee or espresso powder instead of brewed coffee in the Ninja Creami Coffee Ice Cream recipe. Here’s how you can incorporate them:
- Instant Coffee: Dissolve 1-2 tablespoons of instant coffee granules in a small amount of hot water to create a concentrated coffee mixture. Ensure it’s well dissolved before adding to the ice cream base.
- Espresso Powder: Use 1-2 tablespoons of espresso powder and mix it directly into the ice cream base ingredients. Espresso powder provides a strong coffee flavor and dissolves easily.
Adjust the amount of instant coffee or espresso powder based on your preference for coffee strength. This substitution is convenient and allows you to control the intensity of coffee flavor in your homemade ice cream.
How long should I freeze the ice cream base before churning in the Ninja Creami?
It’s recommended to freeze the ice cream base for at least 24 hours before churning it in the Ninja Creami. This ensures that the base is thoroughly chilled, which helps in achieving a smoother and creamier consistency during the churning process. Here are some key points to keep in mind:
- Freezing Time: Allow the ice cream base to freeze in a freezer-safe container for a minimum of 24 hours. This extended freezing time helps solidify the mixture uniformly, reducing the likelihood of ice crystals forming and ensuring optimal texture.
- Preparation: Before freezing, ensure the ice cream base is well-mixed and all ingredients are fully incorporated. Cover the container tightly with a lid or plastic wrap to prevent any potential exposure to freezer odors.
- Churning Process: Once the base is sufficiently frozen, follow the manufacturer’s instructions for your Ninja Creami machine. Typically, the churning process takes about 20-30 minutes, but this can vary based on the machine model and specific recipe.
By allowing ample freezing time for the ice cream base, you set the stage for a successful churning process in your Ninja Creami, resulting in creamy and delicious homemade ice cream.
Can I make this recipe dairy-free?
Yes, you can adapt the Ninja Creami Coffee Ice Cream recipe to be dairy-free by substituting dairy ingredients with suitable alternatives. Here’s how:
- Base Ingredients: Replace heavy cream with full-fat coconut cream. Coconut cream provides a rich and creamy texture similar to dairy cream, making it an excellent dairy-free substitute. Use an equal amount of coconut cream in place of heavy cream in the recipe.
- Milk Substitute: Instead of whole milk, use a dairy-free milk alternative such as almond milk, soy milk, oat milk, or cashew milk. Choose an unsweetened variety to control the sweetness level of your ice cream base. Use the same amount of dairy-free milk as specified in the recipe.
- Sugar and Flavorings: The granulated sugar and vanilla extract can remain unchanged in the recipe, as they are typically dairy-free. Ensure any optional add-ins like chocolate chips or caramel swirls are also dairy-free if desired.
By using these substitutions, you can create a delicious dairy-free version of Ninja Creami Coffee Ice Cream. Adjust ingredients and quantities as needed to suit your dietary preferences and enjoy a creamy, coffee-flavored treat without dairy products.
How do I prevent ice crystals in the ice cream?
To prevent ice crystals from forming in your ice cream, especially when making Ninja Creami Coffee Ice Cream, follow these tips:
- Thoroughly Chill Ingredients: Ensure all ingredients, especially the ice cream base, are thoroughly chilled before churning. This helps in creating a smoother texture and reduces the likelihood of ice crystals forming during freezing.
- Use Proper Freezing Techniques: Freeze the ice cream base in a freezer-safe container with a tight-fitting lid. Ensure the container is placed in the coldest part of your freezer and avoid frequent opening, which can cause temperature fluctuations and ice crystal formation.
- Add a Stabilizer: Incorporate a small amount of stabilizer, such as cornstarch or a commercial ice cream stabilizer, into the ice cream base. Stabilizers help bind water molecules and fats together, reducing the formation of ice crystals and improving texture.
- Limit Over-Churning: Avoid over-churning the ice cream in the Ninja Creami. Follow the manufacturer’s instructions for churning times and stop when the ice cream reaches a smooth and creamy consistency. Over-churning can introduce excess air and lead to icy textures.
- Alcohol Addition: Adding a small amount of alcohol, such as vodka or rum, to the ice cream base can lower its freezing point and inhibit ice crystal formation. Use alcohol sparingly to avoid altering the flavor too much.
- Store Properly: Once churned, store the ice cream in a freezer-safe container with a tight lid. Press a piece of parchment paper or plastic wrap directly onto the surface of the ice cream before sealing the container to prevent ice crystals from forming on the surface.
By following these tips, you can minimize ice crystal formation and achieve a creamy, smooth texture in your Ninja Creami Coffee Ice Cream. Adjusting ingredients and techniques according to your preferences can further enhance the quality of your homemade ice cream.

Hi, I’m Katelyn Williams, the expert behind Ninjacreamiicecream.com. With a deep passion for creating delectable ice cream recipes, I’m here to share my love for all things ice cream. I earned my Bachelor’s degree from Louisiana State University, and since then, I’ve been dedicated to perfecting the art of ice cream making. From classic flavors to innovative creations, my goal is to inspire you to make delicious and creamy treats at home effortlessly. Join me for the best recipes, tips, and techniques to elevate your ice cream game and indulge in delightful frozen desserts!