
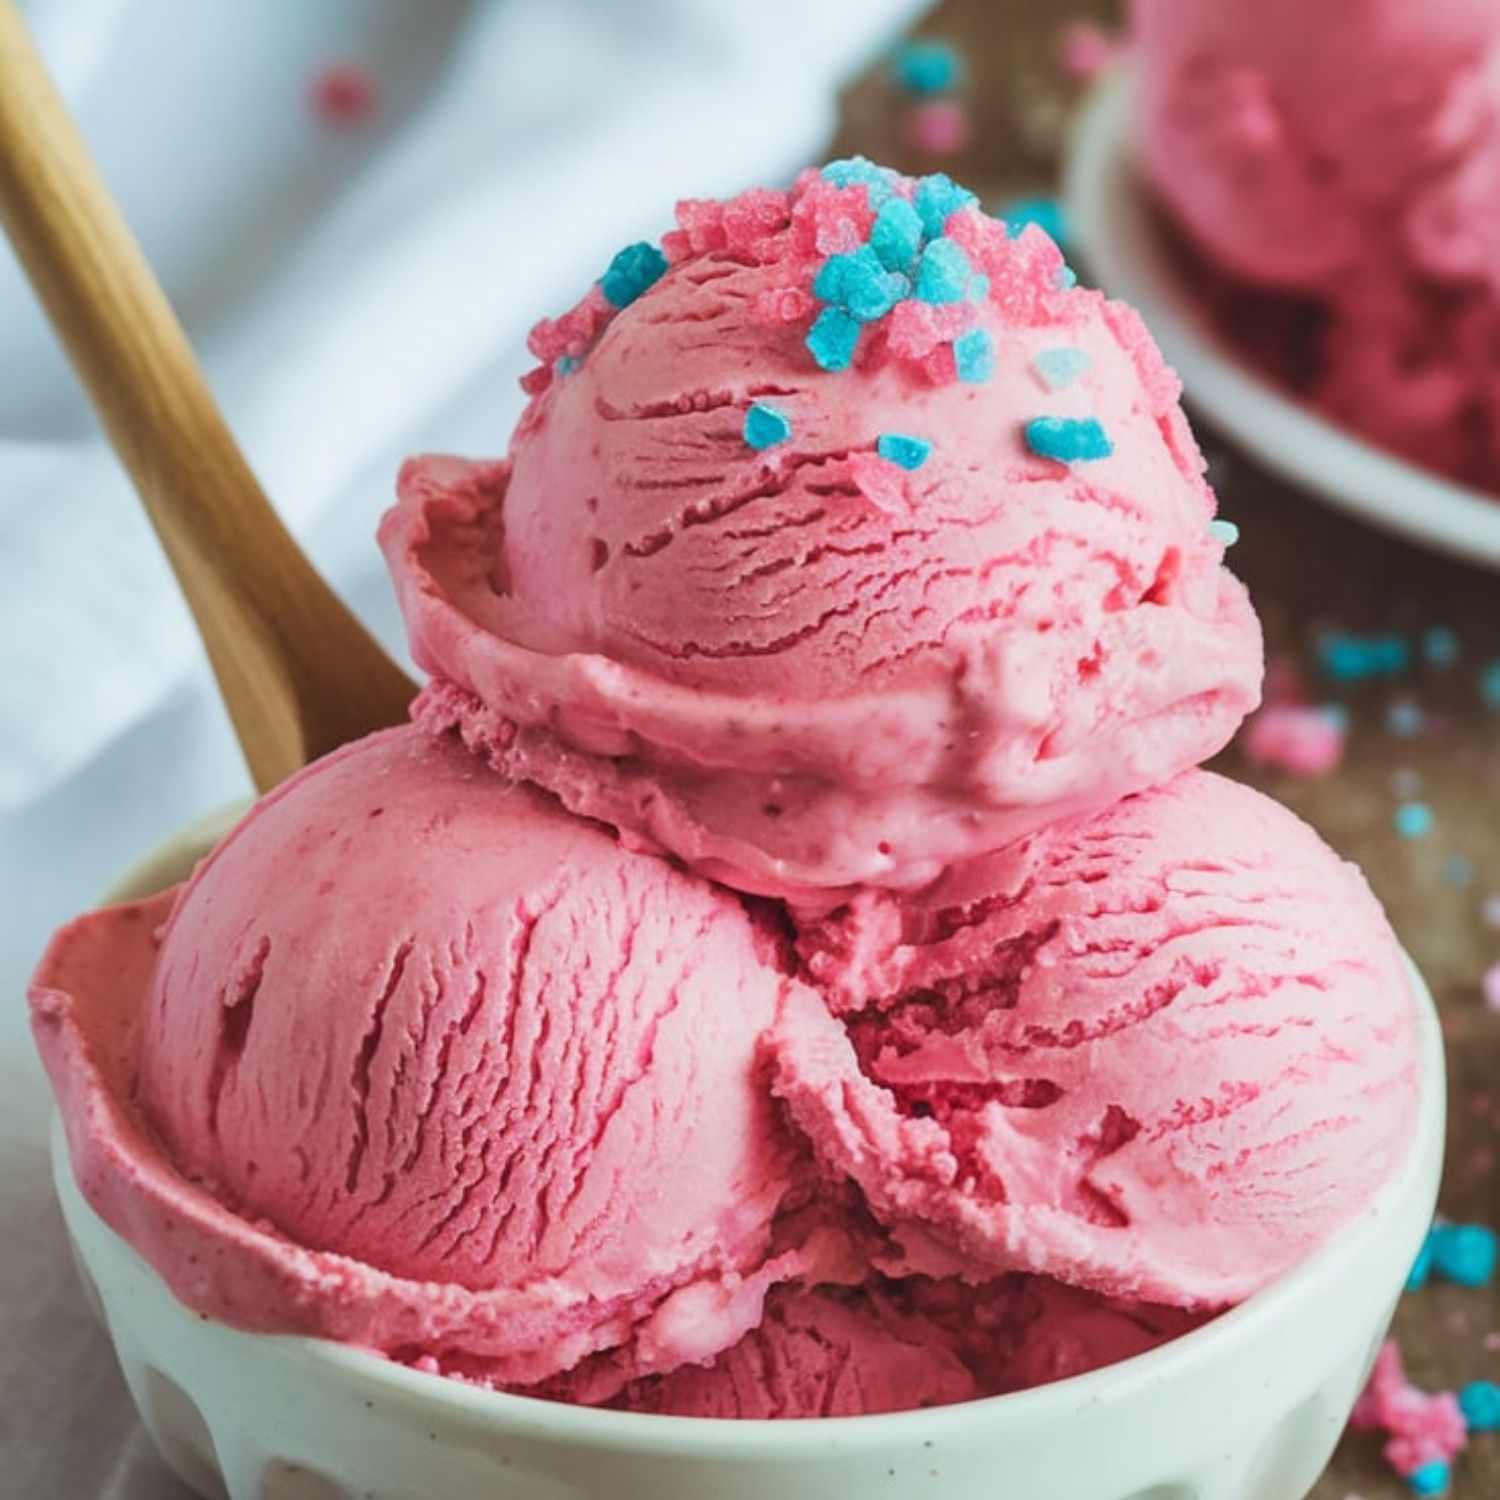
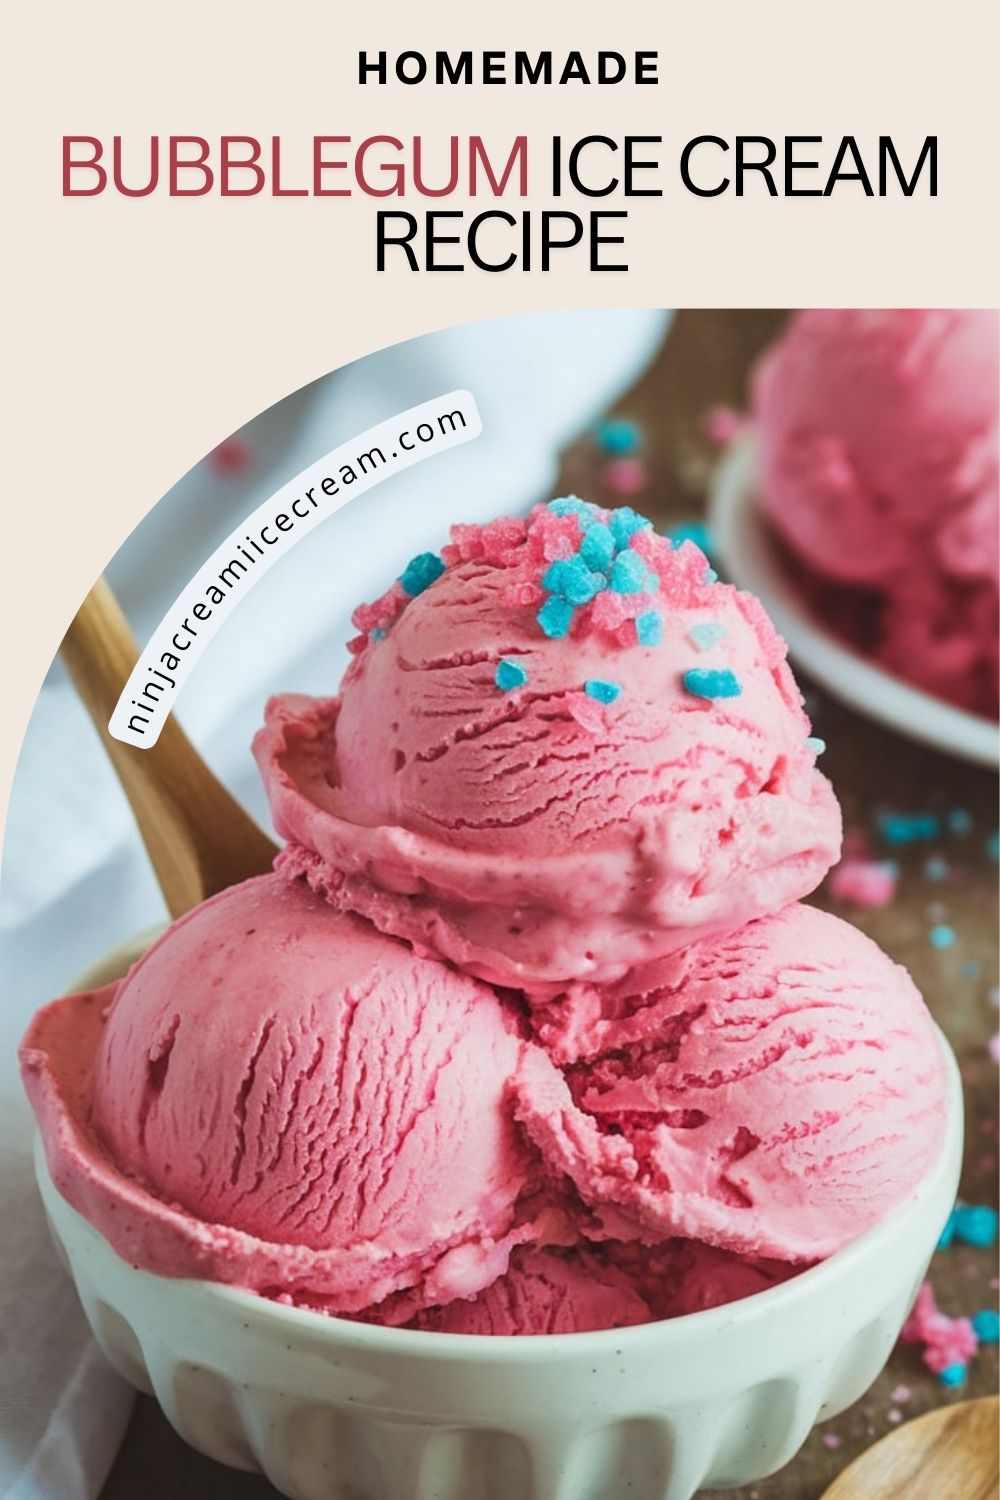
Bubblegum Ice Cream is a delightful, nostalgic treat that brings back memories of carefree childhood summers. With its smooth, creamy texture and sweet bubblegum flavor, it’s a dessert that both kids and adults can’t resist. The vibrant, playful taste of bubblegum combines perfectly with the rich, creamy base, making each bite a fun experience. Whether you choose the easy, no-churn method or opt to use an ice cream maker for a smoother consistency, this recipe is perfect for anyone craving a sweet, whimsical frozen treat.
Disclosure: This post may contain affiliate links. As an Amazon Associate, I earn from qualifying purchases. Read more.
Bubblegum Ice Cream Recipe
Ingredients
To make the perfect Bubblegum Ice Cream, you’ll need the following ingredients:
For the Ice Cream Base:
- 2 Cups Heavy Cream
The heavy cream provides the rich and creamy texture that is essential for making ice cream. It forms the base of the dessert, creating a smooth consistency when whipped. - 1 Can (14 oz) Sweetened Condensed Milk
Sweetened condensed milk adds the necessary sweetness and creaminess to the ice cream base. It helps achieve the perfect balance of flavor without the need for added sugar. - 1 Teaspoon Vanilla Extract
Vanilla extract enhances the overall flavor of the ice cream. It works as a subtle undertone, complementing the sweetness of the bubblegum flavor while rounding out the taste profile. - Pinch of Salt
A pinch of salt helps to balance out the sweetness and enriches the flavor of the ice cream. It brings out the natural creaminess of the mixture.
For the Bubblegum Flavor:
- 1/2 Teaspoon Bubblegum Flavoring (or Bubblegum Extract)
This is the key ingredient that gives the ice cream its signature bubblegum taste. The flavoring imparts the sweet, fruity essence of bubblegum, taking the ice cream to the next level of nostalgic indulgence. - Bubblegum Pieces (Optional)
For an added burst of fun, you can mix in small, chopped-up bubblegum pieces. These chewy bits offer a delightful texture and enhance the bubblegum experience, though they are completely optional.
For Toppings (Optional):
- Sprinkles
Colorful sprinkles make the ice cream more festive and visually appealing. They add a fun crunch and extra sweetness to each scoop. - More Bubblegum Pieces
If you love bubblegum, feel free to top your ice cream with more pieces of bubblegum for an extra treat. This adds a fun, chewy surprise with each bite.
These ingredients work together to create a creamy, sweet, and playful ice cream that’s sure to please anyone who loves the nostalgic taste of bubblegum.
Instructions
Making Bubblegum Ice Cream is simple and fun! Follow these steps to create a creamy, sweet, and nostalgic treat:
Step 1: Prepare the Ice Cream Base
- Whip the Heavy Cream
In a large mixing bowl, pour 2 cups of heavy cream. Use a hand mixer or stand mixer to beat the cream on medium-high speed until soft peaks form. This should take about 2-3 minutes. You’re looking for a fluffy, airy consistency that will give the ice cream its creamy texture. - Add Sweetened Condensed Milk
Once the heavy cream is whipped, add the 1 can (14 oz) of sweetened condensed milk into the bowl. This will provide the sweet, rich base of the ice cream. - Add Vanilla Extract and Salt
Stir in 1 teaspoon of vanilla extract and a pinch of salt. The vanilla will add a subtle, warm flavor, while the salt will help balance the sweetness.
Step 2: Add Bubblegum Flavor
- Mix in Bubblegum Flavoring
Add 1/2 teaspoon of bubblegum flavoring or bubblegum extract to the base. Use a spatula or spoon to gently stir until the flavoring is well incorporated. Be careful not to overmix, as you want to preserve the airiness of the whipped cream.
Step 3: Add Bubblegum Pieces (Optional)
- Incorporate Bubblegum Pieces
If you’d like a fun, chewy surprise in every bite, chop up a few pieces of bubblegum and gently fold them into the ice cream base. This step is optional, but it adds a playful texture that enhances the bubblegum experience.
Step 4: Freeze the Ice Cream
- Transfer to a Freezer-Safe Container
Once the mixture is fully combined, pour it into a freezer-safe container. Smooth the top with a spatula to ensure an even layer. If you’re using a loaf pan, a small plastic container, or a glass dish, it will work just fine. - Cover and Freeze
Cover the container tightly with a lid or plastic wrap. Place it in the freezer and allow it to freeze for at least 4-6 hours, or until solid. The longer it freezes, the firmer the ice cream will be.
Step 5: Serve and Enjoy
- Scoop and Serve
Once the ice cream is fully frozen, it’s time to serve! Use an ice cream scoop to dish out generous portions of your bubblegum ice cream into bowls or cones. - Optional Toppings
For an extra festive touch, add some colorful sprinkles or more chopped-up bubblegum pieces on top of each scoop. You can also drizzle some chocolate or caramel sauce if you’d like a bit of indulgence.
Now, your homemade Bubblegum Ice Cream is ready to be enjoyed! It’s the perfect treat for summer days, birthday parties, or anytime you want a nostalgic dessert.

Bubblegum Ice Cream Recipe
Equipment
- Mixing bowl
- Hand Mixer or Stand Mixer
- Spatula or Spoon:
- Freezer-Safe Container:
- Plastic Wrap or Lid –
- Ice Cream Scoop
- Food Coloring (Optional)
Ingredients
For the Ice Cream Base:
- 2 cups (480 ml) heavy cream
- 1 can (14 oz or 396 g) sweetened condensed milk
- 1 teaspoon vanilla extract
- Pinch of salt
For the Bubblegum Flavor:
- 1/2 teaspoon bubblegum flavoring or extract
For Mix-ins (Optional):
- 1/4 cup chopped bubblegum pieces (optional)
- Sprinkles (optional, for topping)
Instructions
- Whip the CreamIn a large mixing bowl, pour 2 cups of heavy cream. Use a hand mixer or stand mixer to whip the cream on medium-high speed until soft peaks form, about 2-3 minutes.
- Combine with Condensed MilkAdd 1 can (14 oz) of sweetened condensed milk, 1 teaspoon of vanilla extract, and a pinch of salt to the whipped cream. Gently fold the ingredients together until well combined.
- Add Bubblegum FlavorStir in 1/2 teaspoon of bubblegum flavoring or extract, mixing until evenly incorporated into the creamy base.
- Incorporate Mix-ins (Optional)If using, fold in 1/4 cup of chopped bubblegum pieces and any sprinkles for added fun and texture.
- FreezeTransfer the mixture into a freezer-safe container, smoothing the top with a spatula. Cover tightly and freeze for 4-6 hours (or overnight) until firm and scoopable.
Notes
-
Bubblegum Flavoring:
Be sure to use high-quality bubblegum extract or flavoring for the best taste. Different brands may vary in strength, so start with 1/2 teaspoon and adjust to your preference. -
Whipping the Cream:
The key to a creamy texture is properly whipping the heavy cream. Ensure you whip it until soft peaks form but avoid overmixing, as it can cause the cream to turn buttery. -
Freezing Time:
For the best texture, freeze the ice cream for at least 4-6 hours or overnight. This allows the ice cream to fully firm up. If you're in a hurry, you can try it after 4 hours, but longer freezing gives it a more solid consistency. -
Optional Add-ins:
If adding bubblegum pieces or sprinkles, fold them gently into the ice cream mixture to avoid deflating the whipped cream. You can also add colorful food coloring for an extra fun touch. -
Storage:
Store leftover ice cream in a tightly sealed container in the freezer. It’s best consumed within 1-2 weeks for optimal texture and flavor. -
Consistency:
If the ice cream is too hard to scoop after freezing, let it sit at room temperature for 5-10 minutes to soften slightly before serving.
Tips for the Best Bubblegum Ice Cream
- Use High-Quality Flavoring:
For the best bubblegum flavor, use a high-quality bubblegum flavoring or extract. This will ensure that the ice cream has a rich, authentic bubblegum taste. Avoid artificial flavorings that may not deliver the same depth of flavor. - Avoid Overmixing:
When whipping the cream and mixing in the other ingredients, be careful not to overmix. Overmixing can cause the whipped cream to deflate, resulting in a less creamy texture. The goal is to keep the mixture light and fluffy. - Customize with Fun Mix-Ins:
Feel free to get creative with mix-ins! You can add chopped candy pieces, mini marshmallows, or colorful sprinkles to enhance the fun factor of your ice cream. Just fold them in gently at the end to avoid deflating the base. - Make It Vibrant:
Add a few drops of food coloring to make the ice cream even more fun! Pink, blue, or purple coloring will enhance the bubblegum theme, making it visually appealing for kids and adults alike. - Texture Variations:
If you enjoy a smooth, creamy texture without any chewy bits, skip the bubblegum pieces in the mix. You can still have the bubblegum flavor without the texture, making it suitable for everyone. - Freeze for Longer:
For a firmer, creamier consistency, let the ice cream freeze for longer than 4 hours. Ideally, aim for 6 hours or overnight to get the perfect texture. - Dairy-Free Option:
For a dairy-free version, swap out the heavy cream for coconut cream and use a dairy-free sweetened condensed milk alternative. This will keep the flavor and texture while making it suitable for those with dietary restrictions. - Serve with Fun Toppings:
Top your bubblegum ice cream with colorful sprinkles, whipped cream, or extra chopped bubblegum pieces for added texture and visual appeal. You could also drizzle some chocolate syrup for a more indulgent touch.
By following these tips, you’ll ensure your Bubblegum Ice Cream is a fun, creamy, and nostalgic treat that everyone will love!
Conclusion
Bubblegum Ice Cream is the perfect blend of creamy indulgence and nostalgic fun, making it a hit for both kids and adults. With its sweet bubblegum flavor and smooth texture, each scoop is a delightful treat that brings back fond memories of childhood. The vibrant pink color and playful taste make it an ideal dessert for parties, special occasions, or simply as a fun, homemade treat to enjoy any time.
Whether you choose the easy no-churn method or opt for using an ice cream maker, this recipe is simple to make and customizable to suit your tastes. Adding fun mix-ins, such as bubblegum pieces or sprinkles, enhances the experience and allows you to get creative in the kitchen. Plus, the flexibility to adjust the recipe with a dairy-free version means everyone can enjoy a bowl, regardless of dietary preferences.

Hi, I’m Katelyn Williams, the expert behind Ninjacreamiicecream.com. With a deep passion for creating delectable ice cream recipes, I’m here to share my love for all things ice cream. I earned my Bachelor’s degree from Louisiana State University, and since then, I’ve been dedicated to perfecting the art of ice cream making. From classic flavors to innovative creations, my goal is to inspire you to make delicious and creamy treats at home effortlessly. Join me for the best recipes, tips, and techniques to elevate your ice cream game and indulge in delightful frozen desserts!