
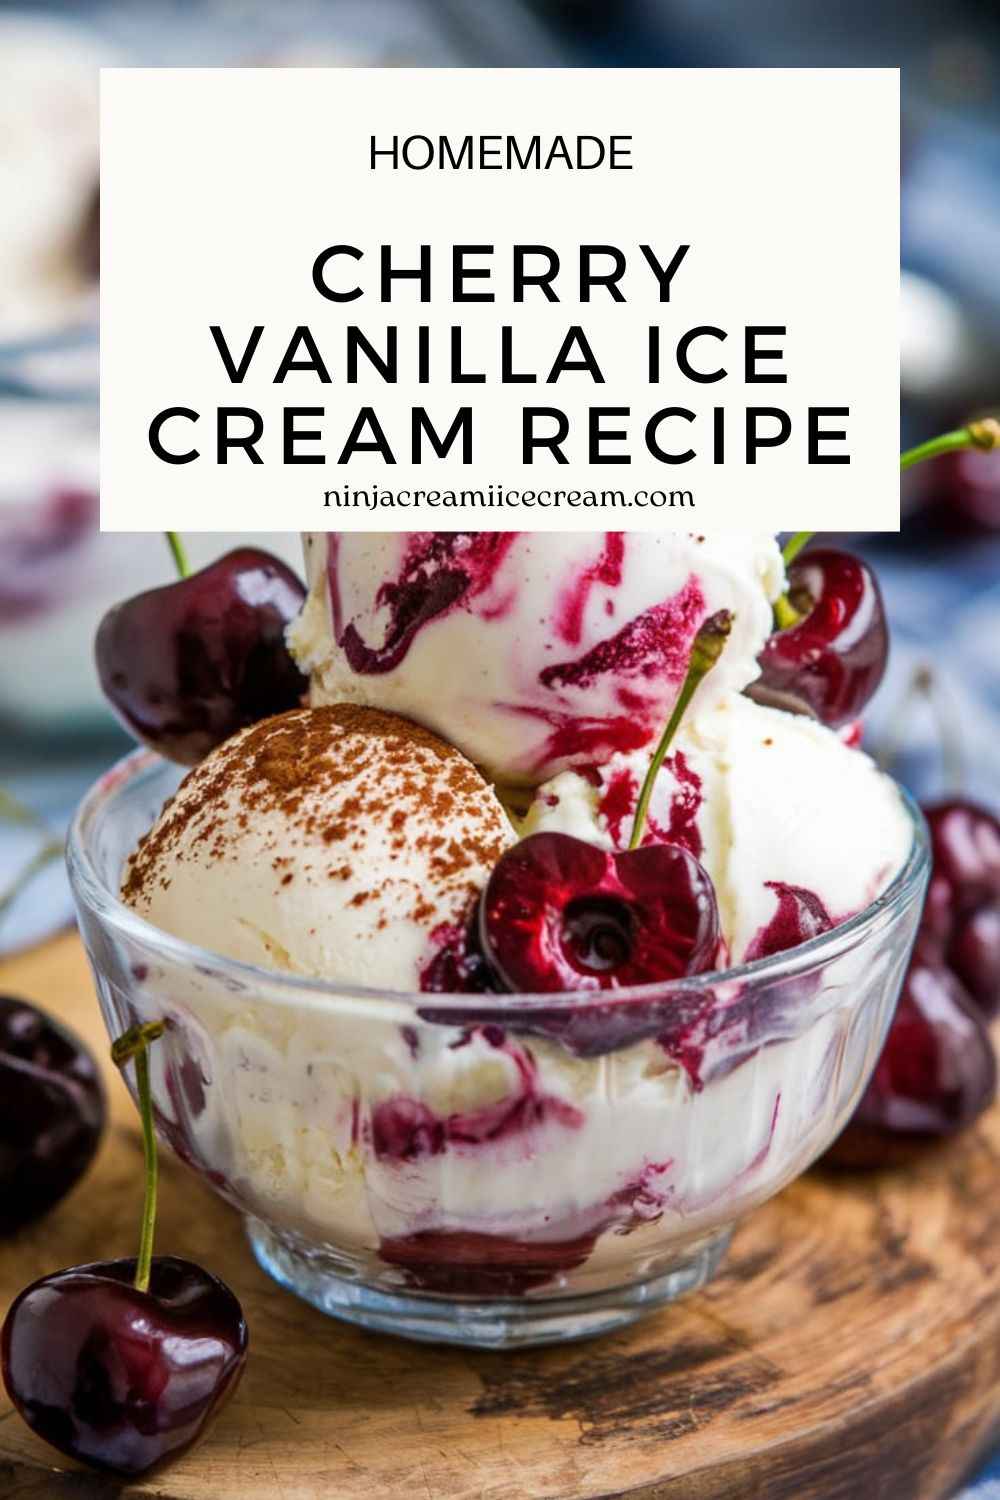
Cherry Vanilla Ice Cream is a beloved classic dessert that has stood the test of time. This delightful treat combines the best of both worlds: the rich, creamy texture of vanilla ice cream paired with the vibrant, sweet flavor of ripe cherries. The contrast between the smooth, mellow vanilla and the tart burst of cherries makes Cherry Vanilla Ice Cream a popular choice among ice cream lovers of all ages. Whether enjoyed on a hot summer day or as a comforting treat year-round, the combination of sweet cherries and creamy vanilla ice cream is a winning flavor pairing that continues to captivate taste buds worldwide.
Disclosure: This post may contain affiliate links. As an Amazon Associate, I earn from qualifying purchases. Read more.

Cherry Vanilla Ice Cream Recipe
Ingredients
Making Cherry Vanilla Ice Cream requires a few simple ingredients, each contributing to the rich, creamy texture and delicious flavor of the dessert. Here’s a detailed breakdown of what you’ll need:
- Heavy Cream (2 cups)
- Heavy cream provides the rich, smooth texture that makes ice cream indulgent. It gives the ice cream its creamy consistency while also helping to balance out the sweetness of the cherries and vanilla. The higher fat content in heavy cream is key to achieving a silky, soft ice cream.
- Whole Milk (1 cup)
- Whole milk helps to lighten the texture without sacrificing creaminess. The combination of whole milk and heavy cream is essential for creating the perfect balance of smoothness and richness in the ice cream base.
- Granulated Sugar (3/4 cup)
- Sugar is the primary sweetener in Cherry Vanilla Ice Cream. It not only sweetens the base but also helps to create a smooth, scoopable texture by lowering the freezing point. The amount of sugar can be adjusted depending on how sweet you prefer the ice cream.
- Vanilla Extract (2 teaspoons)
- Pure vanilla extract is essential for providing the deep, comforting flavor that complements the cherries. The aromatic notes of vanilla enhance the creamy base and bring depth to the flavor profile of the ice cream.
- Fresh Cherries (1 1/2 cups, pitted and chopped)
- Fresh, ripe cherries are the star of this ice cream. They offer a burst of natural sweetness and a slight tartness that contrasts beautifully with the creamy vanilla base. After pitting and chopping the cherries, they are cooked down with a bit of sugar to create a syrupy mixture that swirls through the ice cream.
- Lemon Juice (1 tablespoon)
- A small amount of lemon juice helps to brighten the cherry flavor and balance out the sweetness. The acidity of the lemon enhances the overall flavor of the cherries, making them taste even more vibrant.
- Cornstarch or Egg Yolks (optional for custard base)
- Some recipes for Cherry Vanilla Ice Cream include either cornstarch or egg yolks to create a custard base, which adds extra creaminess and a richer texture. Cornstarch is used as a thickener, while egg yolks provide a velvety smoothness to the ice cream.
- Salt (a pinch)
- A pinch of salt is crucial for bringing out the flavors in the ice cream. It helps to balance the sweetness and enhance the overall taste of the cherries and vanilla.
These simple ingredients come together to create a smooth, creamy base with a swirl of sweet cherry goodness, making Cherry Vanilla Ice Cream an irresistible treat.
Instructions
Follow these detailed steps to create a homemade Cherry Vanilla Ice Cream that’s smooth, creamy, and bursting with sweet cherry flavor.
1. Prepare the Cherry Mixture
- Pit and Chop the Cherries: Start by washing and pitting 1 1/2 cups of fresh cherries. Once pitted, chop the cherries into small pieces. This will help release the juices and ensure the cherry mixture blends well with the ice cream base.
- Cook the Cherries: In a medium saucepan, add the chopped cherries along with 1/4 cup of granulated sugar and 1 tablespoon of lemon juice. Heat over medium heat, stirring occasionally.
- Simmer: Allow the mixture to simmer for about 10 minutes, or until the cherries soften and release their juices, creating a thick syrup. You can mash the cherries gently with a spoon if you prefer a smoother texture.
- Cool the Cherry Mixture: Once the mixture has thickened, remove it from the heat and let it cool completely. For an even smoother consistency, you can blend the cherry mixture before cooling, but leaving some chunks adds texture.
2. Prepare the Vanilla Ice Cream Base
- Combine Milk, Cream, and Sugar: In a large mixing bowl, whisk together 1 cup of whole milk, 2 cups of heavy cream, and 3/4 cup of granulated sugar. The sugar should be fully dissolved, so continue whisking until the mixture is smooth.
- Add Vanilla Extract: Stir in 2 teaspoons of pure vanilla extract. This will infuse the base with a rich, aromatic vanilla flavor.
- Optional – Add Egg Yolks or Cornstarch: If you’re using egg yolks for a custard base, whisk 4 large egg yolks in a separate bowl. Slowly temper the egg yolks by adding a bit of the milk mixture while whisking constantly. Then, gradually whisk the tempered yolks back into the rest of the mixture. Alternatively, if using cornstarch, dissolve 1 tablespoon of cornstarch in a small amount of milk, then add it to the mixture and cook on low heat until it thickens to a custard-like consistency.
3. Chill the Ice Cream Base
- Refrigerate the Base: For the best texture, chill the ice cream base in the refrigerator for at least 2 hours or overnight. This helps the mixture to thicken and freeze more evenly when churned.
4. Churn the Ice Cream
- Prepare Your Ice Cream Maker: If using an ice cream maker, make sure it’s pre-chilled according to the manufacturer’s instructions.
- Pour the Base into the Ice Cream Maker: Once the base is chilled, pour it into the ice cream maker and churn according to the manufacturer’s instructions. This usually takes about 20-25 minutes, depending on the machine.
- Add Cherry Mixture: During the last 5 minutes of churning, slowly pour in the cooled cherry mixture. Allow the cherries to swirl into the vanilla base, creating a marbled effect throughout the ice cream.
5. Freeze and Firm Up the Ice Cream
- Transfer to a Freezer-Safe Container: Once the ice cream reaches a soft-serve consistency, transfer it to an airtight freezer-safe container.
- Freeze Until Firm: For the best texture, freeze the ice cream for at least 4 hours or overnight. This will allow it to firm up to the perfect scoopable consistency.
6. Serve and Enjoy
- Scoop and Serve: Once the ice cream is fully frozen, it’s ready to be served! Scoop it into bowls or cones and enjoy the sweet, creamy blend of vanilla and cherry.
- Optional Garnishes: For extra flavor, top with additional fresh cherries, a drizzle of chocolate sauce, or whipped cream.
These steps will guide you through making Cherry Vanilla Ice Cream that’s rich, creamy, and full of fruity flavor. Enjoy this homemade treat on a warm day or any time you want a delicious dessert!
Cherry Vanilla Ice Cream Recipe
Equipment
- Saucepan For cooking the cherry mixture and making the syrup.
- Mixing Bowls: To combine the ice cream base ingredients.
- Whisk To mix the ice cream base and dissolve the sugar.
- Ice Cream Maker For churning the ice cream to achieve a creamy texture.
- Freezer-Safe Container: To store the ice cream while it firms up in the freezer.
- Measuring Cups and Spoons: To measure ingredients accurately.
- Spatula: For scraping the sides of the bowls and stirring the ingredients.
Ingredients
- 2 cups Heavy Cream
- 1 cup Whole Milk
- 1 cup Granulated Sugar (3/4 cup (for the base) + 1/4 cup (for the cherry mixture)
- 2 teaspoons Vanilla Extract
- 1 tablespoon Lemon Juice
- Salt A pinch (optional)
- 4 large egg yolks (optional, if making a custard base)
- 1 tablespoon Cornstarch (optional, if using as a thickener)
Instructions
- Prepare the Cherry MixtureIn a medium saucepan, combine 1 1/2 cups of chopped fresh cherries, 1/4 cup of granulated sugar, and 1 tablespoon of lemon juice. Heat over medium heat, stirring occasionally, until the cherries release their juices and the mixture thickens, about 10 minutes. Let it cool completely.
- Mix the Ice Cream BaseIn a large mixing bowl, whisk together 2 cups of heavy cream, 1 cup of whole milk, and 3/4 cup of granulated sugar until the sugar is fully dissolved. Stir in 2 teaspoons of vanilla extract. For a custard base, you can whisk in 4 egg yolks or 1 tablespoon of cornstarch if you prefer a thicker, creamier texture.
- Chill the BaseRefrigerate the ice cream base for at least 2 hours or overnight to ensure it's thoroughly chilled. This will help the ice cream churn more smoothly.
- Churn the Ice CreamPour the chilled base into an ice cream maker and churn according to the manufacturer’s instructions, typically for about 20-25 minutes. During the last few minutes of churning, slowly add the cooled cherry mixture, allowing it to swirl through the ice cream.
- Freeze and ServeTransfer the churned ice cream into a freezer-safe container. Freeze for at least 4 hours or until firm. Once frozen, scoop and serve your homemade Cherry Vanilla Ice Cream!
Notes
- Chilling the Base: For the smoothest texture, it's essential to chill the ice cream base for at least 2 hours or overnight. This allows the flavors to meld and helps the ice cream churn more effectively.
- Cherry Mixture: If you prefer a smoother texture, you can blend the cherry mixture before adding it to the ice cream. However, leaving some cherry chunks will create a delightful contrast in texture.
- Storage: Homemade ice cream can become hard after freezing for a long time. To make it scoopable, let it sit at room temperature for a few minutes before serving.
- Custard Base Option: If you're using egg yolks for a custard-style ice cream, ensure that the eggs are tempered slowly with the warm milk mixture to avoid curdling.
Tips for Cherry Vanilla Ice Cream Recipe
Use Fresh, Ripe Cherries
For the best flavor, choose fresh, ripe cherries. Sweet, in-season cherries will provide the perfect balance of sweetness and tartness, giving your ice cream that vibrant, natural cherry flavor. If fresh cherries aren’t available, you can use frozen cherries as an alternative.
Adjust the Sweetness to Your Taste
The sweetness of the ice cream can be adjusted based on your preference and the ripeness of your cherries. If your cherries are particularly sweet, you might want to reduce the amount of sugar in the base or the cherry mixture. Taste both the cherry syrup and the ice cream base before mixing them together to make sure it’s just the right level of sweetness.
For Extra Creaminess, Use a Custard Base
If you want a richer, creamier texture, consider making a custard base by adding egg yolks. This will give your ice cream a smooth, velvety consistency. Be sure to temper the egg yolks slowly by adding warm milk and cream to avoid scrambling them.
Chill the Base Well Before Churning
For the smoothest ice cream, always chill the ice cream base for a few hours (or overnight) before churning. This allows the flavors to meld and ensures that the base is cold enough to churn effectively, leading to a smoother, creamier final product.
Don’t Over-Churn
While churning, be mindful of the texture. Over-churning can make the ice cream too icy or lead to a butter-like consistency. Stop churning when the ice cream reaches the soft-serve stage, as it will continue to firm up once transferred to the freezer.
Add the Cherry Mixture at the Right Time
To achieve a marbled effect, add the cherry mixture to the ice cream base during the last few minutes of churning. This will allow the cherries to swirl into the vanilla base without completely mixing, preserving the beautiful contrast of flavors and textures.
Allow the Ice Cream to Firm Up in the Freezer
For the best scoopable texture, let your ice cream freeze for at least 4 hours after churning. The freezing process ensures the ice cream becomes firm and holds its shape when scooped. If it’s too soft, it will be harder to serve properly.
Experiment with Toppings
Cherry Vanilla Ice Cream is delicious on its own, but you can elevate the experience by adding your favorite toppings. Consider drizzling chocolate syrup, adding chopped nuts, or garnishing with more fresh cherries for an extra layer of flavor.
Conclusion
Cherry Vanilla Ice Cream is a timeless treat that effortlessly combines two classic flavors into one delicious dessert. The creamy vanilla base and the sweet, tart cherries create the perfect balance, making each bite a delightful experience. Whether you’re enjoying it on a warm summer day or as a cozy indulgence during colder months, this ice cream is sure to be a crowd-pleaser.
Making this homemade ice cream is a fun and rewarding process. With simple ingredients like fresh cherries, vanilla extract, and heavy cream, you can easily create a dessert that rivals anything you can find in the store. The added bonus of making it at home is the ability to control the sweetness and texture to suit your personal taste.
Once you’ve mastered this recipe, feel free to get creative with variations, such as adding chocolate chips, crushed nuts, or experimenting with different fruits. Cherry Vanilla Ice Cream is versatile, and with just a few tweaks, you can make it your own. Whether served in a cone, bowl, or as part of a larger dessert, this ice cream is sure to bring joy to anyone who enjoys a delicious, homemade frozen treat.

Hi, I’m Katelyn Williams, the expert behind Ninjacreamiicecream.com. With a deep passion for creating delectable ice cream recipes, I’m here to share my love for all things ice cream. I earned my Bachelor’s degree from Louisiana State University, and since then, I’ve been dedicated to perfecting the art of ice cream making. From classic flavors to innovative creations, my goal is to inspire you to make delicious and creamy treats at home effortlessly. Join me for the best recipes, tips, and techniques to elevate your ice cream game and indulge in delightful frozen desserts!