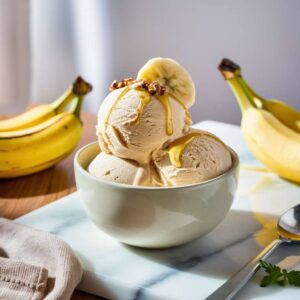
Ninja Creami Banana Ice Cream Recipe
Enjoy a guilt-free dessert with Ninja Creami Banana Ice Cream, a delicious and healthy treat that's easy to make at home. By blending frozen bananas with yogurt or milk in the Ninja Creami, you can create a creamy, dairy-free alternative to traditional ice cream. This recipe emphasizes simplicity and nutritional benefits, offering a low-calorie option rich in potassium and natural sweetness from bananas. Serve with your favorite toppings like fresh berries or nuts for added texture and flavor. Whether you're looking for a light dessert or a refreshing snack, Ninja Creami Banana Ice Cream is sure to satisfy your cravings without compromising on taste or health benefits.
Equipment
- Ninja Creami or Blender: This is the primary equipment for blending the frozen bananas and other ingredients into a smooth and creamy consistency.
- Freezer You'll need a freezer to freeze the bananas before blending. Ensure they are frozen solid for the best texture.
- Knife and Cutting Board: For preparing and slicing the bananas before freezing.
- Measuring Cups and Spoons: To measure out the ingredients accurately, including yogurt or milk, and any optional sweeteners or flavorings.
- Spatula: For scraping down the sides of the blender or Ninja Creami and ensuring all ingredients are blended evenly.
- Optional Toppings and Serving Bowls: Depending on how you choose to serve the ice cream, you might also want bowls or cones and toppings like fresh berries, nuts, or chocolate shavings.
Ingredients
- 3-4 Ripe Bananas, peeled, sliced, and frozen
- 1/2 Cup Plain yogurt or milk (adjust quantity for desired creaminess)
Optional:
- 1 Teaspoon Vanilla extract
- 1/2 Teaspoon Ground Cinnamon
- Optional sweeteners like honey or maple syrup, to taste (if needed)
Instructions
- Prepare Bananas: Peel and slice ripe bananas, then freeze until solid.
- Blend Ingredients: In a Ninja Creami or blender, combine frozen banana slices with yogurt or milk, and optionally add vanilla extract, cinnamon, and sweeteners to taste.
- Blend Until Smooth: Blend until creamy, scraping down the sides as needed, until the mixture resembles soft-serve ice cream.
- Serve: Transfer to bowls or cones, add toppings if desired (like berries or nuts), and enjoy immediately!
Notes
Here are some important notes for making Ninja Creami Banana Ice Cream:
- Banana Ripeness: Use ripe bananas for the best flavor and sweetness. Overripe bananas with brown spots work well as they blend more easily and add natural sweetness.
- Freezing Time: Ensure the banana slices are frozen solid before blending. This helps achieve a creamy ice cream texture without the need for additional ice.
- Blending Consistency: Blend the ingredients until smooth and creamy. You may need to pause and scrape down the sides of the blender or Ninja Creami to ensure even blending.
- Customization: Experiment with different additions like vanilla extract, cinnamon, or other fruits for varied flavors. Adjust sweetness with honey or maple syrup based on personal preference.
- Serving Immediately: Ninja Creami Banana Ice Cream is best served immediately after blending for a soft-serve texture. If storing leftovers, transfer to an airtight container and freeze, though note it may firm up more than fresh servings.
- Toppings: Enhance your ice cream with toppings like fresh berries, nuts, or chocolate chips for added texture and flavor.
- Health Benefits: Enjoy this dessert guilt-free as it's low in calories and fat compared to traditional ice cream, while offering potassium and other nutrients from bananas.